Building the blueprint
Now, creating the blueprint is very simple, as always. Just create a new blueprint, but this time base it on the CoinPickup class.

Name it whatever you want, it will not make a difference. The method we followed is not affected by naming. After creating it, open the blueprint editor, and set the coin mesh as the mesh asset you have (feel free to get the one I made from my project by following the Migrate assets from Chapter 1, Preparing for a Big Project).

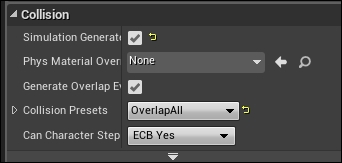
Now it's time for the last step before throwing it into the map. Just change Collision Presets to OverlapAll. This way we make sure it is not an obstacle for the AI, and doesn't block the player.

Throw some coins onto the map, in different places, and then hit Play. You'll notice that once you touch any coin with the gladiator, the coin will disappear right away; and its value will be added to your stock, and it will all be printed onto the screen.


