In this section, we will cover installing Python and the environment that we will use for most of the book, the Jupyter Notebook. Furthermore, we will install the NumPy module, which we will use for the first set of examples.
Using Python and the Jupyter Notebook
Installing Python
The Python programming language is a fantastic, versatile, and an easy to use language.
For this book, we will be using Python 3.5, which is available for your system from the Python Organization's website https://www.python.org/downloads/. However, I recommend that you use Anaconda to install Python, which you can download from the official website at https://www.continuum.io/downloads.
In this book, I assume that you have some knowledge of programming and Python itself. You do not need to be an expert with Python to complete this book, although a good level of knowledge will help. I will not be explaining general code structures and syntax in this book, except where it is different from what is considered normal python coding practice.
If you do not have any experience with programming, I recommend that you pick up the Learning Python book from Packt Publishing, or the book Dive Into Python, available online at www.diveintopython3.net
The Python organization also maintains a list of two online tutorials for those new to Python:
- For non-programmers who want to learn to program through the Python language:
https://wiki.python.org/moin/BeginnersGuide/NonProgrammers
- For programmers who already know how to program, but need to learn Python specifically:
https://wiki.python.org/moin/BeginnersGuide/Programmers
Windows users will need to set an environment variable to use Python from the command line, where other systems will usually be immediately executable. We set it in the following steps
- First, find where you install Python 3 onto your computer; the default location is C:\Python35.
- Next, enter this command into the command line (cmd program): set the environment to PYTHONPATH=%PYTHONPATH%;C:\Python35.
Once you have Python running on your system, you should be able to open a command prompt and can run the following code to be sure it has installed correctly.
    $ python
    Python 3.5.1 (default, Apr 11 2014, 13:05:11)
    [GCC 4.8.2] on Linux
    Type "help", "copyright", "credits" or "license" for more
      information.
    >>> print("Hello, world!")
Hello, world!
    >>> exit()
Note that we will be using the dollar sign ($) to denote that a command that you type into the terminal (also called a shell or cmd on Windows). You do not need to type this character (or retype anything that already appears on your screen). Just type in the rest of the line and press Enter.
After you have the above "Hello, world!" example running, exit the program and move on to installing a more advanced environment to run Python code, the Jupyter Notebook.
Installing Jupyter Notebook
Jupyter is a platform for Python development that contains some tools and environments for running Python and has more features than the standard interpreter. It contains the powerful Jupyter Notebook, which allows you to write programs in a web browser. It also formats your code, shows output, and allows you to annotate your scripts. It is a great tool for exploring datasets and we will be using it as our main environment for the code in this book.
To install the Jupyter Notebook on your computer, you can type the following into a command line prompt (not into Python):
$ conda install jupyter notebook
You will not need administrator privileges to install this, as Anaconda keeps packages in the user's directory.
With the Jupyter Notebook installed, you can launch it with the following:
$ jupyter notebook
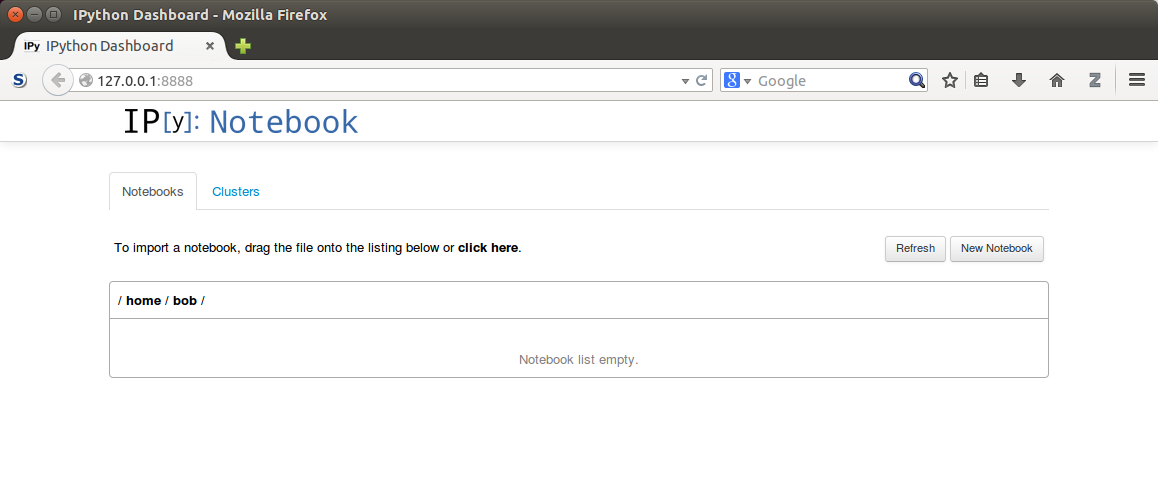
Running this command will do two things. First, it will create a Jupyter Notebook instance - the backend - that will run in the command prompt you just used. Second, it will launch your web browser and connect to this instance, allowing you to create a new notebook. It will look something like the following screenshot (where you need to replace /home/bob with your current working directory):

To stop the Jupyter Notebook from running, open the command prompt that has the instance running (the one you used earlier to run the jupyter notebook command). Then, press Ctrl + C and you will be prompted Shutdown this notebook server (y/[n])?. Type y and press Enter and the Jupyter Notebook will shut down.
Installing scikit-learn
The scikit-learn package is a machine learning library, written in Python (but also containing code in other languages). It contains numerous algorithms, datasets, utilities, and frameworks for performing machine learning. Scikit-learnis built upon the scientific python stack, including libraries such as the NumPy and SciPy for speed. Scikit-learn is fast and scalable in many instances and useful for all skill ranges from beginners to advanced research users. We will cover more details of scikit-learn in Chapter 2, Classifying with scikit-learn Estimators.
To install scikit-learn, you can use the conda utility that comes with Python 3, which will also install the NumPy and SciPy libraries if you do not already have them. Open a terminal with administrator/root privileges and enter the following command:
$ conda install scikit-learn
Users of major Linux distributions such as Ubuntu or Red Hat may wish to install the official package from their package manager.
Those wishing to install the latest version by compiling the source, or view more detailed installation instructions, can go to http://scikit-learn.org/stable/install.html and refer the official documentation on installing scikit-learn.


