Search icon CANCEL
Subscription
0
Cart icon
Your Cart (0 item)
Close icon
You have no products in your basket yet
Arrow left icon
Explore Products
Best Sellers
New Releases
Books
Videos
Audiobooks
Learning Hub
Conferences
Free Learning
Arrow right icon
Arrow up icon
GO TO TOP
Learning ASP.NET Core 2.0

You're reading from   Learning ASP.NET Core 2.0 Build modern web apps with ASP.NET Core 2.0, MVC, and EF Core 2

Arrow left icon
Product type Paperback
Published in Dec 2017
Publisher Packt
ISBN-13 9781788476638
Length 516 pages
Edition 1st Edition
Languages
Tools
Arrow right icon
Authors (2):
Arrow left icon
Michel Bruchet Michel Bruchet
Author Profile Icon Michel Bruchet
Michel Bruchet
Jason De Oliveira Jason De Oliveira
Author Profile Icon Jason De Oliveira
Jason De Oliveira
Arrow right icon
View More author details
Toc

Table of Contents (12) Chapters Close

Preface 1. What is ASP.NET Core 2.0? 2. Setting Up the Environment FREE CHAPTER 3. Creating a Continuous Integration Pipeline in VSTS 4. Basic Concepts of ASP.NET Core 2.0 - Part 1 5. Basic Concepts of ASP.NET Core 2.0 - Part 2 6. Creating MVC Applications 7. Creating Web API Applications 8. Accessing Data using Entity Framework Core 2 9. Securing ASP.NET Core 2.0 Applications 10. Hosting and Deploying ASP.NET Core 2.0 Applications 11. Managing and Supervising ASP.NET Core 2.0 Applications

Creating a VSTS build pipeline

After having planned and organized your work and created your Git repository, you should now configure a VSTS build pipeline, which will allow you to do continuous integration of your application:

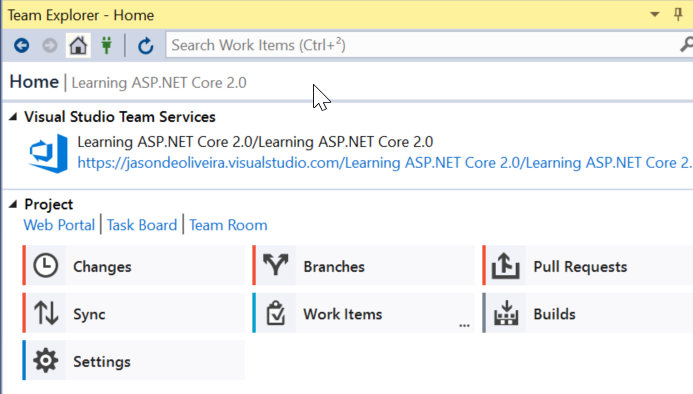
  1. Open Visual Studio 2017 and go to the Team Explorer tab, then click on the Builds button:
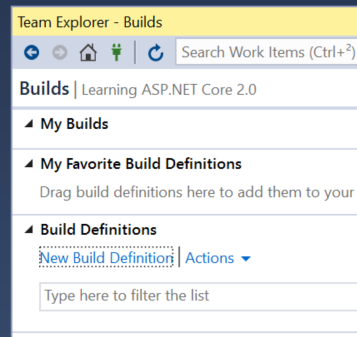
  1. Next, click on the New Build Definition link:
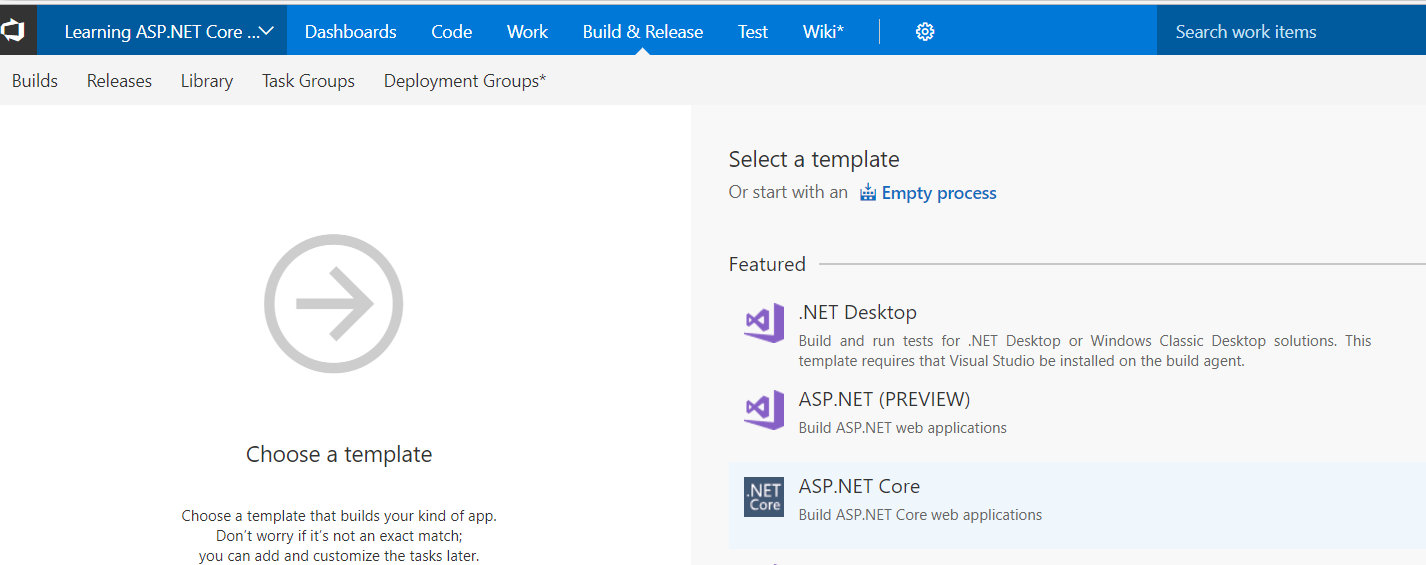
  1. The VSTS website is opened and you are presented with a choice of build definition templates, select the ASP.NET Core template:
  1. In the new build definition, enter a name and select your default agent queue. We recommend using Hosted VS2017:
  1. For choosing a source repository, click on Get sources. For our example, we use the default values (This project, Branch: master, Clean: false):
  1. To enable continuous integration, click on Triggers in the build definition menu, then click on the Enable this trigger button...
lock icon The rest of the chapter is locked
Register for a free Packt account to unlock a world of extra content!
A free Packt account unlocks extra newsletters, articles, discounted offers, and much more. Start advancing your knowledge today.
Unlock this book and the full library FREE for 7 days
Get unlimited access to 7000+ expert-authored eBooks and videos courses covering every tech area you can think of
Renews at $19.99/month. Cancel anytime
Banner background image