Getting started with the SpriteKit game framework
With the release of iOS 7.0, Apple has introduced its own native 2D game framework called SpriteKit. SpriteKit is a great 2D game engine, which has support for sprite, animations, filters, masking, and most important is the physics engine to provide a real-world simulation for the game.
Apple provides a sample game to get started with the SpriteKit called Adventure Game. The download URL for this example project is http://bit.ly/Rqaeda.
This sample project provides a glimpse of the capability of this framework. However, the project is complicated to understand and for learning you just want to make something simple. To have a deeper understanding of SpriteKit-based games, we will be building a bunch of mini games in this book. To understand the basics of the SpriteKit game programming, we will build a mini AntKilling game in this chapter.
Getting ready
To get started with iOS game development, you have the following prerequisites for SpriteKit:
- You will need the Xcode 5.x
- The targeted device family should be iOS 7.0+
- You should be running OS X 10.8.X or later
If all the above requisites are fulfilled, then you are ready to go with the iOS game development. So let's start with game development using iOS native game framework. We will be building a mini game in the chapter and will be taking it forward in every chapter to add more and more features and enhancements.
How to do it...
Let's start building the AntKilling game. Perform the following steps to create your new SpriteKit project:
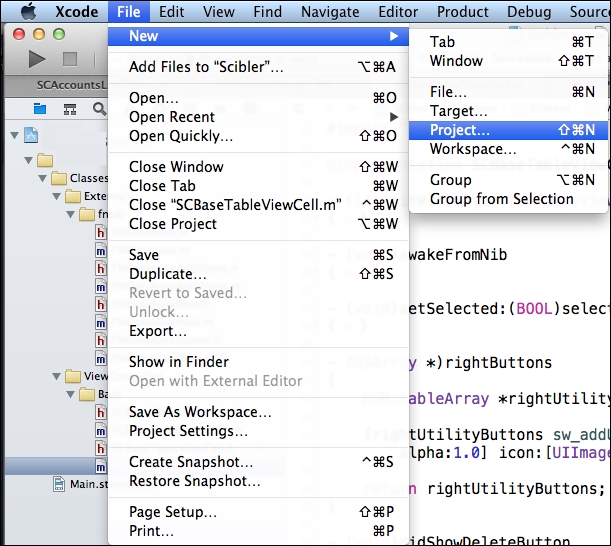
- Start your Xcode. Navigate to File | New | Project....
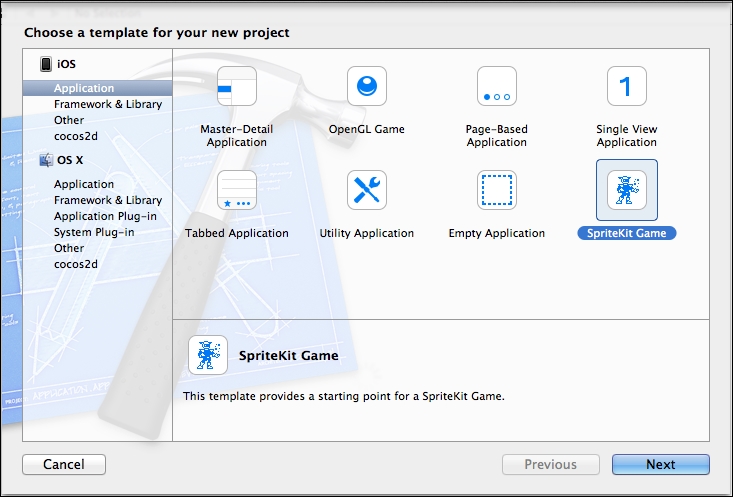
- Then from the prompt window, navigate to iOS | Application | SpriteKit Game and click on Next.
- Fill all the project details in the prompt window and provide
AntKillingas the project name with your Organization Name, device as iPhone, and Class Prefix asAK. Click on Next.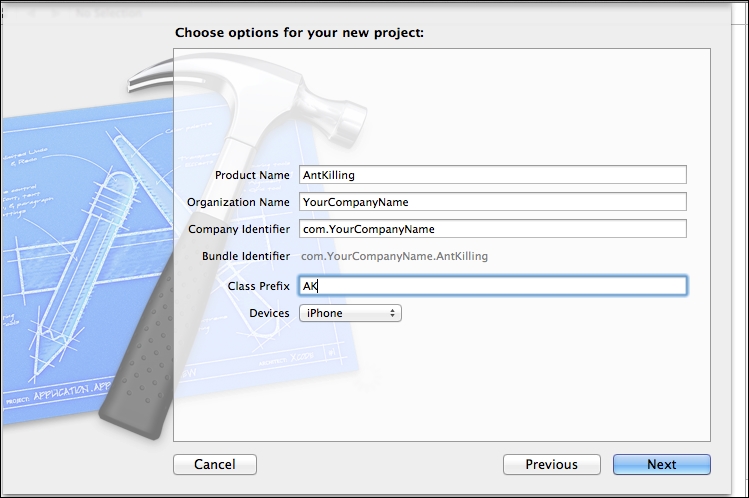
- Select a location on the drive to save the project and click on Create.
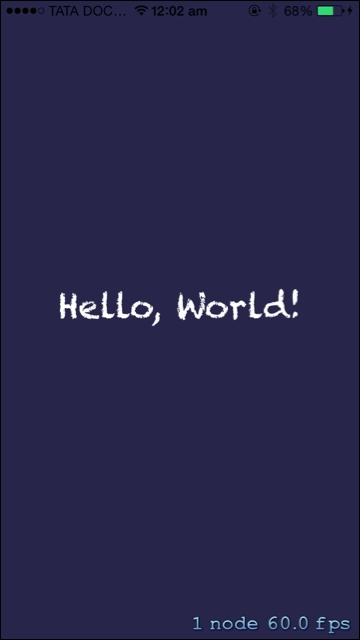
- Then build the sample project to check the output of the sample project. Once you build and run the project with the play button, you should see the following on your device:
How it works...
The following are the observations of the starter project:
- As you have seen, the sample project of SpriteKit plays a label with a background color.
- SpriteKit works on the concept of scenes, which can be understood as the layers or the screens of the game. There can be multiple scenes working at the same time; for example, there can be a gameplay scene, hud scene, and the score scene running at the same time in the game.
Now we can look into the project for more detail arrangements of the starter project. The following are the observations:
- In the main directory, you already have one scene created by default called AKMyScene.
- Now click on
AKMyScene.mto explore the code to add the label on the screen. You should see something similar to the following screenshot: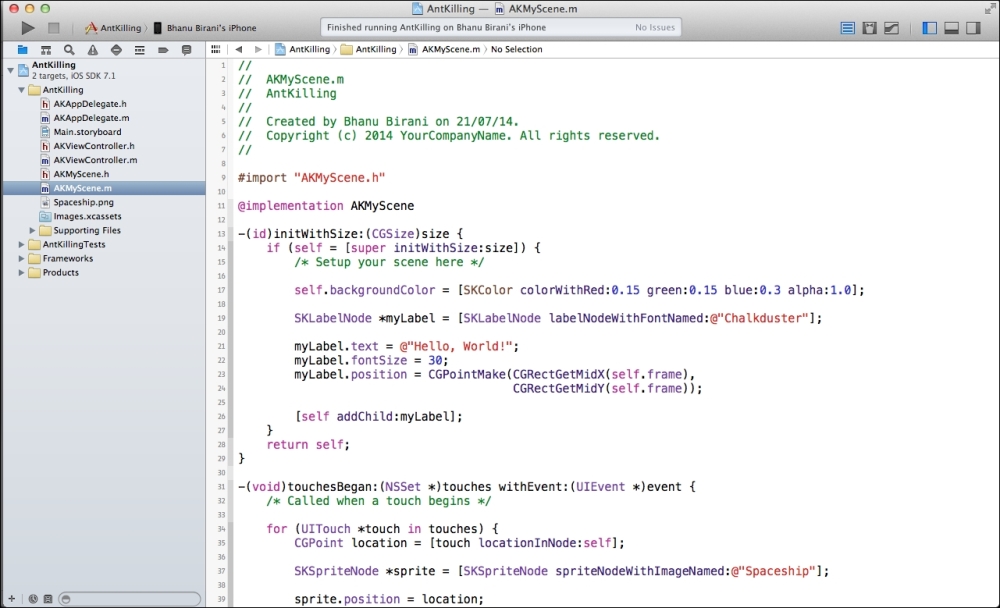
- Now we will be updating this file with our code to create our AntKilling game in the next sections.
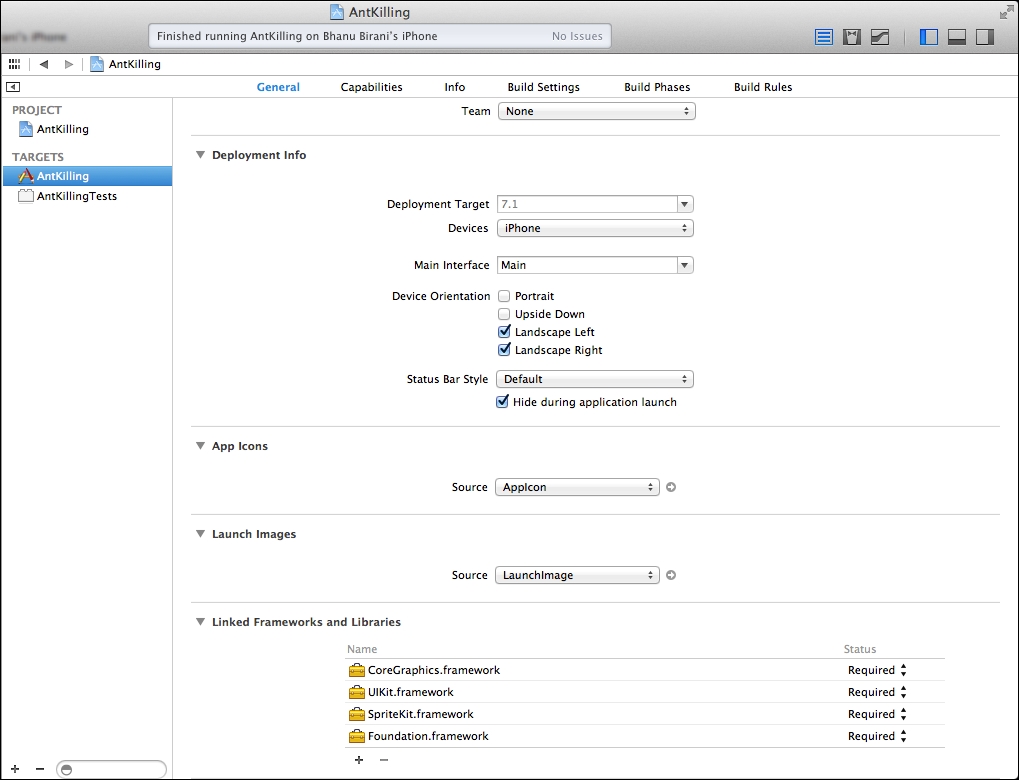
- We have to fulfill a few prerequisites to get started with the code, such as locking the orientation to landscape as we want a landscape orientation game.
- To change the orientation of the game, navigate to AntKilling project settings | TARGETS | General. You should see something similar to the following screenshot:

- Now in the General tab, uncheck Portrait from the device orientation so that the final settings should look similar to the following screenshot:
- Now build and run the project. You should be able to see the app running in landscape orientation.
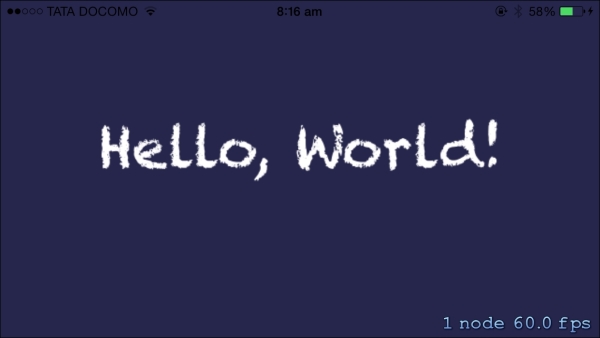
- The bottom-right corner of the screen shows the number of nodes with the frame rate.


