Installing MariaDB
In Chapter 3, Using JPA to Create and Access a Database, we are going to use MariaDB, so you will need to install it locally on your computer. MariaDB is a widely used open-source relational database. MariaDB is available for Windows, Linux, and macOS, and you can download the latest stable community server at https://mariadb.com/downloads/community/. MariaDB is developed under a GNU General Public License, version 2 (GPLv2) license.
The following steps guide you to install MariaDB:
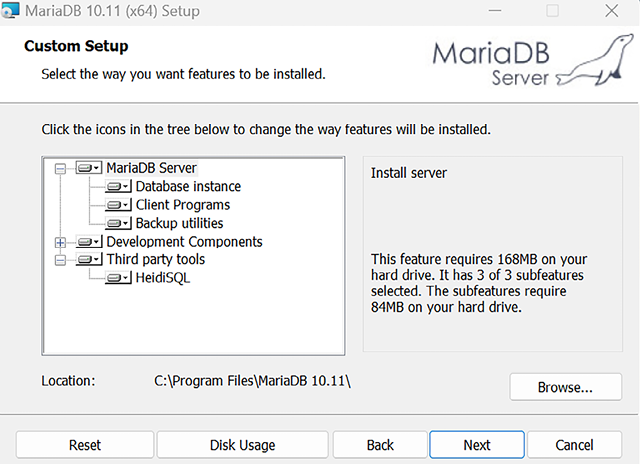
- For Windows, there is the Microsoft Installer (MSI), which we will use here. Download the installer and execute it. Install all features from the installation wizard, as illustrated in the following screenshot:

Figure 1.14: MariaDB installation (step 1)
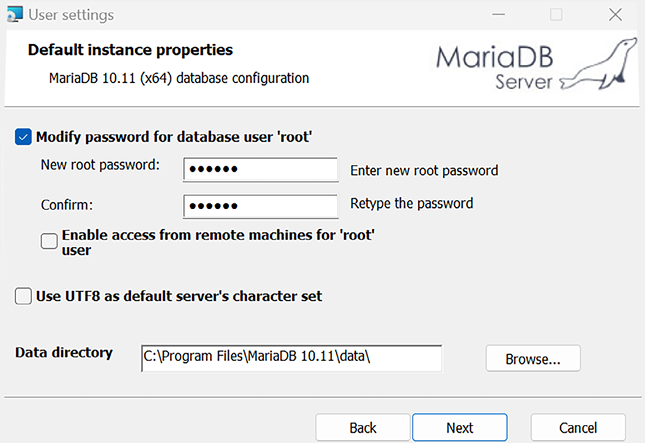
- In the next step, you should give a password for the root user. This password is needed in the next chapter when we connect our application to the database. The process is illustrated in the following screenshot:

Figure 1.15: MariaDB installation (step 2)
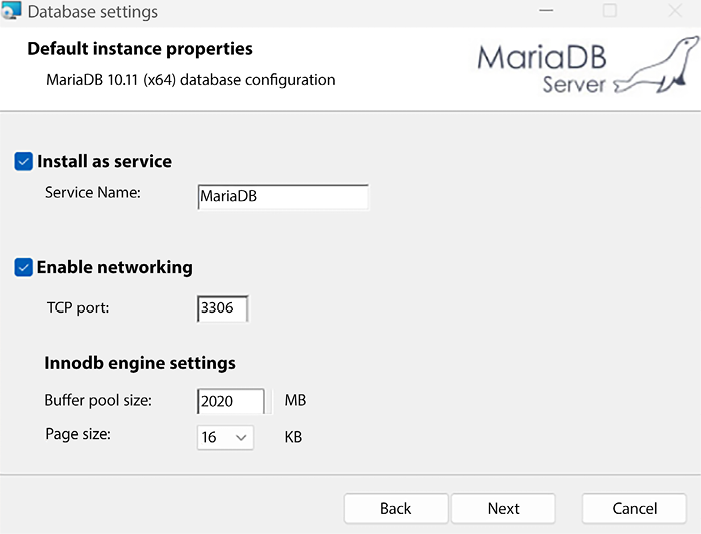
- In the next phase, we can use the default settings, as illustrated in the following screenshot:

Figure 1.16: MariaDB installation (step 3)
- Now, the installation will start, and MariaDB will be installed on your local computer. The installation wizard will install HeidiSQL for us. This is an easy-to-use, graphical database client. We will use this to add a new database and make queries to our database. You can also use the Command Prompt included in the installation package.
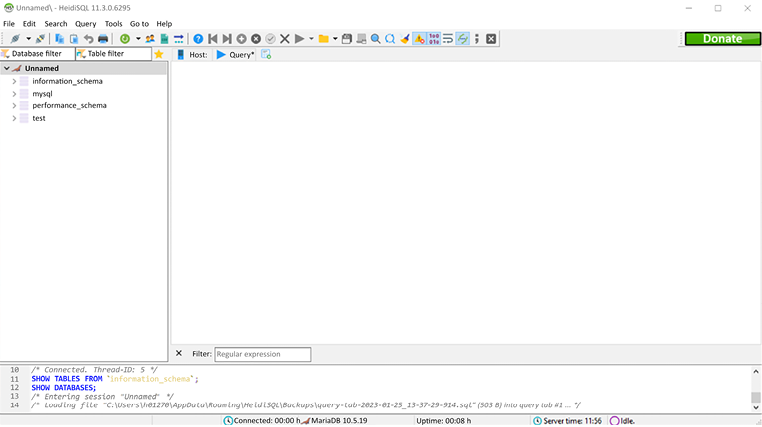
- Open HeidiSQL and log in using the password that you gave in the installation phase. You should then see the following screen:

Figure 1.17: HeidiSQL
IMPORTANT NOTE
HeidiSQL is only available for Windows. If you are using Linux or macOS, you can use DBeaver (https://dbeaver.io/) instead.
We now have everything needed to start the implementation of the backend.


