Exploring data management
In this section, we will dive into how to manage data in Azure Databricks in order to perform analytics, create ETL pipelines, train ML algorithms, and more. First, we will briefly describe types of data in Azure Databricks.
Databases and tables
In Azure Databricks, a database is composed of tables; table collections of structured data. Users can work with these tables, using all of the operations supported by Apache Spark DataFrames, and query tables using Spark API and Spark SQL.
These tables can be either global or local, accessible to all clusters. Global tables are stored in the Hive metastore, while local tables are not.
Tables can be populated using files in the DBFS or with data from all of the supported data sources.
Viewing databases and tables
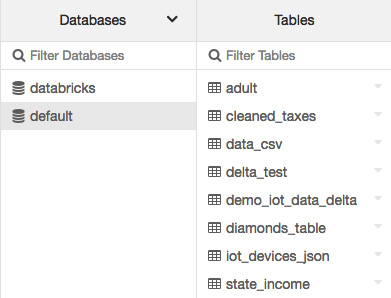
Tables related to the cluster you are currently using can be viewed by clicking on the data icon button in the sidebar. The Databases folder will display the list of tables in each of the selected databases:

Figure 1.25 – Default tables
Users can select a different cluster by clicking on the drop-down icon at the top of the Databases folder and selecting the cluster:

Figure 1.26 – Selecting databases in a different cluster
We can have several queries on a cluster, each with its own filesystem. This is very important when we reference data in our notebooks.
Importing data
Local files can be uploaded to the Azure Databricks filesystem using the UI.
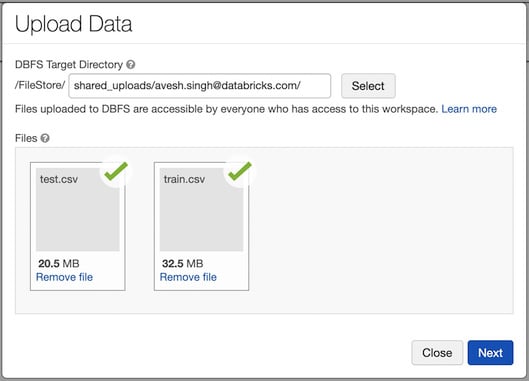
Data can be imported into Azure Databricks DBFS to be stored in the FileStore using the UI. To do this, you can either go to the Upload Data UI and select the files to be uploaded as well as the DBFS target directory:

Figure 1.27 – Uploading the data UI
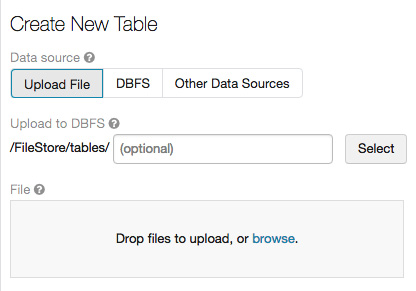
Another option available to you for uploading data to a table is to use the Create Table UI, accessible in the Import & Explore Data box in the workspace:

Figure 1.28 – Creating a table UI in Import & Explore Data
For production environments, it is recommended to use the DBFS CLI, DBFS API, or the Databricks filesystem utilities (dbutils.fs).
Creating a table
Users can create tables either programmatically using SQL, or via the UI, which creates global tables. By clicking on the data icon button in the sidebar, you can select Add Data in the top-right corner of the Databases and Tables display:

Figure 1.29 – Adding data to create a new table
After this, you will be prompted by a dialog box in which you can upload a file to create a new table, selecting the data source and cluster, the path to where it will be uploaded into the DBFS, and also be able to preview the table:

Figure 1.30 – Creating a new table UI
Creating tables through the UI or the Add data options are two of the many options that we have to ingest data into Azure Databricks.
Table details
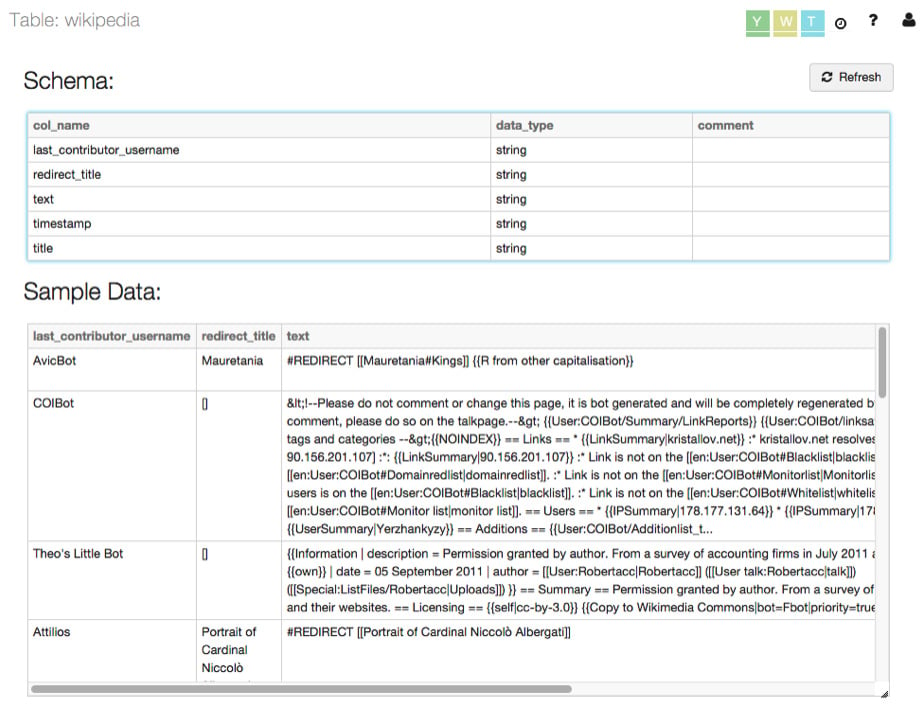
Users can preview the contents of a table by clicking the name of the table in the Tables folder. This will show a view of the table where we can see the table schema and a sample of the data that is contained within:

Figure 1.31 – Table details
These table details allow us to plan transformations in advance to fit data to our needs.


