Saving an After Effects project
Before we proceed further, let’s save our After Effects project; even though After Effects auto-saves newly created projects, it is a best practice to save any project in your preferred location in your system. Follow these steps to save the file:
- Click on File: In the menu bar at the top of the After Effects window, click on File.
- Select Save As: From the drop-down menu that appears when you click on File, select Save As.

Figure 1.4: The Save As option in the File menu
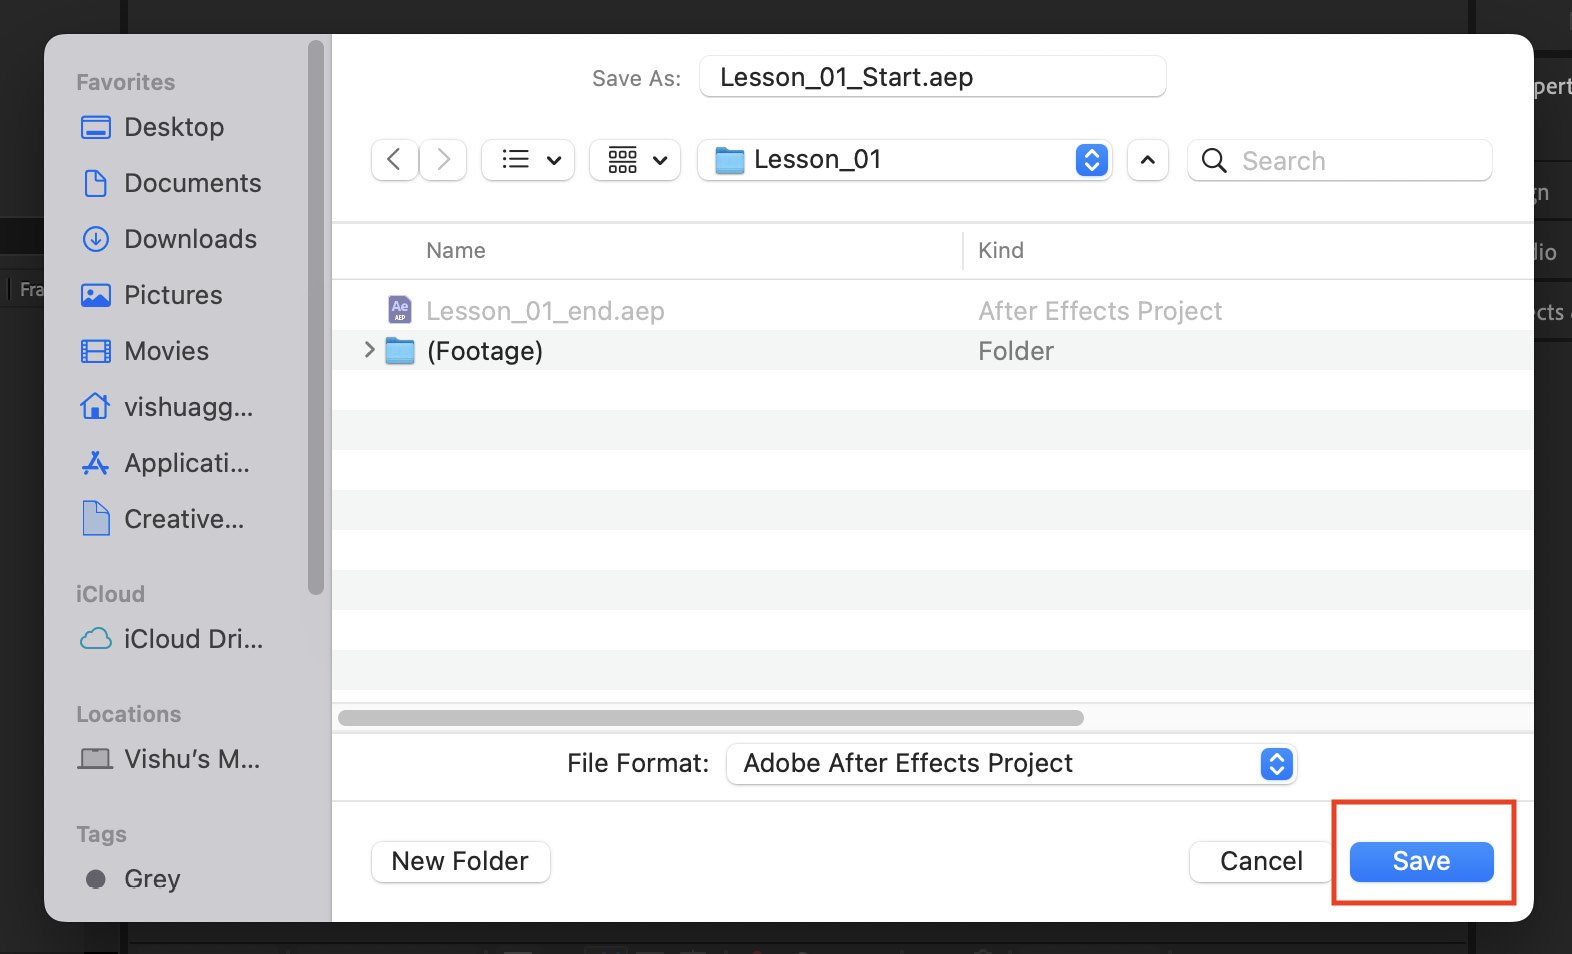
- Choose the location: After clicking Save As, a dialog box will appear. Choose the location on your computer where you want to save the project file.
- Enter a filename: In the dialog box, enter a name for your project file. Choose a descriptive and recognizable name so that you can easily identify the project later.
- Click Save: After entering the filename and choosing a location, click the Save button in the dialog box.

Figure 1.5: The Save As dialog box in After Effects
Your After Effects project is now saved to the specified location on your computer.
It’s a good practice to save your project frequently to prevent any loss of data in the case of unexpected software crashes or power outages. You can use the same steps to save your project again after making significant changes.
Now, you have learned the basics of the Adobe After Effects interface, how to customize the interface for your convenience and workflow, how to set up interface preferences, and how to save projects. In the next section, we will cover the first step with After Effects, that is, importing the necessary files for a project.


