We will use the following components:
- NodeMCU (it has a built-in ESP8266)
- GPS receiver (you can use the Ublox NEO-6M GPS Module)
- A few cables
- Power source
- A smartphone (for the Blynk)
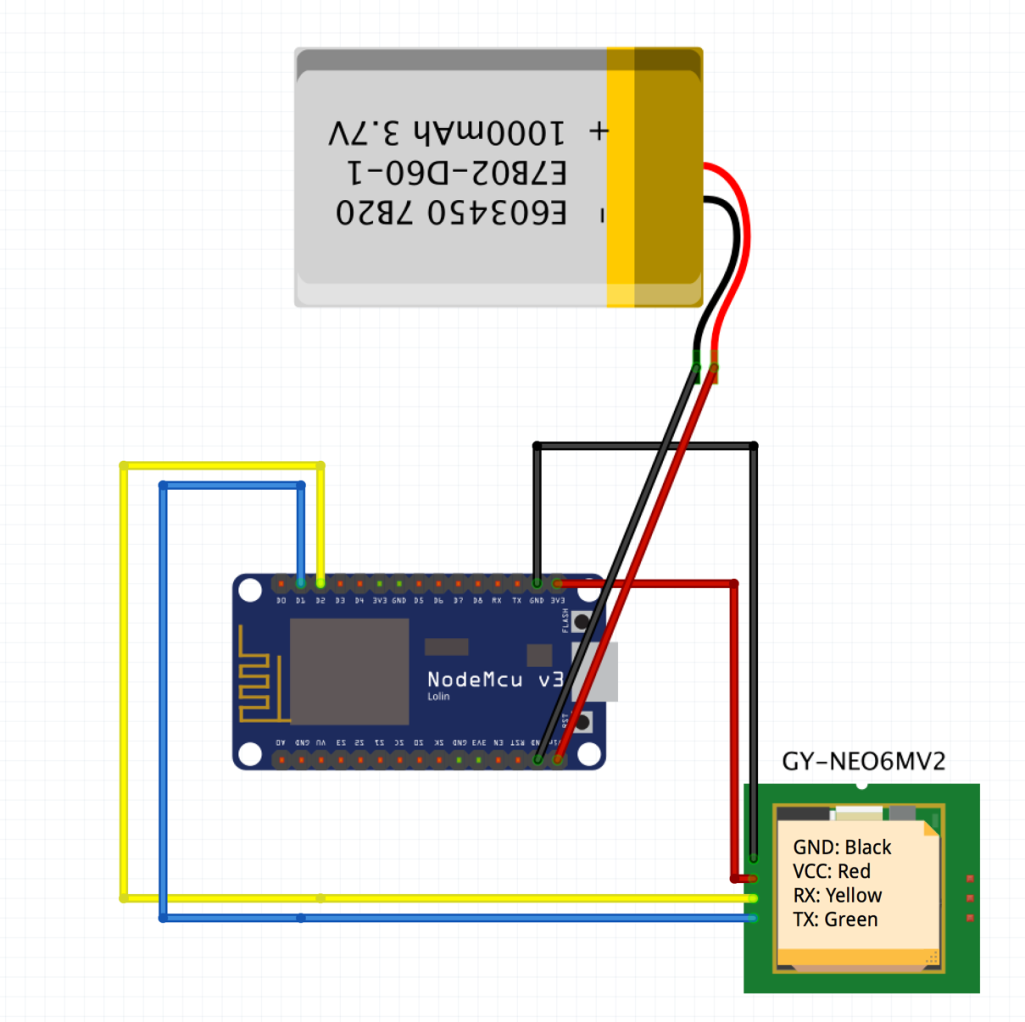
To make the connection, follow the pin configurations with NodeMCU and the GPS receiver:
|
NodeMCU |
GPS receiver |
|
D1 |
TX |
|
D2 |
RX |
|
GND |
GND |
|
VCC |
3V |
See the following circuit for clarification:

- Now, connect the NodeMCU to the computer and open the Arduino application to program the NodeMCU. Before uploading the code, let's open our Blynk app.
- Create a new project, as we discussed in Chapter 3, Preparing Your Drone for Flying.
- Remember the authentication code sent to the email address you registered with the app; this will be needed later. In my case, I have set my project name as MY GPS TRACKER, device type as NodeMCU, and connection type...


