Dependency management in Golang
For now, the code is stored locally. However, it's recommended to store the source code in a remote repository for versioning. That's where a solution such as GitHub comes into play. Sign up for a free account at https://github.com. Then, create a new GitHub repository called hello-world:

Figure 1.22 – New GitHub repository
Next, initialize the repository with the following commands:
git init
git remote add origin https://github.com/mlabouardy/hello-world.git
Commit the main.go file to the remote repository by executing the following commands:
git add .
git commit -m "initial commit"
git push origin master
Your repository should now look like this:

Figure 1.23 – Versioning main.go in Git
We can stop here. However, if you're working within a team, you will need some way to ensure all team members are using the same Go version and packages. That's where Go modules come into the picture. Go modules were introduced in 2018 to make dependency management a lot easier.
Note
Starting with Go 1.16, Go modules are the default way to manage external dependencies.
In the project folder, run the following command to create a new module:
go mod init hello-world
This command will create a go.mod file that contains the following content. The file defines projects requirements and locks dependencies to their correct versions (similar to package.json and package-lock.json in Node.js):
module github.com/mlabouardy/hello-world
go 1.15
To add the Gin package, we can issue the go get command. Now, our go.mod file will look like this:
module github.com/mlabouardy/hello-world
go 1.15
require github.com/gin-gonic/gin v1.6.3
A new file called go.sum will be generated upon adding the Gin framework (the output was cropped for brevity). You may assume it's a lock file. But in fact, go.mod already provides enough information for 100% reproducible builds. The other file is just for validation purposes: it contains the expected cryptographic checksums of the content of specific module versions. You can think of it as an additional security layer to ensure that the modules your project depends on do not change unexpectedly, whether for malicious or accidental reasons:
github.com/davecgh/go-spew v1.1.0/go.mod h1:J7Y8YcW2NihsgmVo/mv3lAwl/skON4iLHjSsI+c5H38=
github.com/davecgh/go-spew v1.1.1/go.mod h1:J7Y8YcW2NihsgmVo/mv3lAwl/skON4iLHjSsI+c5H38=
github.com/gin-contrib/sse v0.1.0 h1:Y/yl/+YNO8GZSjAhjMsSuLt29uWRFHdHYUb5lYOV9qE=
github.com/gin-contrib/sse v0.1.0/go.mod h1:RHrZQHXnP2xjPF+u1gW/2HnVO7nvIa9PG3Gm+fLHvGI=
github.com/gin-gonic/gin v1.6.3 h1:ahKqKTFpO5KTPHxWZjEdPScmYaGtLo8Y4DMHoEsnp14=
github.com/gin-gonic/gin v1.6.3/go.mod h1:75u5sXoLsGZoRN5Sgbi1eraJ4GU3++wFwWzhwvtwp4M=
github.com/go-playground/assert/v2 v2.0.1/go.mod h1:VDjEfimB/XKnb+ZQfWdccd7VUvScMdVu0Titje2rxJ4=
github.com/go-playground/locales v0.13.0 h1:HyWk6mgj5qFqCT5fjGBuRArbVDfE4hi8+e8ceBS/t7Q=
github.com/go-playground/locales v0.13.0/go.mod
You can list your dependencies with the following command:
go list -m all
The output is as follows:
github.com/mlabouardy/hello-world
github.com/davecgh/go-spew v1.1.1
github.com/gin-contrib/sse v0.1.0
github.com/gin-gonic/gin v1.6.3
github.com/go-playground/assert/v2 v2.0.1
github.com/go-playground/locales v0.13.0
github.com/go-playground/universal-translator v0.17.0
github.com/go-playground/validator/v10 v10.2.0
github.com/golang/protobuf v1.3.3
github.com/google/gofuzz v1.0.0
github.com/json-iterator/go v1.1.9
github.com/leodido/go-urn v1.2.0
github.com/mattn/go-isatty v0.0.12
github.com/modern-go/concurrent v0.0.0-20180228061459
e0a39a4cb421
github.com/modern-go/reflect2 v0.0.0-20180701023420
4b7aa43c6742
github.com/pmezard/go-difflib v1.0.0
github.com/stretchr/objx v0.1.0
github.com/stretchr/testify v1.4.0
github.com/ugorji/go v1.1.7
github.com/ugorji/go/codec v1.1.7
golang.org/x/sys v0.0.0-20200116001909-b77594299b42
golang.org/x/text v0.3.2
golang.org/x/tools v0.0.0-20180917221912-90fa682c2a6e
gopkg.in/check.v1 v0.0.0-20161208181325-20d25e280405
gopkg.in/yaml.v2 v2.2.8
Important Note
To remove unused dependencies, you can use the go mod tidy command.
Finally, add the go.mod and go.sum files to the remote repository using the following commands:
git add .
git commit -m "dependency management"
git push origin master
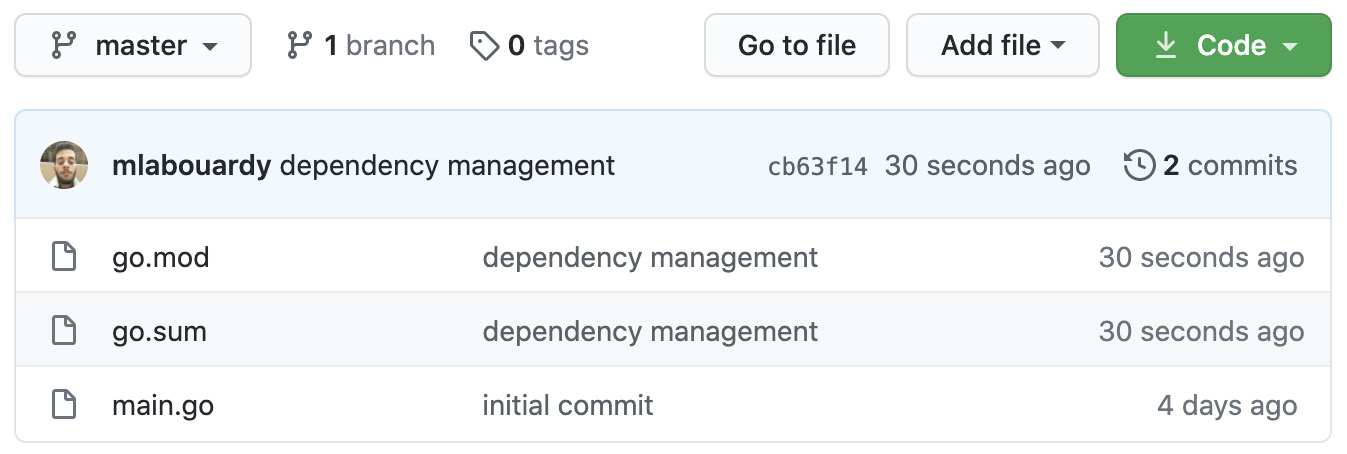
The updated repository will look as follows:

Figure 1.24 – Managing dependencies with Go modules
It's worth mentioning that the downloaded modules are stored locally in your $GOPATH/pkg/mod directory. However, sometimes, it's useful to store the modules or third-party packages that your project depends on and place them in a folder, so that they can be checked into version control. Fortunately, Go modules support vendoring:
go mod vendor
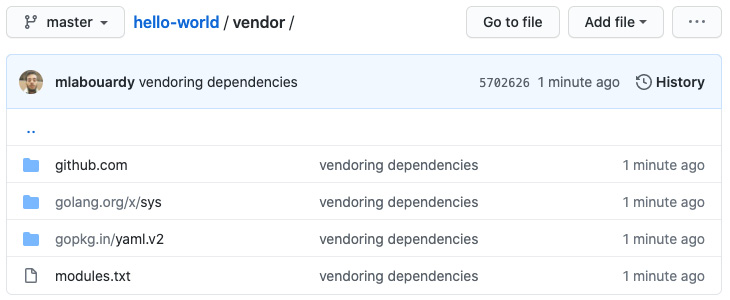
This command will create a vendor directory in your project folder that contains all your third-party dependencies. You can now commit this folder to your remote Git repository to ensure the stability of your future builds, without having to rely on external services:

Figure 1.25 – Vendoring dependencies
Sometimes, you may wonder why a specific package is a dependency. You can answer this by analyzing or visualizing the project dependencies. To do so, we can use the go mod graph command to display the list of modules in the go.mod file:
go mod graph | sed -Ee 's/@[^[:blank:]]+//g' | sort | uniq >unver.txt
This command will generate a new file called unver.txt containing the following content (the output has been cropped for brevity):
github.com/gin-contrib/sse github.com/stretchr/testify
github.com/gin-gonic/gin github.com/gin-contrib/sse
github.com/gin-gonic/gin github.com/go-playground/validator/v10
github.com/gin-gonic/gin github.com/golang/protobuf
github.com/gin-gonic/gin github.com/json-iterator/go
github.com/gin-gonic/gin github.com/mattn/go-isatty
github.com/gin-gonic/gin github.com/stretchr/testify
github.com/gin-gonic/gin github.com/ugorji/go/codec
github.com/gin-gonic/gin gopkg.in/yaml.v2
Then, create a graph.dot file containing the following content:
digraph {
    graph [overlap=false, size=14];
    root="$(go list -m)";
    node [ shape = plaintext, fontname = "Helvetica",
          fontsize=24];
    "$(go list -m)" [style = filled,
                     fillcolor = "#E94762"];
This content will generate a graph structure using the DOT language. We can use DOT to describe graphs (directed or not). That being said, we will inject the output of unvert.txt into the graph.dot file with the following commands:
cat unver.txt | awk '{print "\""$1"\" -> \""$2"\""};' >>graph.dot
echo "}" >>graph.dot
sed -i '' 's+\("github.com/[^/]*/\)\([^"]*"\)+\1\\n\2+g' graph.dot
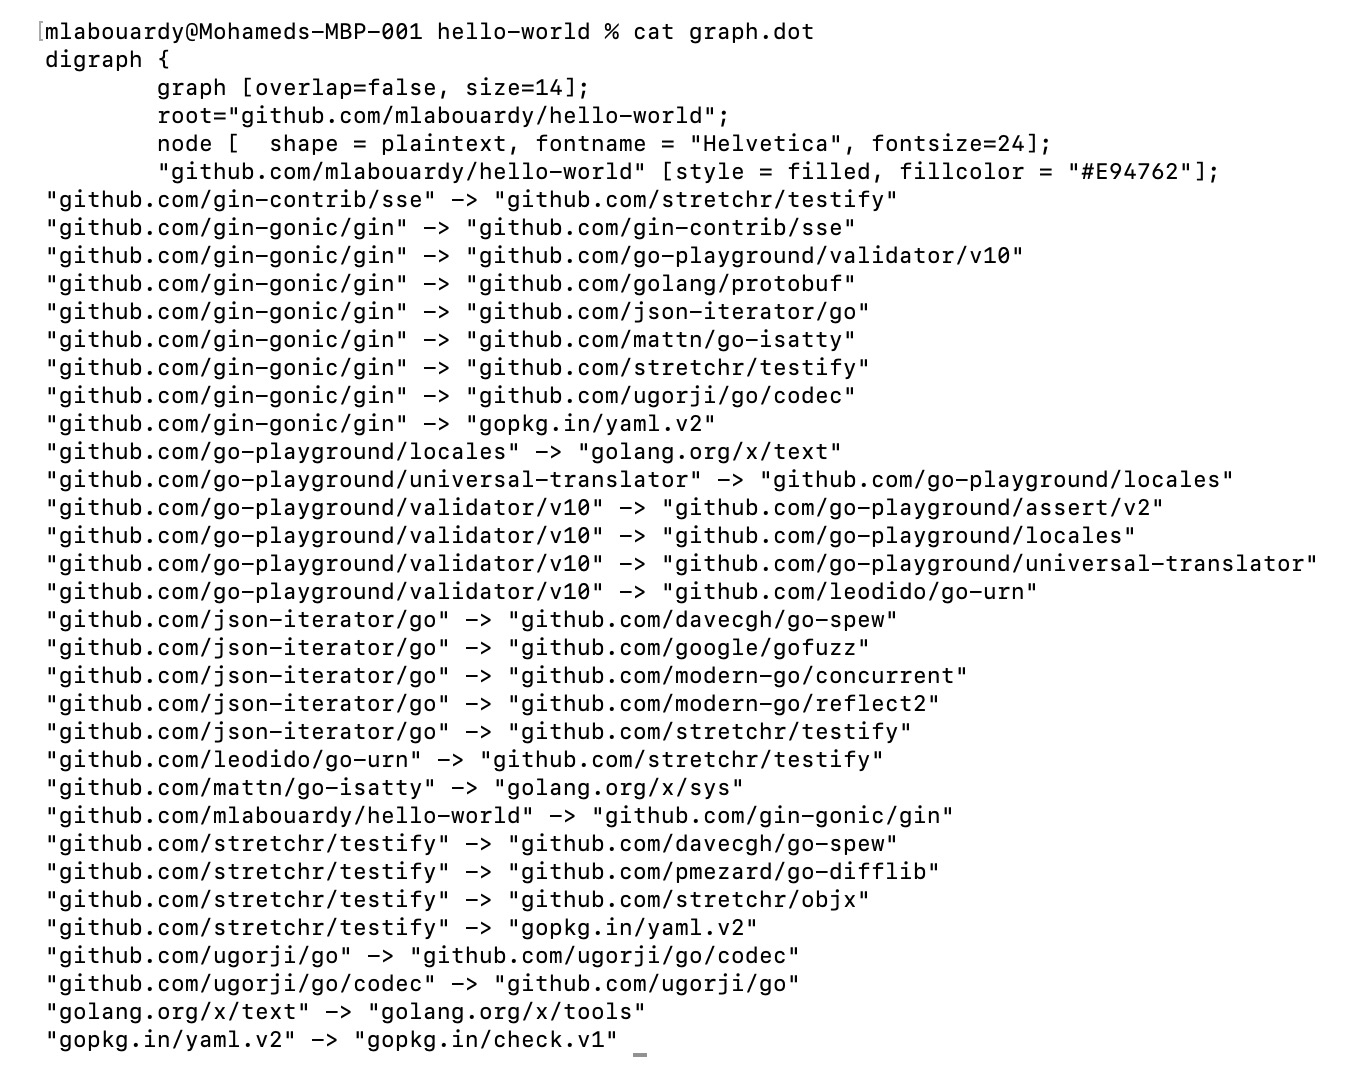
This results in a module dependency graph:

Figure 1.26 – Module dependency graph
We can now render the results with Graphviz. This tool can be installed with the following commands, based on your operation system:
- Linux: You can download the official package based on your package manager. For Ubuntu/Debian, use the following command:
apt-get install graphviz
- MacOS: You can use the Homebrew utility for MacOS:
brew install graphviz
- Windows: You can use the Chocolatey (https://chocolatey.org/install) package manager for Windows:
choco install graphviz.portable
Once Graphviz has been installed, execute the following command to convert the graph.dot file into .svg format:
sfdp -Tsvg -o graph.svg graph.dot
A graph.svg file will be generated. Open the file with the following command:
open graph.svg
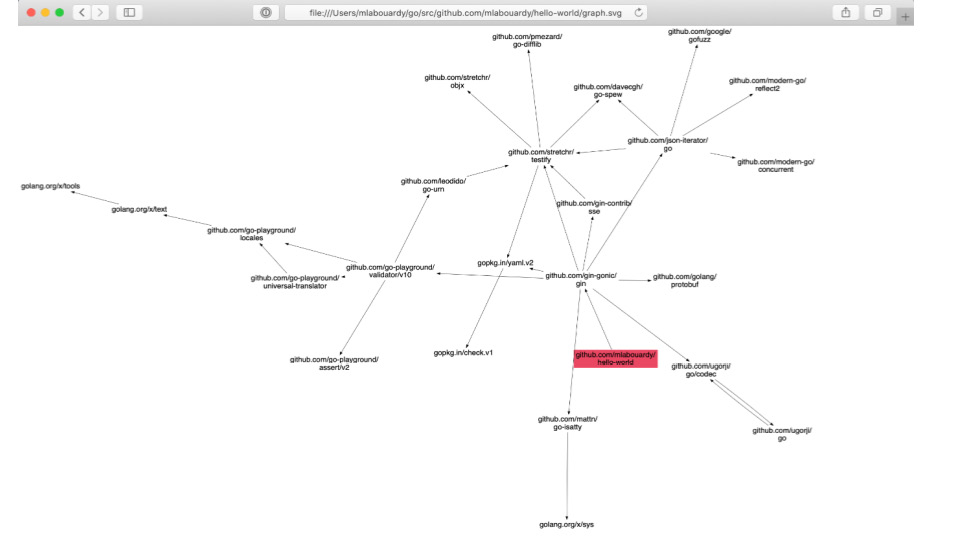
This results in the following directed graph:

Figure 1.27 – Visually analyzing module dependencies
This graph perfectly shows the dependencies among the modules/packages of the hello-world project.
Note
Another way of generating a dependencies graph is by using the modgv utility (https://github.com/lucasepe/modgv). This tool converts go mod graph output into GraphViz's DOT language with a single command.
Now that the source code has been versioned in GitHub, we can go further and explore how to write a custom function handler for Gin routes.


