Migration tooling and processes
After having performed the assessment(s) of your source environment and laid out the path toward a solid cloud environment that takes identity, compliance, and governance into account, you are here to take the next step: running your migrations. We already briefly touched on several of these, but mainly from the assessment capabilities perspective that comes with them. This section walks you through the actual migration approaches. Several approaches are possible, and the one you choose will depend on different factors.
Manual migrations
The first option that comes to mind is running a manual migration. Starting from your existing source workload, you build a similar environment in Azure and copy over the data. Let's take a look at some examples.
Migrating VHD disks
If your source environment is Hyper-V and there is enough downtime allowed for your application, you could consider performing a manual migration by copying VHD disks into Azure Storage. Azure supports both Gen1 and Gen2 Hyper-V machines nowadays, with the maximum size of the VHD disk being 1,023 GB.
If your source environment is VMware, although there's a bit more work, it shouldn't be a blocking factor to copy the VM over to Azure. Tools such as Microsoft Virtual Machine Converter can help you in transforming the VMDK file into a VHD file format.
If you want to just migrate a single VHD and run an Azure virtual machine out of it, you don't have to generalize the VHD image; you can instead configure it as a specialized disk. If, however, you want to use this source VHD as a template disk for multiple Azure VM deployments, you should generalize the disk first. This is done using sysprep from within the source VM itself.
Once the disk is ready to be copied, use the Add-azVHD cmdlet in PowerShell to upload the VHD to an Azure Storage account. Other options you have available include using AzCopy and using the free Azure Storage Explorer tool.
Next, define an image from this uploaded VHD by using the New-AzImageConfig and New-AzImage PowerShell cmdlets.
Finally, when you have your image available, you can continue with deploying a new Azure virtual machine based on this source image.
Detailed step-by-step guidance on how to achieve this is documented here:
Migrating SQL databases using bacpac
If your source database solution is an SQL Server database, you might be familiar with SQL Server's built-in backup solution, storing your database in a BACPAC file. This is the perfect way to migrate your database to Azure SQL, if downtime is allowed.
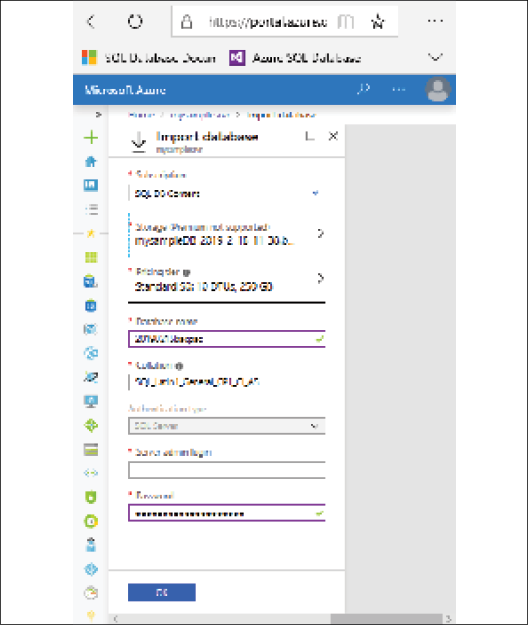
After you deploy a new Azure SQL Database instance in Azure (Figure 11), copy the bacpac file to Azure Storage. Head over to the import database option within Azure SQL Database and you're done! That really is how easy a migration can be.

Figure 11: SQL Azure import from a bacpac file
Migrating websites to Azure Web Apps
The other common workload to migrate to Azure is a web application or a websites. Azure App Service's Web Apps supports both Windows web servers and Linux Apache web servers as underlying source environments, as well as a full list of development languages and frameworks (.NET, Java, Python, Node.js, Ruby, and more).
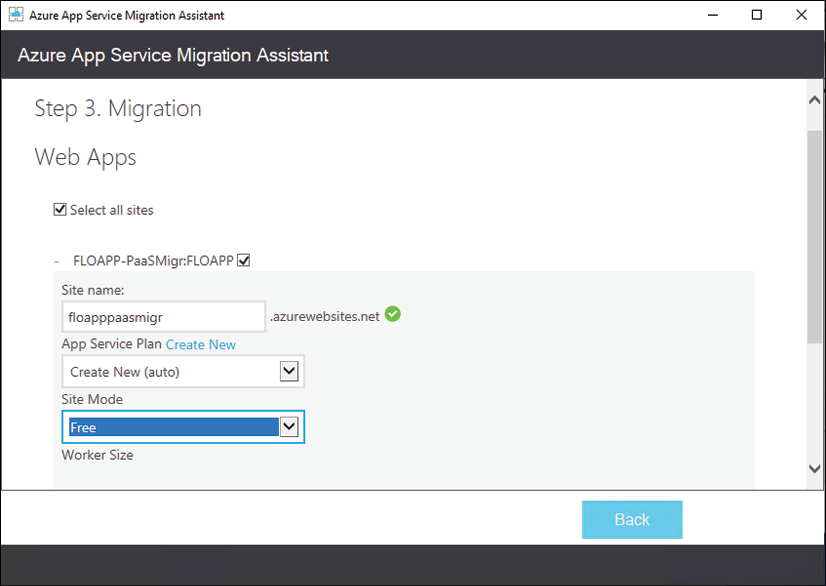
If you have your source code available, you could most probably push it directly into an Azure web app and run your site from Azure. Tools such as Visual Studio and Visual Studio Code provide this publish mechanism out of the box. If you have used the App Service Migration Assessment tool for an on-premises workload, know that you can also use the same tool to perform the actual web content migration step. Figure 12 shows you a screenshot of what such migration process looks like from within the tool itself.

Figure 12: App Service Migration Assistant
Azure Migration Center
We already described the new Azure Migration Center in terms of its support and guidance in performing source workload assessments. But obviously, it can also guide you through the actual migration of these systems. Thanks to the latest updates, only published July 2019, Azure Migration Center has become the main place to check out when you need to migrate application or data solution systems to Azure. Therefore, Azure Migration Center has now become a central hub for starting, executing, and tracking your migration projects, whether you want to migrate to Azure virtual machines, Azure data solutions, or Azure App Service.
Azure Data Box
By now, it should be clear you have a full set of options to migrate your workloads to Azure, no matter whether the target environment is IaaS or PaaS. The aforementioned scenarios most probably cover about 80-90% of the migration scenarios.
There is one last scenario I would like to touch on here, which is the migration of larger volumes of data (think in hundreds of terabytes or even petabytes). These larger volumes of data are not the best candidate for manual migration, nor will you migrate those storage environments into Azure virtual machines using Azure Site Recovery. The good news is that there is another, more flexible way to do this: Azure Data Box.
Azure Data Box allows for offline data migration, based on a physical device you introduce in your datacenter. You offload the data to this physical device, which gets securely transported to the closest Azure region, where the data gets copied into your Azure environment. All data in transit and at rest is AES encrypted for advanced security and compliance.
Depending on the data volume size, you can choose between any of the three models shown in Table 2:
|
|
Azure Data Box:
|
|
|
Azure Data Box Disk:
|
|
|
Azure Data Box Heavy:
|
Table 2: Azure Data Box models for offline large data volume migration
Besides these offline data migration solutions, the Azure Data Box offering was extended with two additional online data migration solutions, Azure Data Box Edge and Azure Data Box Gateway, shown in Table 3:
|
|
Azure Data Box Edge:
|
|
|
Azure Data Box Gateway:
|
Table 3: Azure Data Box models for online data volume migration
Having discussed Azure Data Box, let's move on to talk about the deployment of Azure.
Deploying a greenfield Azure environment
Another migration strategy we should look at is deploying a greenfield environment in Azure, which means deploying a virtual datacenter from scratch. Instead of performing a lift and shift migration—as recommended in the previous scenarios—it could be beneficial to start with a totally new environment and only migrate the bare minimum (which would most probably be just data such as source code, file shares, and data solutions).
In order to make this approach a success, you must have a good understanding of how to architect and build such a greenfield environment, mapping it with your business requirements from a technical and non-technical perspective.
Obviously, the same is valid for the other migration scenarios described earlier.
For the remainder of this chapter, the assumption is that you will use IaaS, relying on the several virtual datacenter capabilities available in Azure.


