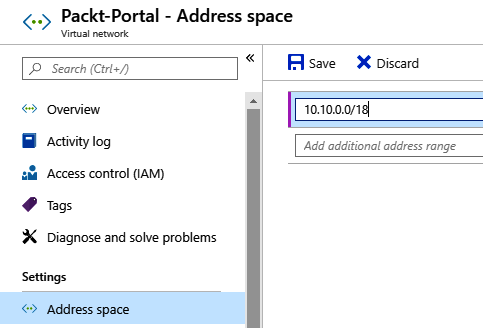
After the initial address space is defined during the creation of a virtual network, we can still change the address space size as needed. We can either increase or decrease the size of the address space, or change the address space completely by using a new address range.
Changing the address space size
Getting ready
Before you start, open a web browser and go to the Azure portal at https://portal.azure.com.
How to do it...
In order to change the address space size for a virtual network using the Azure portal, we must observe the following steps:
- In a virtual network blade, locate Address space under Settings.
-
In the available address space, click on Address space and change the value. An example is shown in the following screenshot:

- After you have entered a new value for Address space, click Save to apply the changes.
How it works...
Although you can change the address space at any time, there are some rules that determine what you can or cannot do. Address space can't be decreased if you have subnets defined in the address space that wouldn't be covered by a new address space. For example, if the address space was in the range of 10.0.0.0/16, it would cover addresses from 10.0.0.1 to 10.0.255.254. If one of the subnets was defined as 10.0.255.0/24, we wouldn't be able to change the virtual network to 10.0.0.0/17, as this will leave the subnet outside the new space.
Address space can't be changed to the new address space if you have subnets defined. In order to completely change the address space, you need to remove all subnets first. For example, if we have the address space defined as 10.0.0.0/16, we wouldn't be able to change it to 10.1.0.0/16, since having any subnets in the old space would leave them in an undefined address range.


