Exploring log forwarding profiles
Security rules determine how the firewall processes sessions traversing its interfaces. Not only are ports and applications determined by the security rules, but also which security profiles and even which log forwarding profile is applied. This means that you need to attach a Log Forwarding profile to every security rule so that matching sessions are logged to an external system. First, you will need to create a Log Forwarding profile.
Important Note
Creating a Log Forwarding profile named default will automatically add it to every new security rule that is created afterward.
In Objects > Log Forwarding, create a new profile and name it default. This will ensure that this profile will be added to each new security policy moving forward. Additional profiles can be added as needed. Only one Log Forwarding profile can be added per security rule.
The default profile should look somewhat like the profile depicted in the following screenshot:
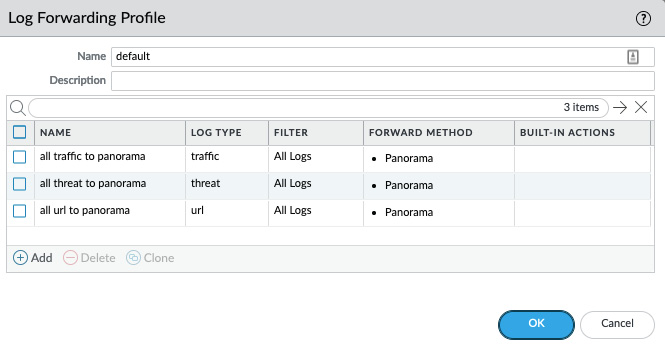
Figure 1.16 – Default log forwarding profile
A log forwarding profile consists of a set of match lists. Each match list contains the log type that needs to be forwarded, the destination server profiles the logs will be sent to, and optional filters to limit which logs will be forwarded. A typical log forwarding profile will contain all the common logs, such as traffic, threat, and url filtering logs. More specific Match lists can be added and tailored to take a specific action when an event is registered. For example, the following Match List will send out an email and forward the log to a syslog server when a critical threat is detected. This can be leveraged to alert the IT security team of an event and forward the information to an Security Operations Centre (SOC):
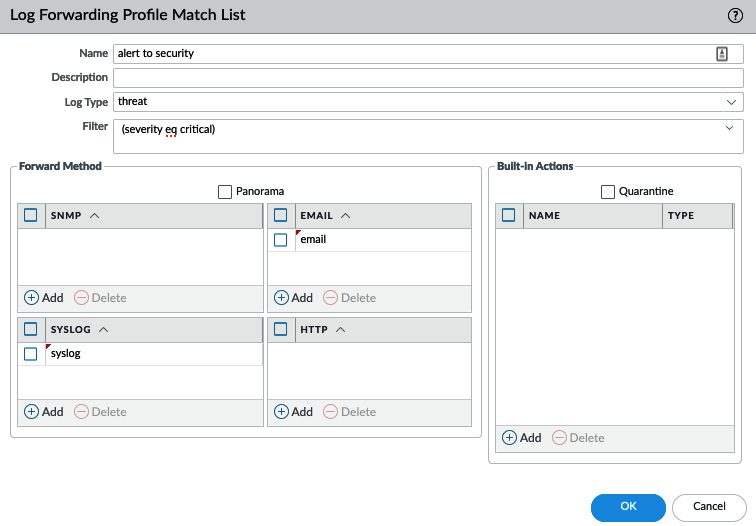
Figure 1.17 – Email and syslog log forwarding
Built-In Actions take log forwarding one step further by dynamically taking action on log events that can help protect critical systems from attacks, as we will see in the next section.
Dynamic tagging
The Built-In Actions section of Match List can be used to act dynamically when an event is seen that matches the filter.
The Quarantine checkbox can be used to add a source host to the device's quarantine list (the list can be found via Device > Device Quarantine). These devices can then be matched against the Quarantine attribute in a security policy, as shown in the following screenshot. The default behavior is to block the session that triggered a signature without interfering with other sessions initiated by a potentially malicious client. The advantage of adding this capability to Quarantine is that hosts are placed in a controlled group that can be cordoned off from sensitive resources, and even prevented from establishing a GlobalConnect VPN connection, until an unregister action is triggered or manually removed by an administrator:
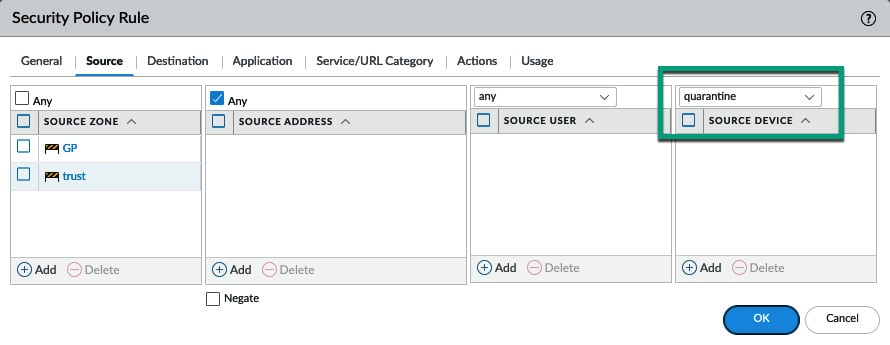
Figure 1.18 – Quarantine match on a security policy rule
As shown in the following screenshot, additional actions can be taken that will add a tag (these can be created in Objects > Tags) to a Target:
- Destination Address
- Source Address
- User
X-Forwarded-For-Address: The address contained in the x-forwarded for header added by a proxy server, indicating the original client IP:
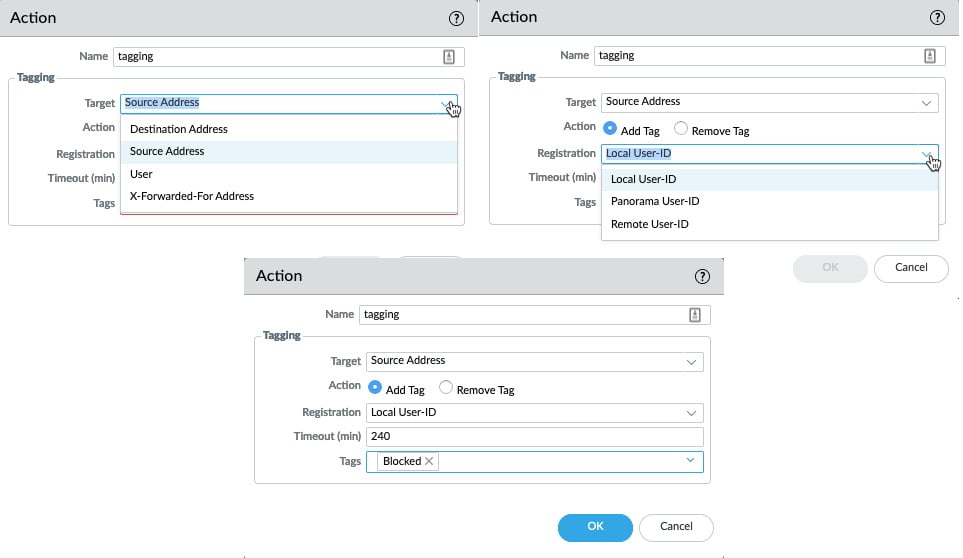
Figure 1.19 – Dynamic tag action
Tags can be added or removed by our Action. The tag can currently be registered to three different systems:
- Local User-ID: This is the local firewall.
- Panorama User-ID: This is a Panorama management server that can redistribute the tags via User-ID redistribution.
- Remote User-ID: This is the User-ID agent that's been installed on a Windows server.
For Panorama and the Remote User-ID, an XML API needs to be enabled in the configuration of the User-ID agents. A timeout can be added so that a tag is removed after a certain amount of time.
As shown in the following screenshot, once tagging has been set up, a Dynamic User Group can be created for tagged users, or an Address Group can be used for tagged addresses. These groups can then be added to security rules so that they can be granted or blocked access to resources:
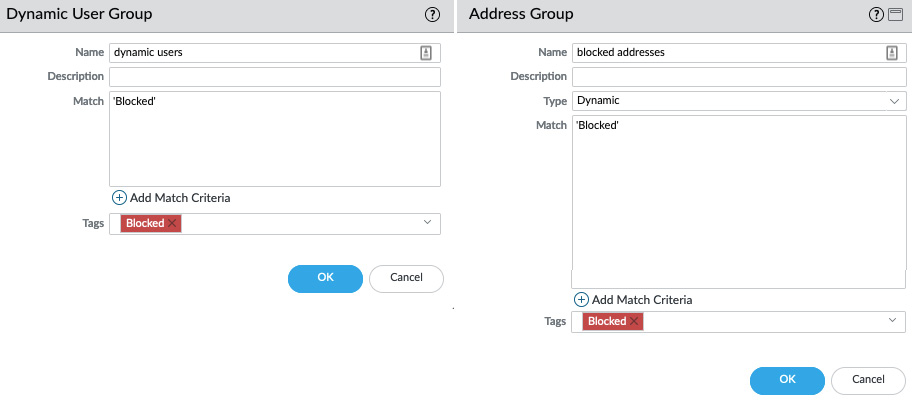
Figure 1.20 – Dynamic user group and address group
Once the dynamic tags are active and IPs start getting tagged, you can follow their progress in the Monitor > IP-Tag log, as you can see in the following screenshot:

Figure 1.21 – IP-Tag logs
The IP addresses or users that were tagged can be viewed by clicking the more… link next to the dynamic profile. If needed, addresses can be unregistered from this pop up as well:
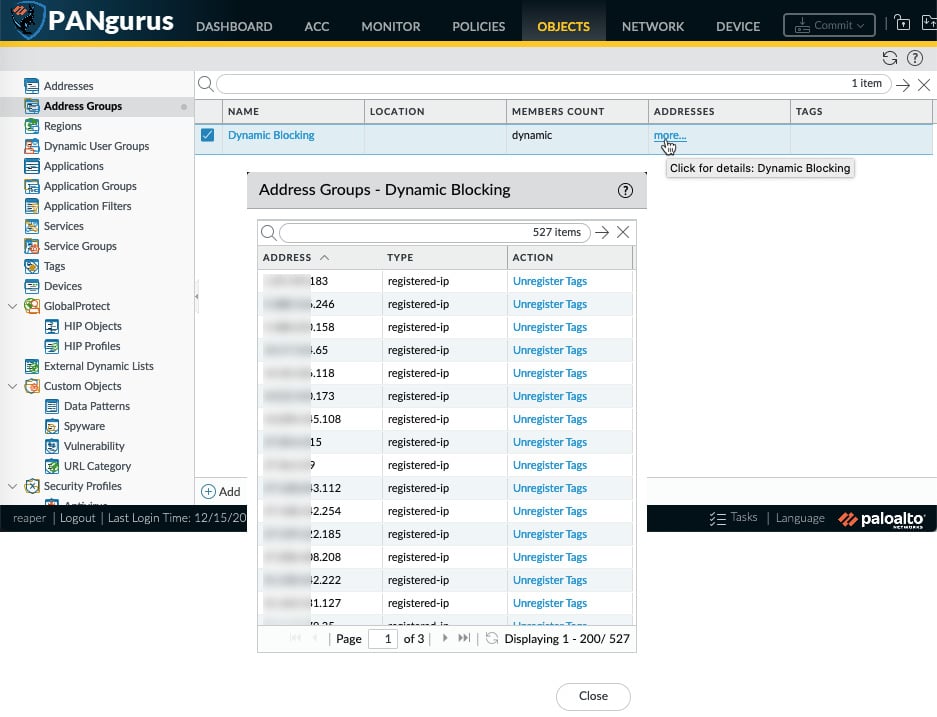
Figure 1.22 – List of tagged addresses in the dynamic profile
Before the Log Forwarding profiles can effectively start sending logs out and taking dynamic actions, they need to be assigned. We will learn about assigning log forwarding actions in the next section.
Assigning log forwarding actions
The last thing we need to do, before logs can be sent out to external systems, is add the log forwarding profile to all Security Policy rules that process sessions of interest. Log actions are determined by the Security Policy rule a session is handled by, so a log forwarding profile should be added to all security rules.
Important Note
Even rules that have no logging action enabled in the Security Policy Rule Log Settings may still generate logs: any threat event or URL filtering event with an action that is not allowed (that is, alert, block, and so on) will generate a log in the threat or URL filtering log database. The WildFire, Data Filtering, and File Blocking events will also still generate logs.
As shown in the following screenshot, the most common setting is set so that our Security Policy Rule Log Setting is Log at Session End, accompanied by a log forwarding profile.
Log at session end is the default setting that generates a log at the end of a session. This means that all the relevant data pertaining to the session can be recorded in one entry (for example, the number of transmitted bytes and packets, APP-ID, NAT actions, and so on).
Log at session start will create a log entry at every stage of a session, which includes when the SYN packet is received but also every mutation the App-ID may go through, which could be several stages for a child application. This log setting may be useful for troubleshooting but can be very chatty and storage-intensive when applied to regular traffic:
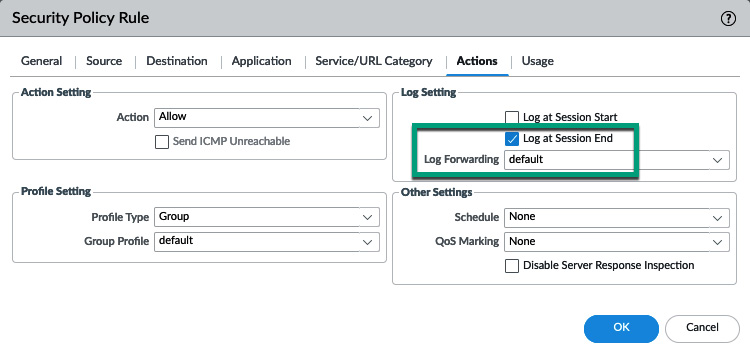
Figure 1.23 – Log forwarding profile in a security policy rule
Now that we have seen what we can do with logs, we will learn how to troubleshoot issues that could arise while forwarding logs.


