This recipe describes how to create an authorized RSA key so the user can log in to the pfSense console without using a password.
Generating authorized RSA keys
Getting ready
Linux and macOS users will need the ssh-keygen utility (installed by default in most cases). Windows users will need the puttygen utility.
How to do it...
For Linux/macOS users:
- In a Terminal window, type ssh-keygen and press Enter
- Enter the name of the file in which to save the public key (or just accept the default value)
- Enter a passphrase for the new key (not necessary, but recommended)
- Enter the passphrase a second time for confirmation
- The program will now generate an RSA public key and save it to the file
For Windows users:
- Start the puttygen utility.
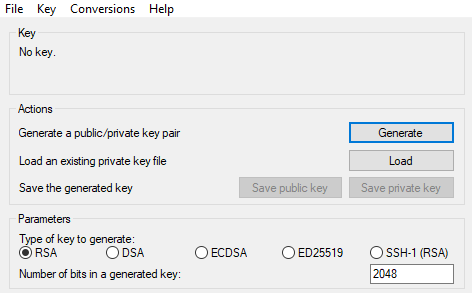
- In the Actions section, click on the Generate button to generate a public/private key pair:

- Move your mouse over the top section of the puttygen dialog box to generate random activity, as per puttygen's instructions.
- Enter a passphrase (not necessary, but recommended).
- Click on the Save private key button and specify a filename for the private key (for example, MyPrivateKey.ppk).
- Highlight the public key that was created in the textbox and save it to a file (for example, MyPublicKey.txt). Do not use the Save public key button because it adds potentially incompatible text to the file.
How it works...
RSA has become a standard for securing client/server connections. A client generates a public/private key pair—a private key file and a public key file, and a possible passphrase for additional security. Any server can then request the client’s public key and add it to their system; that client can then authenticate without typing in a password.
See also
- The Enabling SSH access recipe
- The Configuring SSH RSA key authentication recipe


