In this recipe, you will learn how to position VideoCapture objects at different frame positions.
Jumping between frames in video files
Getting ready
You need to have OpenCV 3.x installed with Python API support.
How to do it...
The steps for this recipe are:
- First, let's create a VideoCapture object and obtain the total number of frames:
import cv2
capture = cv2.VideoCapture('../data/drop.avi')
frame_count = int(capture.get(cv2.CAP_PROP_FRAME_COUNT))
print('Frame count:', frame_count)
- Get the total number of frames:
print('Position:', int(capture.get(cv2.CAP_PROP_POS_FRAMES)))
_, frame = capture.read()
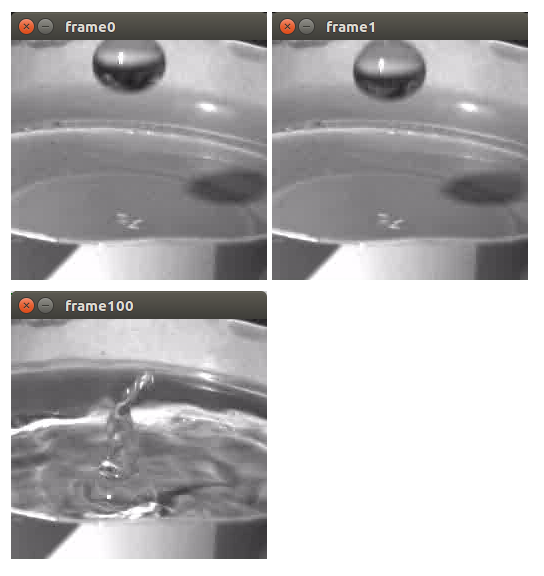
cv2.imshow('frame0', frame)
- Note that the capture.read method advances the current video position one frame forward. Get the next frame:
print('Position:', capture.get(cv2.CAP_PROP_POS_FRAMES))
_, frame = capture.read()
cv2.imshow('frame1', frame)
- Let's jump to frame position 100:
capture.set(cv2.CAP_PROP_POS_FRAMES, 100)
print('Position:', int(capture.get(cv2.CAP_PROP_POS_FRAMES)))
_, frame = capture.read()
cv2.imshow('frame100', frame)

cv2.waitKey()
cv2.destroyAllWindows()
How it works...
Obtaining the video position and setting it is done using the cv2.CAP_PROP_POS_FRAMES property. Depending on the way a video is encoded, setting the property might not result in setting the exact frame index requested. The value to set must be within a valid range.
You should see the following output after running the program:
Frame count: 182
Position: 0
Position: 1
Position: 100
The following frames should be displayed:


