Footprinting and scanning is the first phase after the pre-interactions and, based on the type of testing approach (black box, white box, or grey box), the footprinting phase will differ significantly. In a black box test scenario, we will target everything since no prior knowledge of the target is given, while we will perform focused application- and architecture-specific tests in a white box approach. A grey box test will combine the best of both types of methodology. We will follow the black box approach. So, let's fire up Metasploit and run a basic scan. However, let us add a new workspace to Metasploit. Adding a new workspace will keep the scan data separate from the other scans in the database and will help to find the results in a much easier and more manageable way. To add a new workspace, just type in workspace -a [name of the new workspace] and, to switch the context to the new workspace, simply type in workspace followed by the name of the workspace, as shown in the following screenshot:
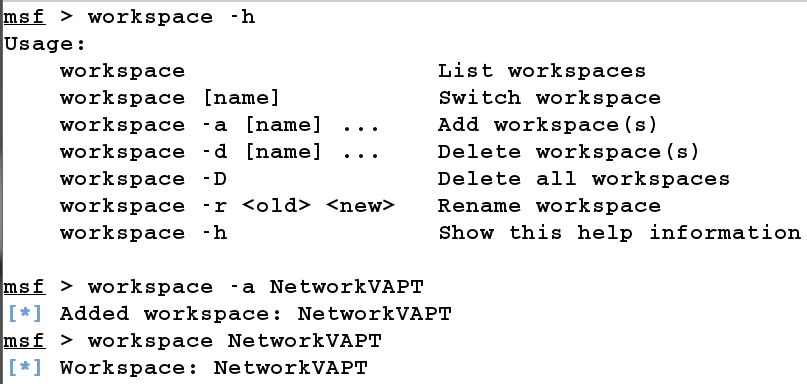
In the preceding screenshot, we can see that we added a new workspace NetworkVAPT and switched onto it. Let us now perform a quick scan of the network to check all the live hosts. Since we are on the same network as that of our target, we can perform an ARP sweep scan using the module from auxiliary/scanner/discovery/arp_sweep, as shown in the following screenshot:
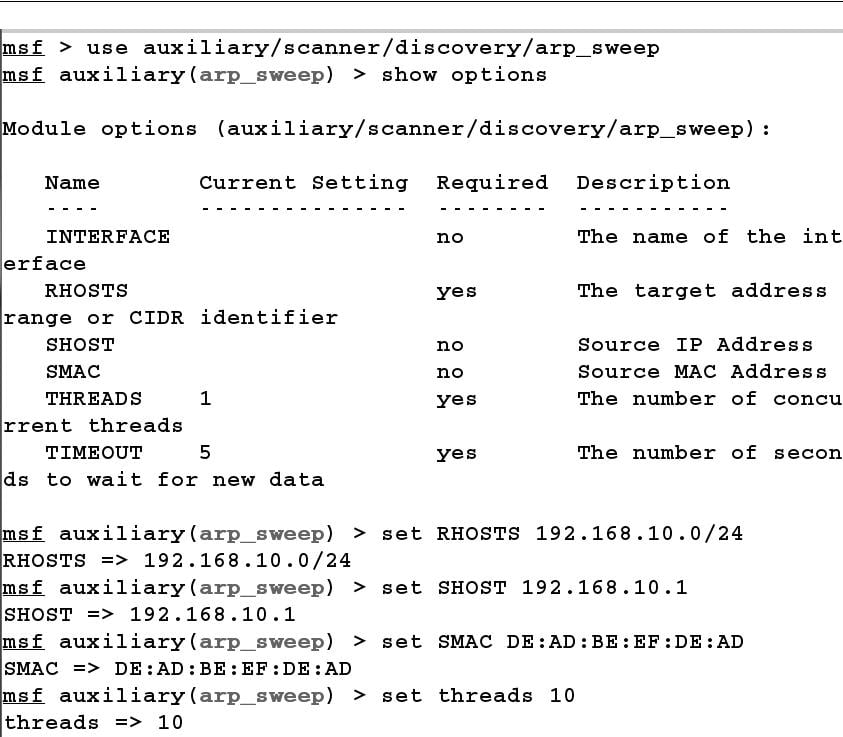
We choose a module to launch with the use command. The show options command will show us all the necessary options required for the module to work correctly. We set all the options with the set keyword. In the preceding illustration, we spoof our MAC and IP address by setting SMAC and SHOST to anything other than our original IP address. We used 192.168.10.1, which looks similar to the router's base IP address. Hence, all the packets generated via the ARP scan will look as if produced by the router. Let's run the module and also check how valid our statement is by analyzing traffic in Wireshark, as shown in the following screenshot:
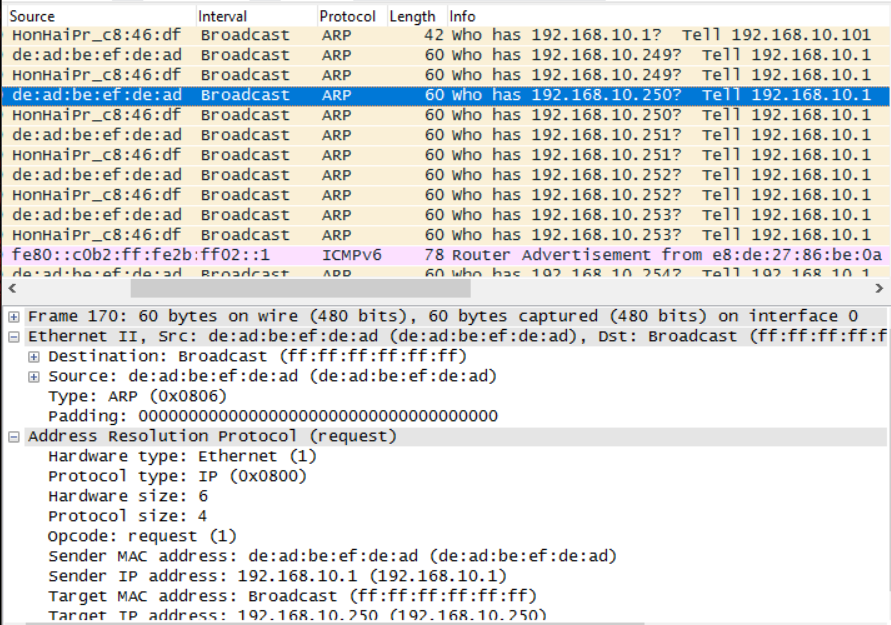
We can clearly see in the preceding screenshot that our packets are being spoofed from the MAC and IP address we used for the module:
msf auxiliary(arp_sweep) > run
192.168.10.111 appears to be up.
Scanned 256 of 256 hosts (100% complete)
Auxiliary module execution completed
msf auxiliary(arp_sweep) >
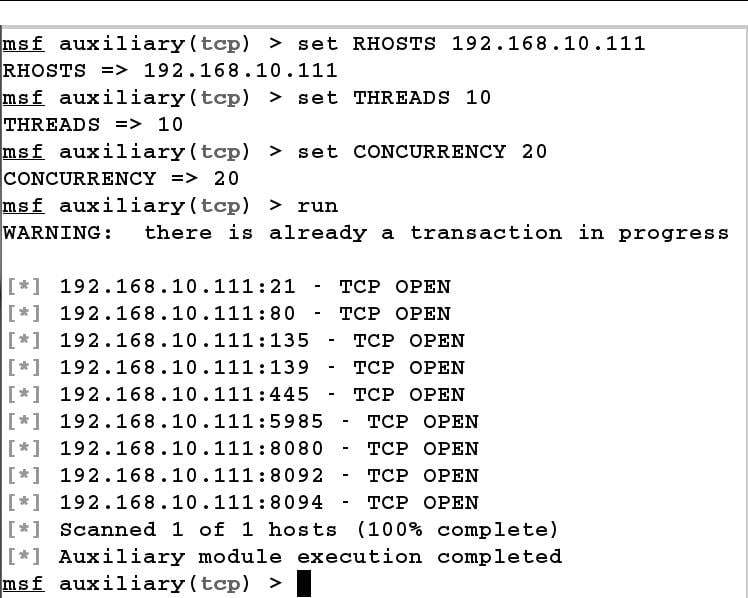
From the obtained results, we have one IP address which appears to be live, that is, 192.168.10.111 Let us perform a TCP scan over 192.168.10.111 and check which ports are open. We can perform a TCP scan with the portscan module from auxiliary/scanner/portscan/tcp, as shown in the following screenshot:
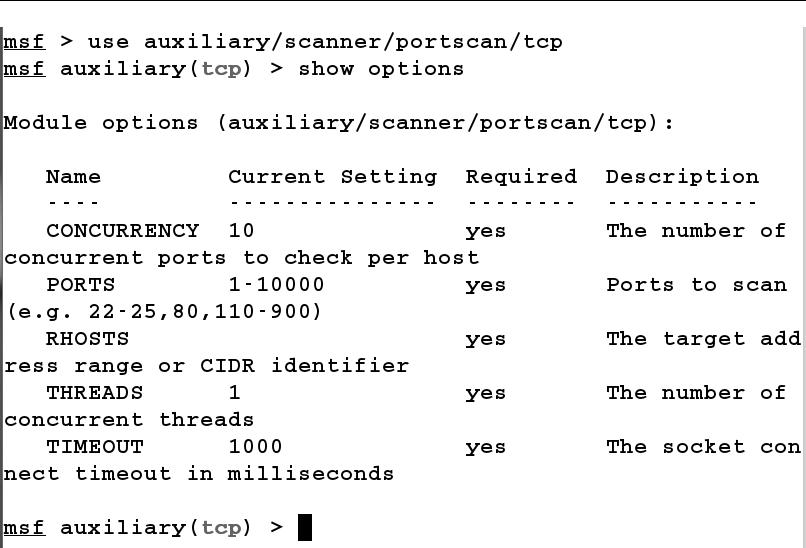
Next, we will set RHOSTS to the IP address 192.168.10.111. We can also increase the speed of the scan by using a high number of threads and setting the concurrency, as shown in the following screenshot:
It's advisable to perform banner-grabbing over all the open ports found during the scan. However, we will focus on the HTTP-based ports for this example. Let us find the type of web server running on 80, 8080 using the auxiliary/scanner/http/http_version module, as shown in the following screenshot:
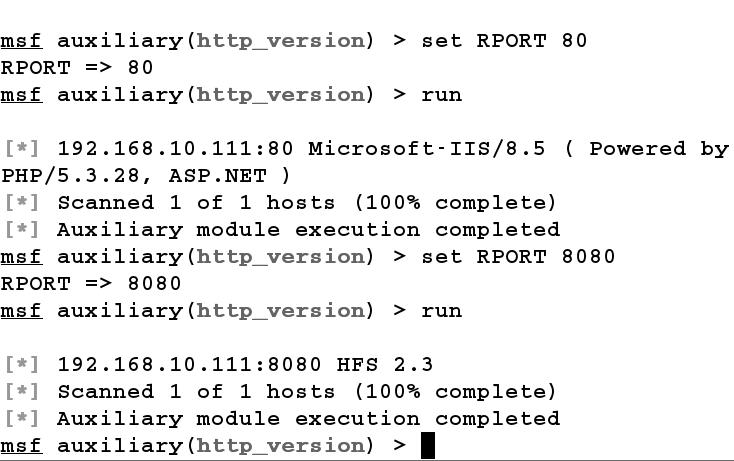
We load the http_version scanner module using the use command and set RHOSTS to 192.168.10.111. First, we scan port 80 by setting RPORT to 80, which yields the result as IIS/8.5 and then we run the module for port 8080 which depicts that the port is running the HFS 2.3 web server.


