A simple plugin example
The goal of this section is to customize TestPlugin to classify the loaded layers in the raster and vectors and respectively populate two comboboxes with the layer names.
Adding basic logic to TestPlugin
As said previously, to customize TestPlugin we have to modify some code portions in the files: test_plugin_dialog_base.ui for the GUI layout, test_plugin_dialog.py for the GUI logic, and test_plugin.py for the plugin logic.
Modifying the layout with Qt Designer
The default plugin GUI layout has only two buttons, Ok and Cancel. Here, we will add two comboboxes that will be populated by the logic of the plugin in test_plugin.py.
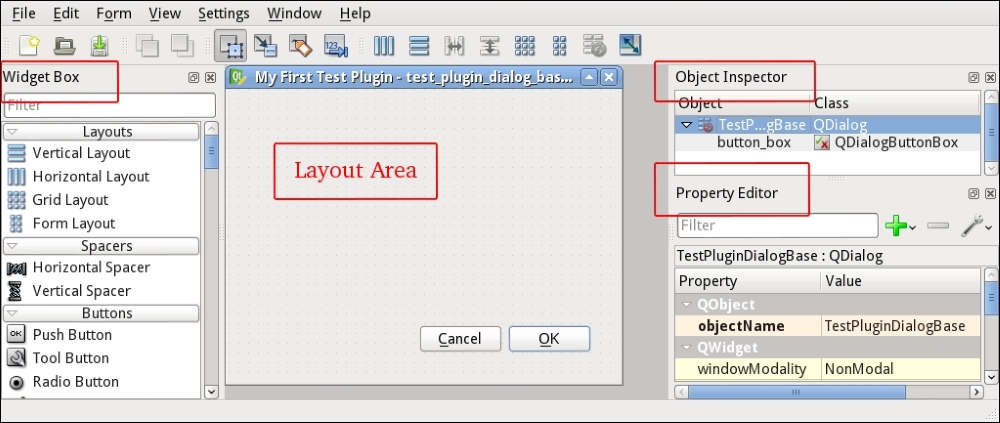
To edit the test_plugin_dialog_base.ui GUI layout, open it with Qt Designer, which will show the interface of the following screenshot:

This is the graphical representation of the test_plugin_dialog_base.ui XML file. With Qt Designer we can reorganize the layout, adding new graphical elements, and also connect events and triggers related to the interface...


