Kali Linux can also be set up in the cloud as an Amazon Machine Image (AMI) in the Amazon Web Services platform, as a cloud computing service. Although listed with a cost of $0.046 per hour, it can be used for free if specifically configured as a basic service with the user not exceeding certain set limits. Although a credit card is required for sign-up and configuration, you will be notified before you are charged, should said limits be crossed.
Before we begin setting up Kali Linux in the cloud, you can first visit the Amazon Marketplace to view the details of the AMI at this link: https://aws.amazon.com/marketplace/pp/B01M26MMTT. Notice that it is listed as Free Tier.
To begin our setup and to configure Kali Linux in the cloud, we must perform the following steps:
- First, create an account at Amazon's AWS portal. Visit https://aws.amazon.com/ and click on Create a new account. Be sure to remember the credentials used as well as the AWA Name you created, as seen in the screenshot:
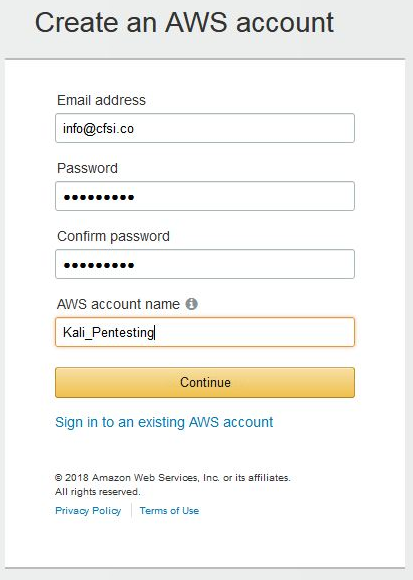
- After clicking on Continue, complete the additional required details. When entering your credit card details, you may be prompted to have Amazon call you and have you enter a code for verification and security purposes. Once completed, you will be greeted with the AWS Console.
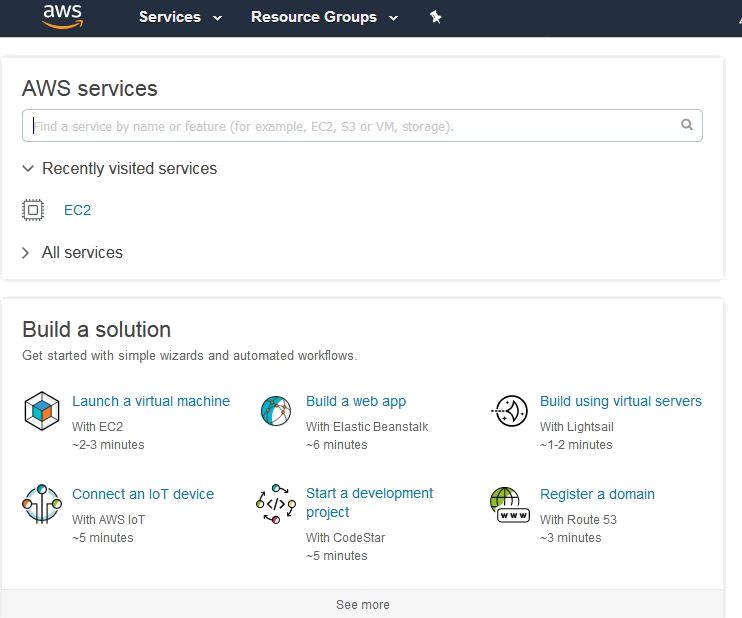
- You should also receive an email notification informing you that your account has been successfully created. You may now log in to the AWS console where you will be able to complete your configuration. Under the Build a solution section, click on Launch a virtual machine:
- Within the EC2 Dashboard of the AWS Console, on the left pane, click on Key pairs under the Network & Security category:
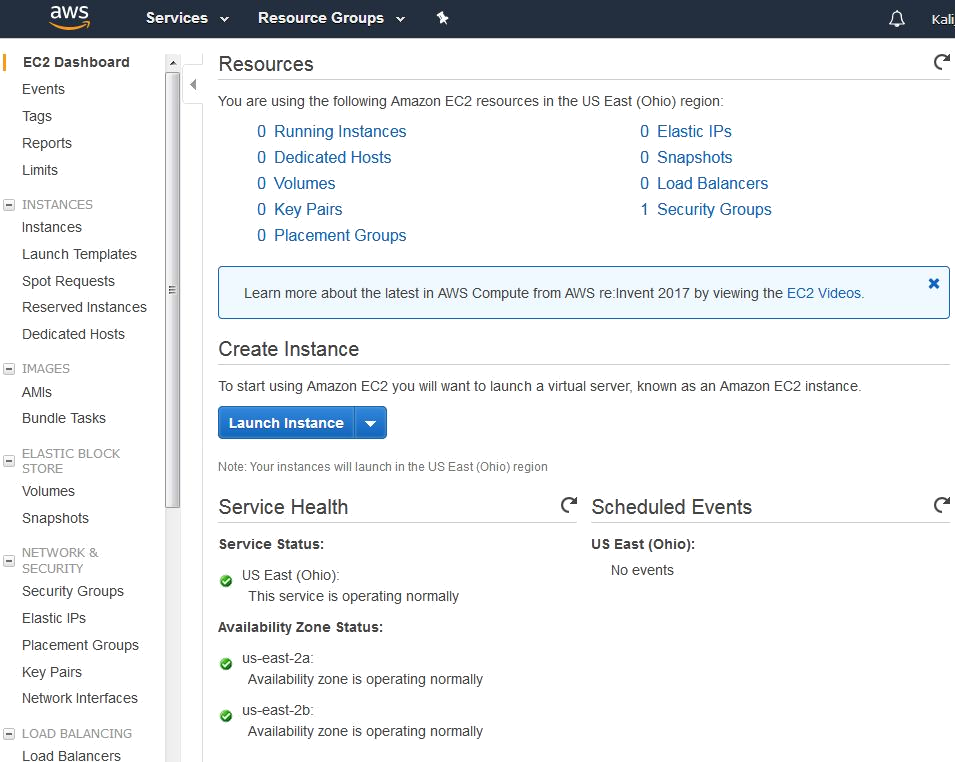
Next, click on Create Key Pair.
When prompted, type a name for your key pair. It is recommended that you choose a name and location that are easy to remember as you will need this Key Pair for authentication and verification:
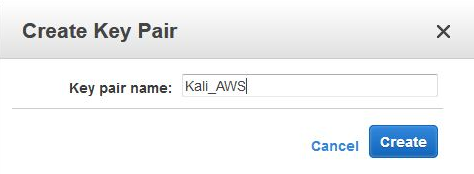
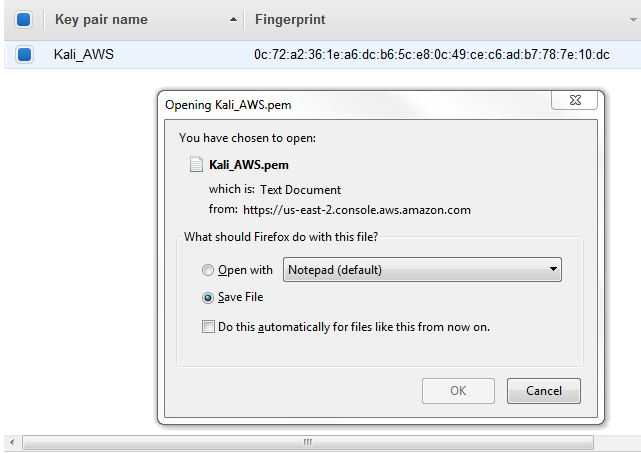
Save your Key Pair to a destination of your choice. Note that the key pair extension is listed as .pem and it also has a digital fingerprint in hexadecimal format, as seen here:
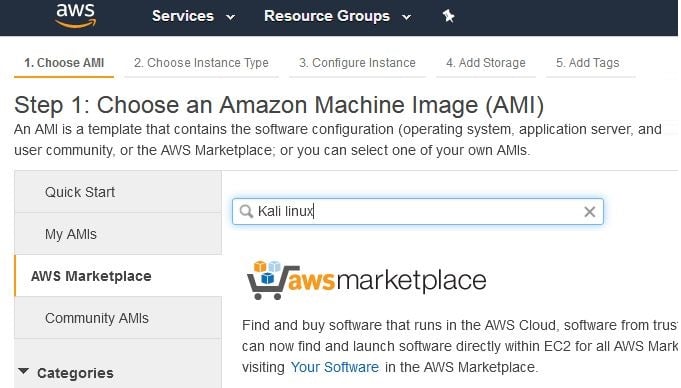
Once your key pair has been saved, return to the AWS console and click on Resource Groups at the top of the console and then choose Launch a Virtual Machine. In the menu at the left of the console, click on AWS Marketplace and enter Kali Linux in the search bar as seen here:
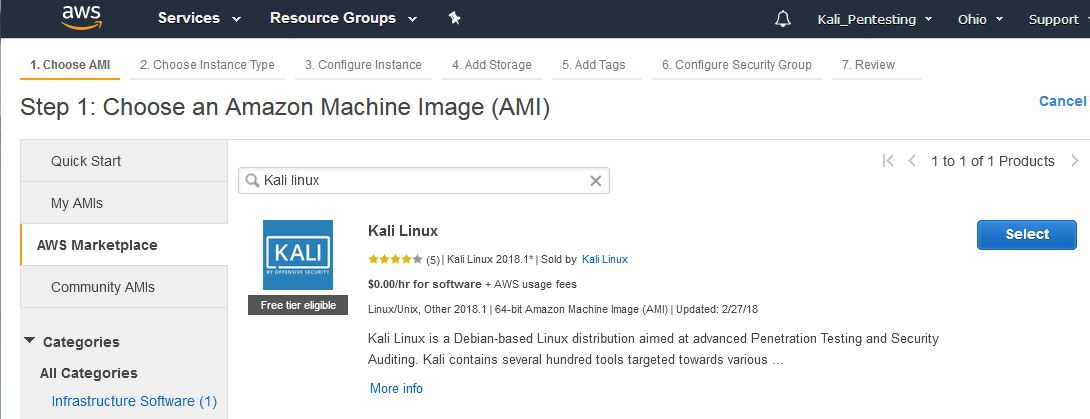
There is currently only once instance of a Kali Linux AMI in the marketplace. Notice that it is listed as Free tier eligible under the Kali logo. Click on Select to use this AMI:
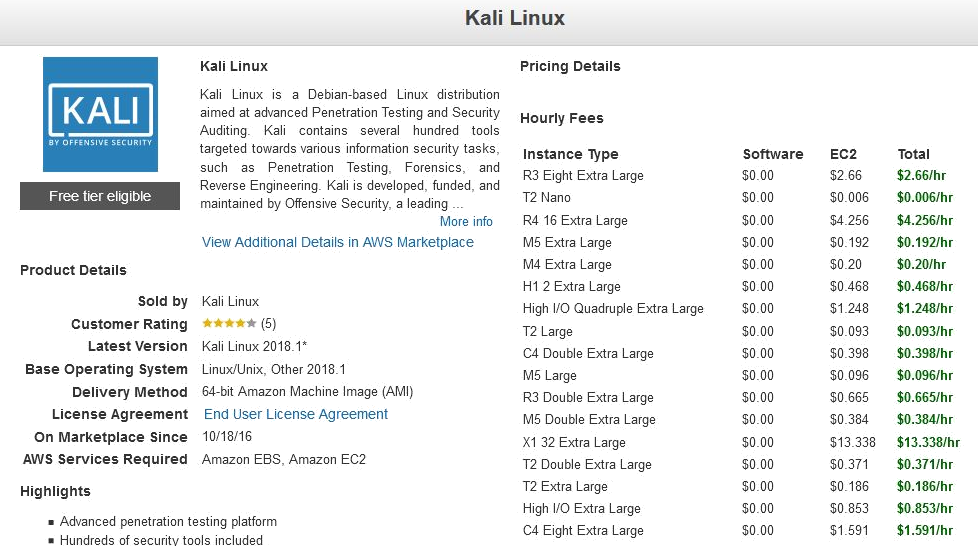
This brings us to the pricing details of the various Instance Types for AMIs, which package the specifications such as memory and processor usage available to the AMI, with T2 Nano having the lowest hourly rate of $0.006/hr. Once finished viewing the Instance Types, scroll to the bottom of the page and click on Continue:
For the free version, select the t2 micro type as this is for general purpose use and is eligible for the Free Tier:
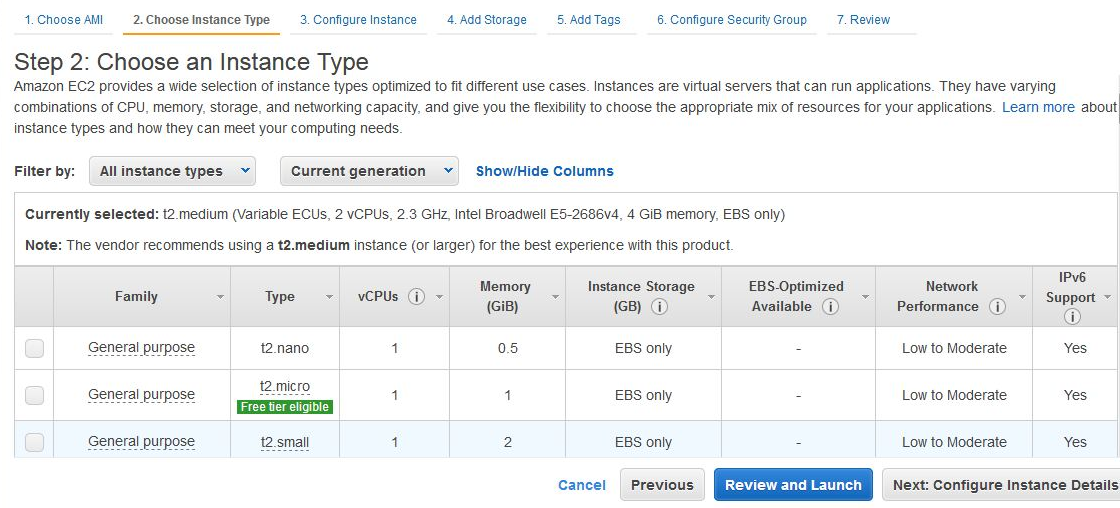
Click on the Review and Launch button. Confirm that the Instance Type chosen is t2.micro and click on Launch:
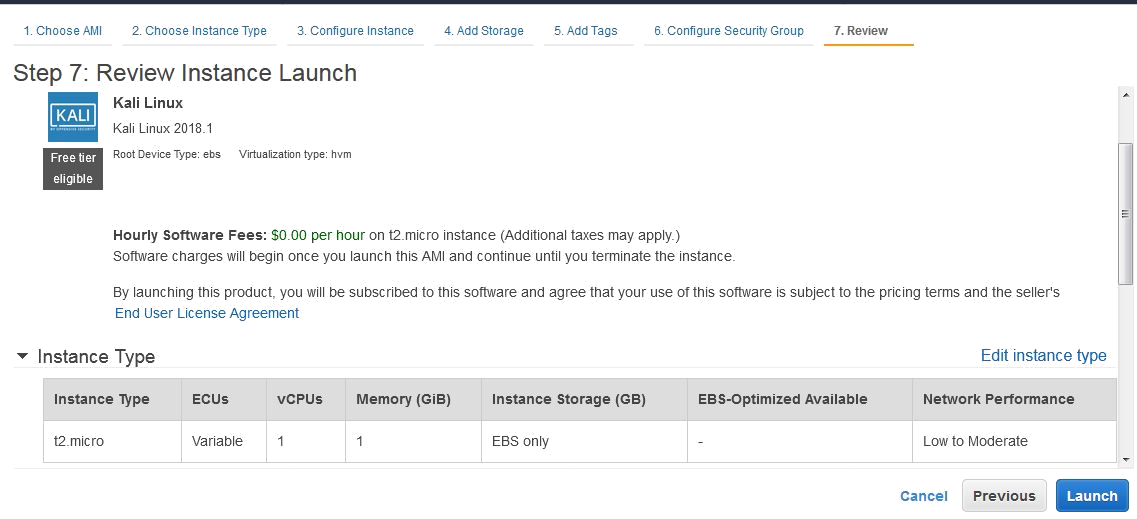
You should now be prompted to use your previously saved key pair. In the first drop-menu, select Choose and existing key pair. In the Select a key pair menu, browse to the location of your saved key pair. Click on the checkbox to acknowledge the terms and then lastly click on Launch Instances.
You should now be notified of the Launch Status of the Kali Linux AMI. You can also create billing alerts in the event that you exceed AWS's Free Tier usage:
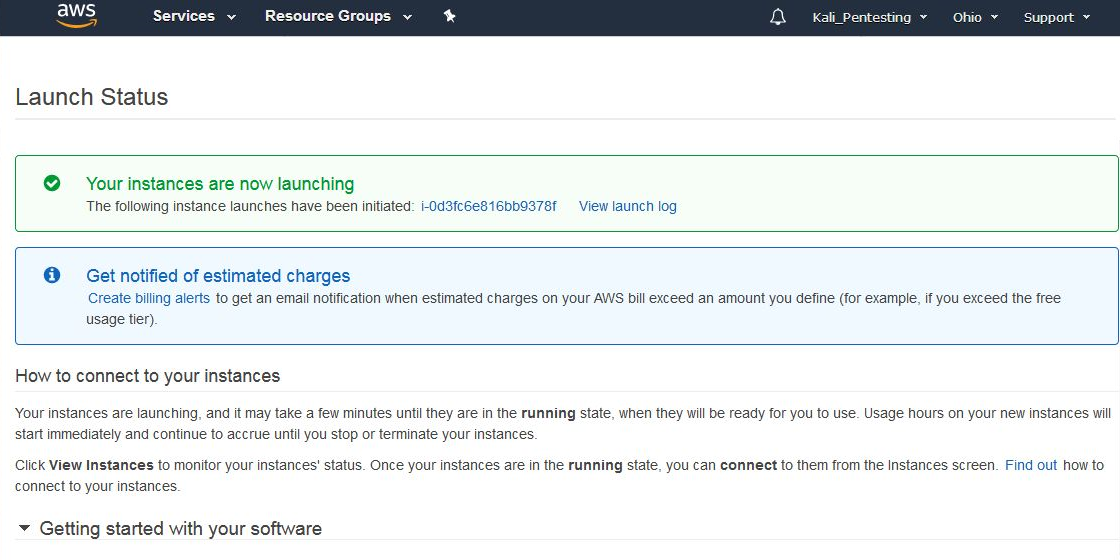
Scroll down and click on View Usage Instructions:

Return to the Launch Status page and click on Open Your Software on AWS Marketplace. In the Software Subscriptions and AMI tab, click on View Instances.
This presents a pop-up box displaying the details of the instance including the ID, OS Info, and Status. Click on Manage in the AWS Console:

Click on the Connect button:

We are then presented with the options available to connect to our Instance, as well as instructions on how to do so using an SSH client such as PuTTY. Note that in the example listed, the name of the key pair is Kali_AWS.pem. When connecting via an SSH client, be sure to use the key pair name you chose in the previous steps:
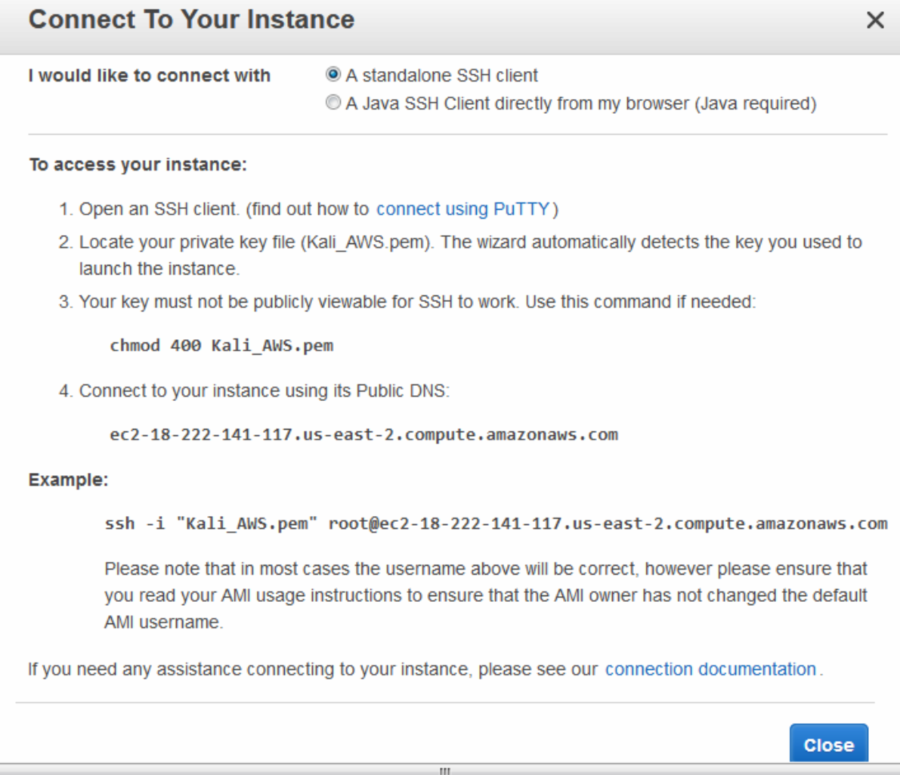
Now we need a standalone Secure Shell (SSH) client to be able to connect to our Kali Linux instance in the cloud. We'll be using Putty as our standalone client and we will also require Puttygen to be able to authenticate with our cloud instance using our previously downloaded key pair. Both Putty and Puttygen come in 32-bit and 64-bit versions and can be downloaded from the following link: https://www.chiark.greenend.org.uk/~sgtatham/putty/latest.html?.
Be sure to download both putty.exe and puttygen.exe which are Windows executables. The machine I am using is of 64-bit architecture, therefore I'll be using the 64-bit versions.
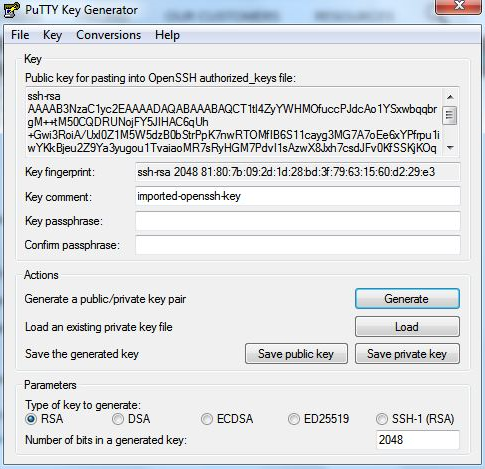
Once they are downloaded, run puttygen.exe first. Click on File and then click on Load Private Key. Now, browse to the key pair file you downloaded earlier. You may have to change the file type from PFF to All Files as the key file is in the older .pem format.
Once selected, you should be prompted to Save private key to be able to save it in Putty's format.
Once the Key has been located, click on the Save private key button:
Now, we can run and configure Putty.exe with the necessary settings to connect to our Kali instance in the AWS cloud.
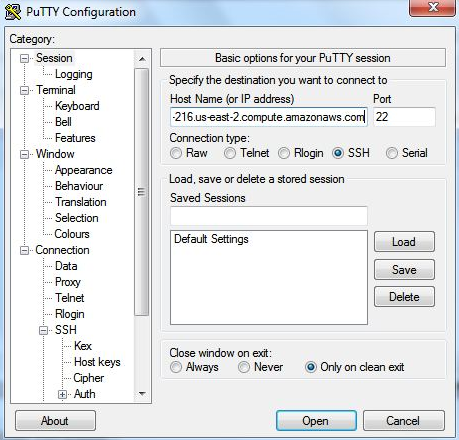
In the Session category in the left pane of Putty, enter the Public DNS URL shown in the Instances category in the dashboard. It should look like the URL in this screenshot:

Enter the Public DNS address into the Host Name area in Putty, as seen in the screenshot:
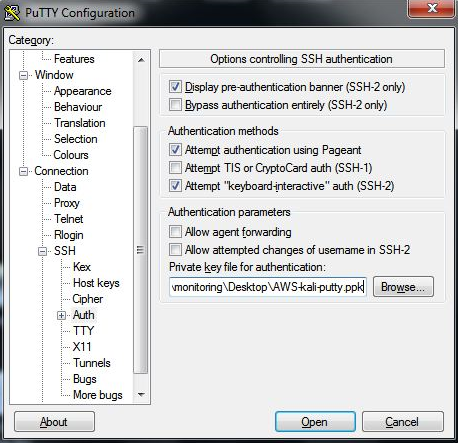
Next, scroll down to the SSH category in the left pane and click on the Auth sub-category. Click on the Browse button on the right pane to browse to the saved .ppk private key.
For the username, we will be using Ec2-user:
Click on the Open button and you should now be able to log in to your Kali instance in the cloud. Once connected, remember to update Kali.


