Search icon CANCEL
Subscription
0
Cart icon
Your Cart (0 item)
Close icon
You have no products in your basket yet
Save more on your purchases! discount-offer-chevron-icon
Savings automatically calculated. No voucher code required.
Arrow left icon
Explore Products
Best Sellers
New Releases
Books
Videos
Audiobooks
Learning Hub
Newsletter Hub
Free Learning
Arrow right icon
timer SALE ENDS IN
0 Days
:
00 Hours
:
00 Minutes
:
00 Seconds
Arrow up icon
GO TO TOP
Implementing DevOps with Microsoft Azure

You're reading from   Implementing DevOps with Microsoft Azure Automate your deployments and incorporate the DevOps culture

Arrow left icon
Product type Paperback
Published in Apr 2017
Publisher Packt
ISBN-13 9781787127029
Length 422 pages
Edition 1st Edition
Languages
Tools
Concepts
Arrow right icon
Author (1):
Arrow left icon
Mitesh Soni Mitesh Soni
Author Profile Icon Mitesh Soni
Mitesh Soni
Arrow right icon
View More author details
Toc

Table of Contents (9) Chapters Close

Preface 1. Microsoft Azure – Cloud Platform and Services FREE CHAPTER 2. Getting Started with Visual Studio Team Services (VSTS) 3. Continuous Integration with VSTS 4. Continuous Development with Microsoft Azure Web Apps 5. Azure App Service Environments 6. Continuous Delivery to Azure Web Apps and ASE Using VSTS 7. Continuous Monitoring in Cloud Platform 8. More from the Author

Configuration of continuous build integration in VSTS


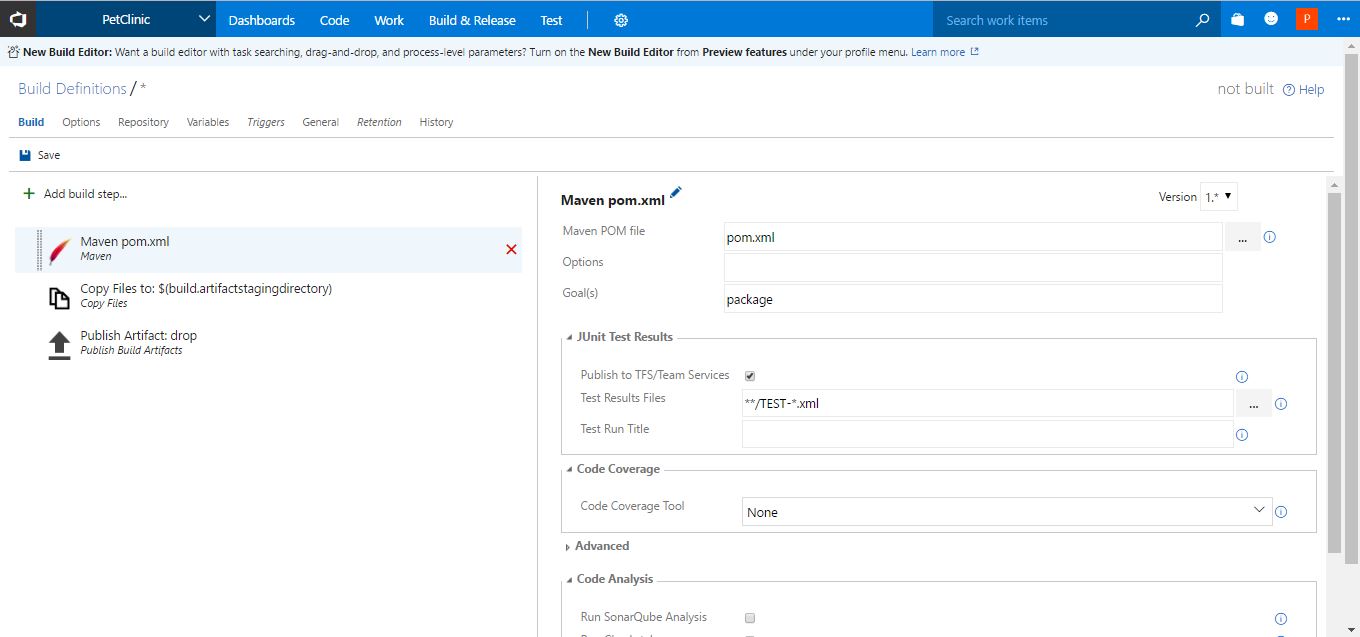
Once the build definition is created, we will configure the Maven task to give the path to pom.xml so build definition can use pom.xml, to compile the source code and create a package file.

Select Maven pom.xml. In the Maven POM file, give the path to pom.xml for the existing project:
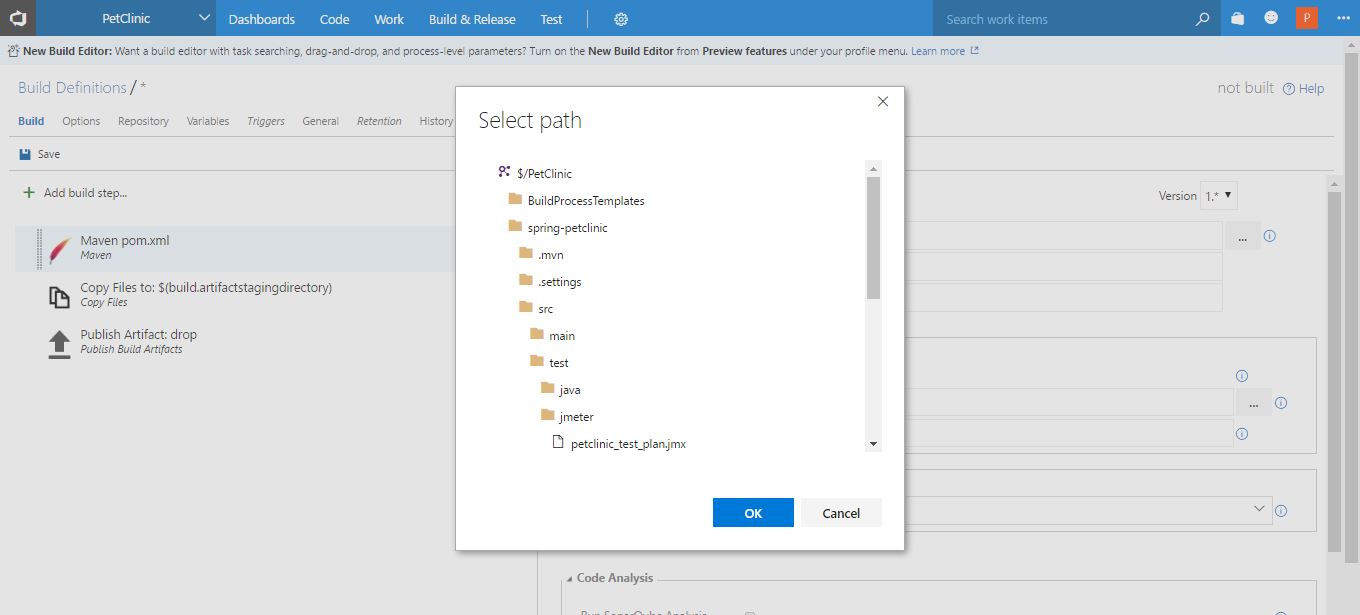
Click on the ... icon to browse through the folders available in the existing project and select the path to pom.xml:
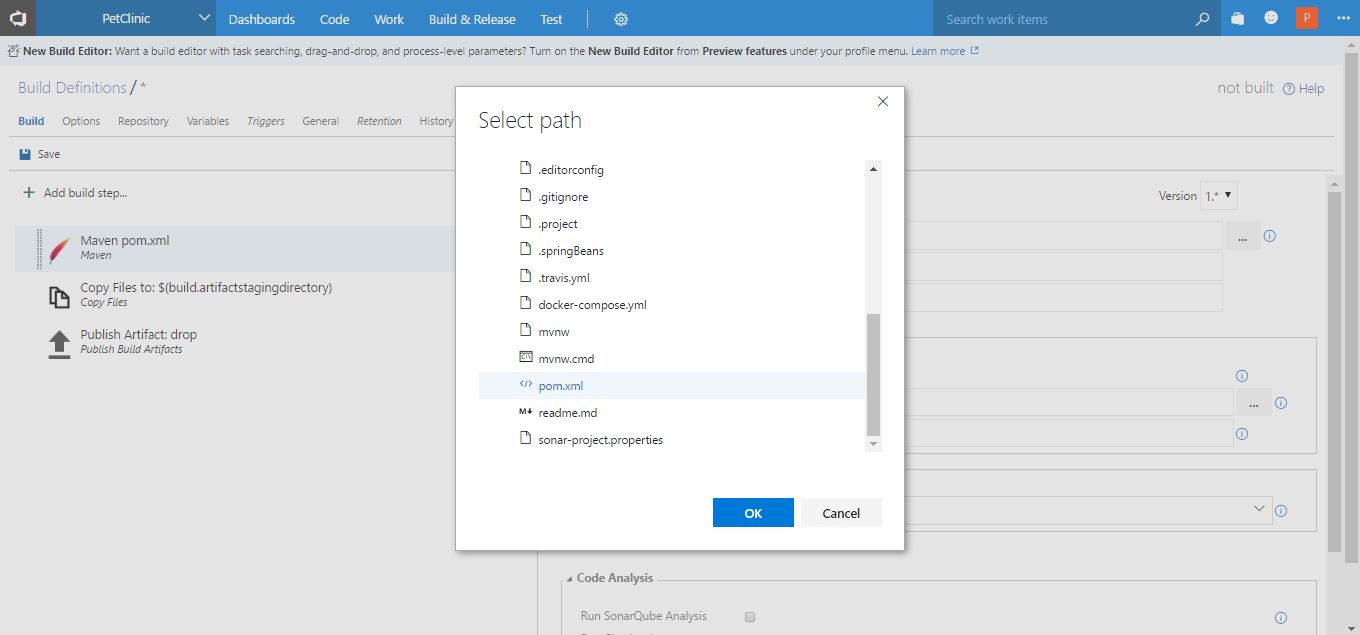
Scroll down; in our case, select pom.xml and click on OK:
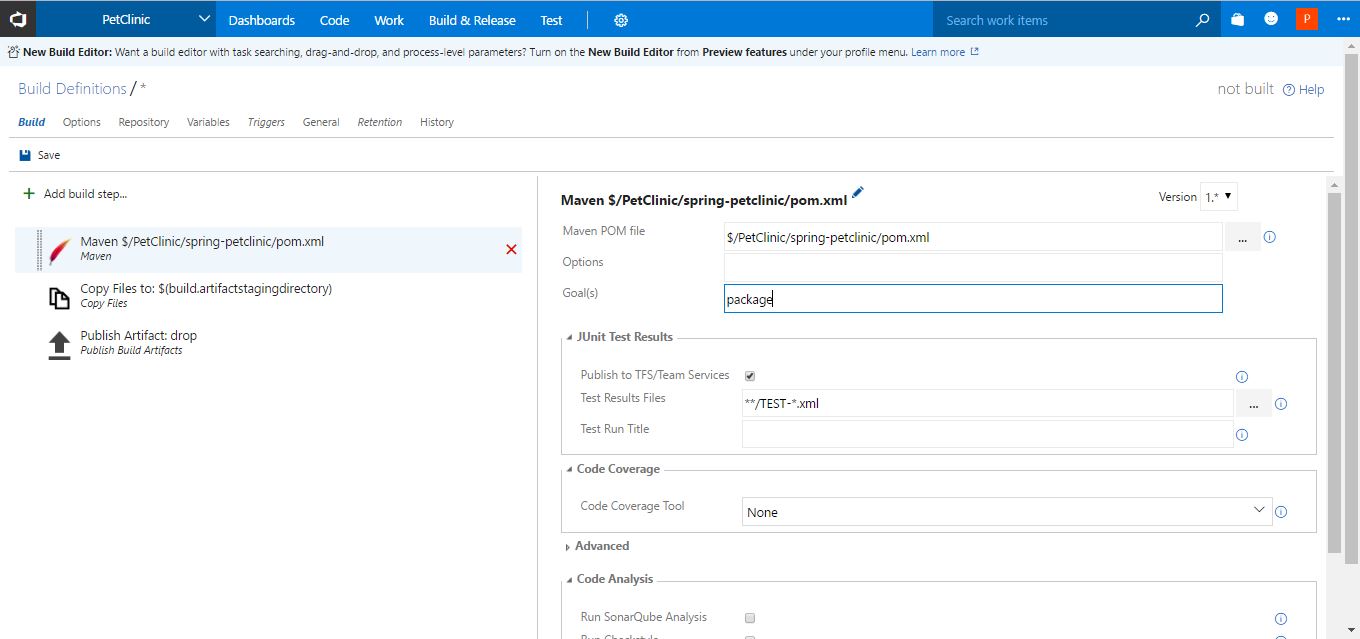
In the case of Maven, there are different goals such as compile, test, and package. We will give package here. If the default goal is available in pom.xml, then we don't need to explicitly mention it here. 

Keep the Test Results Files setting as it is:
Select Copy Files to: tasks and keep Source Folder and Target Folder as it is. In the Contents box, enter **/*.war. It will copy the WAR file available in the source directory of the project from any path and copy it to the staging directory...

lock icon The rest of the chapter is locked
Register for a free Packt account to unlock a world of extra content!
A free Packt account unlocks extra newsletters, articles, discounted offers, and much more. Start advancing your knowledge today.
Unlock this book and the full library FREE for 7 days
Get unlimited access to 7000+ expert-authored eBooks and videos courses covering every tech area you can think of
Renews at $19.99/month. Cancel anytime
Banner background image