Setting up the development environment
Now that Android in our UDOO board is fully functional, it's time to configure the development environment. Every project we're going to build is composed of two different running applications: the first is the physical application composed of an Arduino program capable of controlling an external circuit through UDOO I/O pins; the second one, is an Android application that will run on the board and that deals with the user interface.
Because we have to write two different applications that interact with each other, we need to configure our development environment with two different IDEs.
Installing and using Arduino IDE
Before we can start to upload our programs, we need to install the microUSB serial port driver so that we can correctly communicate with onboard Arduino. The USB to the Universal Asynchronous Receiver/Transmitter (UART) driver, compatible with the CP210x converter available on the board, can be downloaded from
http://www.silabs.com/products/mcu/pages/usbtouartbridgevcpdrivers.aspx.
Here we have to choose the correct version according to our operating system. Once the download is complete, we can extract the archive and double-click on the executable to proceed with the installation. When the installation process is complete, we may need to restart the system.
Now that the microUSB bridge driver is working, from the Arduino website, we have to download the IDE 1.5x beta because, at the moment, the beta version is the only one that supports Arduino Due boards. The link http://arduino.cc/en/Main/Software#toc3 points directly to the latest version.
Note
To upload a new program, UDOO needs to receive the signals ERASE and RESET from the serial port before and after the upload, respectively. On the official Arduino Due board, this action is performed by the integrated ATmega16U2 microcontroller, which is missing in the UDOO board. The Arduino IDE will take care of this process, but if in the future you prefer to use another IDE, you will have to take care on your own.
Installing in Windows
To install in Windows, we have two different options: use the provided installer or use the archive file for nonadministrator installation. If we choose to use the installer, we can double-click on the executable. When the installer asks us which components we want to install, be sure to select all the checkboxes. If we choose to use the archive file instead of the installer, extract the file and put the result directory into your users folder.
Installing in Mac OS X
To install in Mac OS X, we need to download the archive version. If we run an OS X version greater than 10.7, we can download the Java 7 version. In any other cases, or if you are not sure, download the Java 6 version.
When we finish the download, we have to double-click on the archive to proceed with the extraction and then drag-and-drop the Arduino application icon inside our Applications folder.
Installing in Linux
To install in Linux, we need to download the archive version supported by our 32 or 64 bit architecture. Once the download has finished, we can extract the IDE and put it inside our home folder or in any other folder of your choice.
First launch
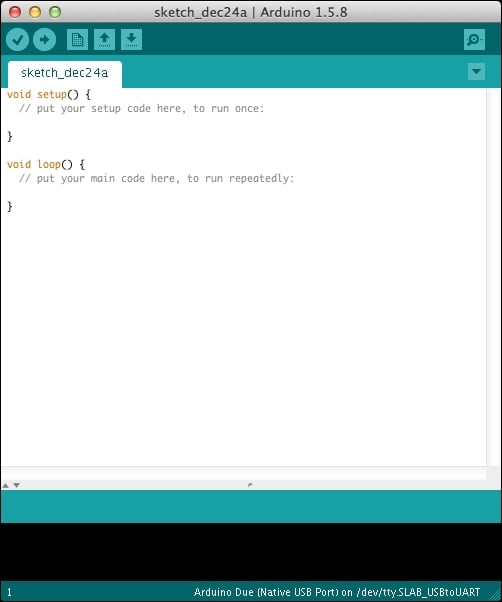
Now that we have finished configuring the communication driver and the IDE with the correct patch, we can launch and see the Arduino IDE, as shown in the following screenshot:

Installing and using Android Studio
UDOO with an Android operating system acts like any other traditional Android device. This means we can use the standard toolchain, build system, and IDE used for the development of smartphones or tablets applications. At the moment, the available toolchains are related to two main IDEs: Eclipse and Android Studio.
Eclipse is an open source IDE with an advanced plugin system that allows you to easily extend many of its core capabilities. This brought Google to develop an Android Development Tool (ADT) plugin to create an integrated development environment in which developers can write, debug, and package their Android applications.
Android Studio is a more recent project whose first beta was released in May 2013 while the first stable release was in December 2014. Based on IntelliJ IDEA, a well-known Java IDE, it's powered by the Gradle build system that combines the flexibility of Ant with the dependency management of Maven. All these characteristics, together with the increasing number of plugins, best practices, Google Cloud Platform integration, and third-party services integration such as Travis CI, make Android Studio a great choice for the development of future projects.
All Android projects covered in this book are built using Android Studio, and if you are a novice or an experienced Android developer and Eclipse is your usual IDE, this could be a great opportunity to try the new Android Studio.
The first thing to do is to download the latest version of Android Studio for your operating system from https://developer.android.com/sdk/.
When the download starts, we'll be redirected to the installation instructions related to our operating system, and when we finish the installation, we can start the IDE. During the first run, the IDE will make all the required checks to retrieve and install the latest available SDK, virtual device, and build system to let you start developing the first application. In the Setup Wizard - SDK Settings page, be sure to select the Android SDK and Android Virtual Device components and then click on Next. In the next page, you should accept all Android licenses and then click on Finish.
Once the IDE is installed, we can start Android Studio. The following screenshot shows the main window when a project is not opened:


