Exercise 3: Configuring App Service
In this exercise, you will configure App Service to make use of the authentication and authorization module.
Seeing the authentication flow and authorization behavior in action will help cement your understanding of the topic. We’re going to use the Azure portal for this exercise, as that will be easier to illustrate and understand. The exam does not require you to know all the commands to set this up programmatically; you just need to have some understanding of the setup and behavior:
- Open your App Service within the Azure portal and navigate to the Authentication blade.
- Select Add identity provider and notice the providers available in the Identity provider dropdown.
- From the provider list, select Microsoft.
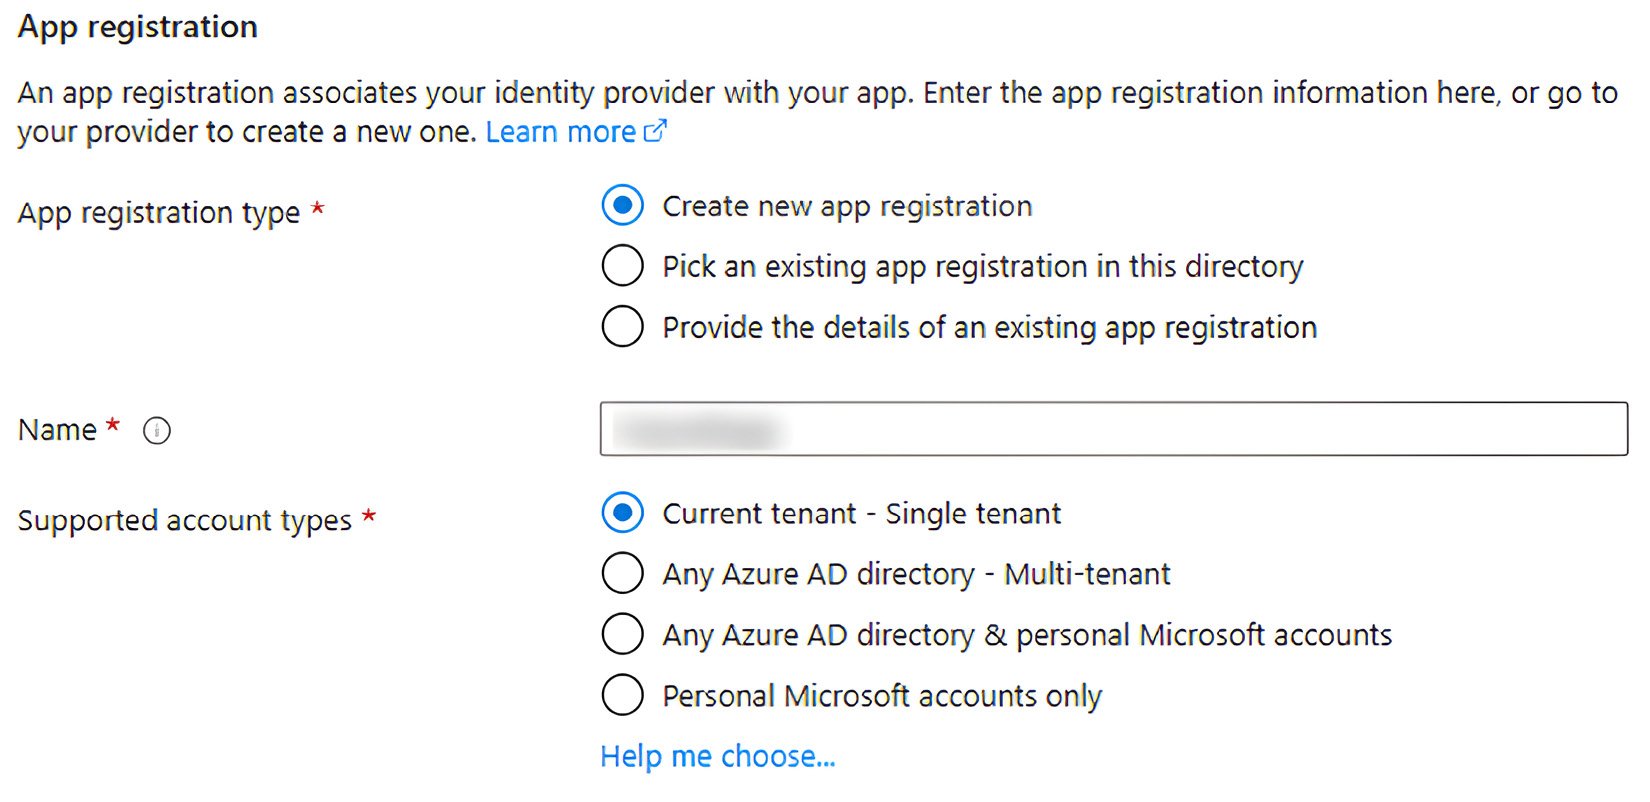
- Leave the default settings for the App registration section:

Figure 2.9: Default App Service app registration settings
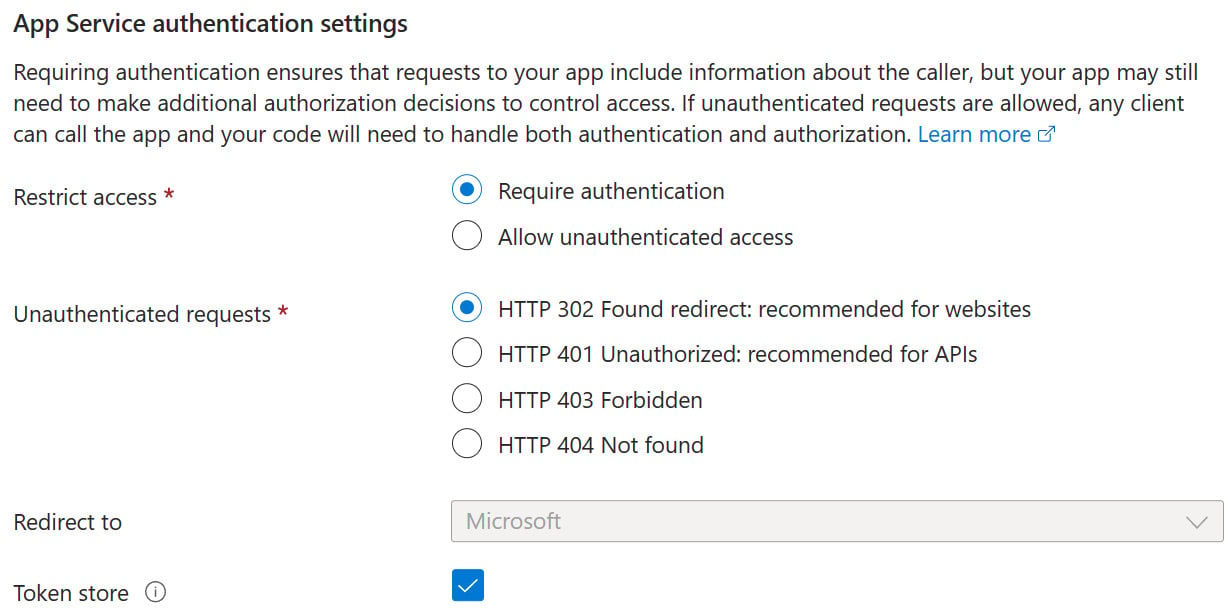
Notice the settings available under the App Service authentication settings section and how they relate to what has been covered so far:

Figure 2.10: App Service authentication settings
- Select Add. You will see that your App Service has a new identity provider configured and that authentication is required to be able to access the app. Notice App (client) ID? You’ll see that referenced again shortly.
- Within the Configuration blade, notice there’s a new application setting for the provider authentication secret of the app registration just created.
Note on UI changes
At the time of writing, the Azure App Service UI started changing for some users. Rather than environment variables being configured within the Configuration blade, some users will see a separate Environment variables blade. While writing this book, the UI changed several times. Whenever you see environment variables being configured within the Configuration blade, note that this may have changed to the Environment variables blade, or Microsoft may have further changed the UI.
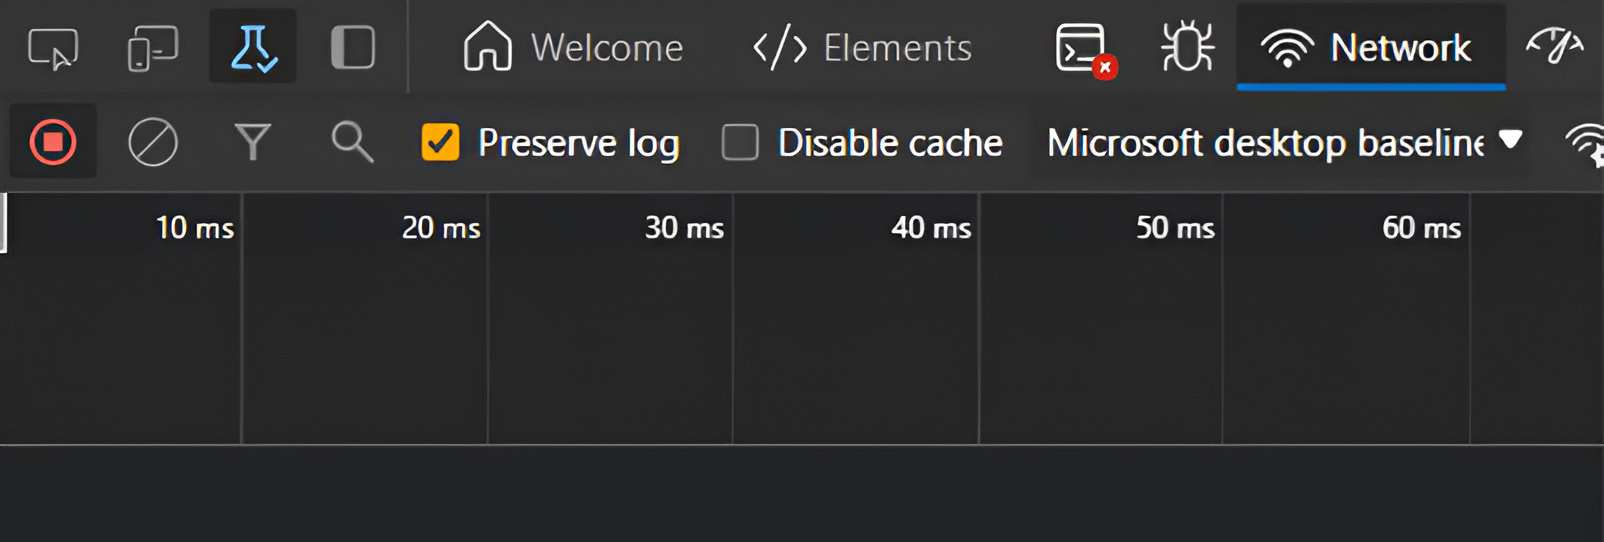
- Open a new InPrivate/Incognito browser session, open the built-in developer tools (you can open it with F12 for most browsers by default), and navigate to the Network tab. This example uses Microsoft Edge, so references here will relate to the Edge browser:

Figure 2.11: In-browser developer tools Network tab
You’re more than welcome to use tools other than the in-browser developer tools if you wish.
- In this new browser session, browse to the URL of your web app (copy it from the Azure portal if you need to). You will be faced with the familiar Microsoft sign-in screen. Within the developer tools, select the entry that just lists the URL of your app, and you’ll see a 302 Found status code:

Figure 2.12: In-browser developer tools showing a 302 Found status code
If you haven’t connected the dots yet, you can review the authentication settings for your app and see that you have configured unauthenticated requests to receive an HTTP 302 Found response and redirect to the identity provider (Microsoft, in this example):

Figure 2.13: Authentication settings summary showing the 302 Found configuration
- Select one of the entries with
authorize?in the name. Notice that, on the Payload tab,redirect_uriandclient_idrelate to the redirect URI/callback address and the app (client) ID mentioned previously, telling the provider where to redirect (with the token) once authentication is completed. Also, notice that the response it expects includes an ID token:

Figure 2.14: In-browser developer tools showing the redirect URI and client ID
At this point, you may want to clear the network log when you’re about to finish the sign-in process to start from a clean log when you sign in. You don’t have to, but it may make it easier to select entries when there are fewer of them.
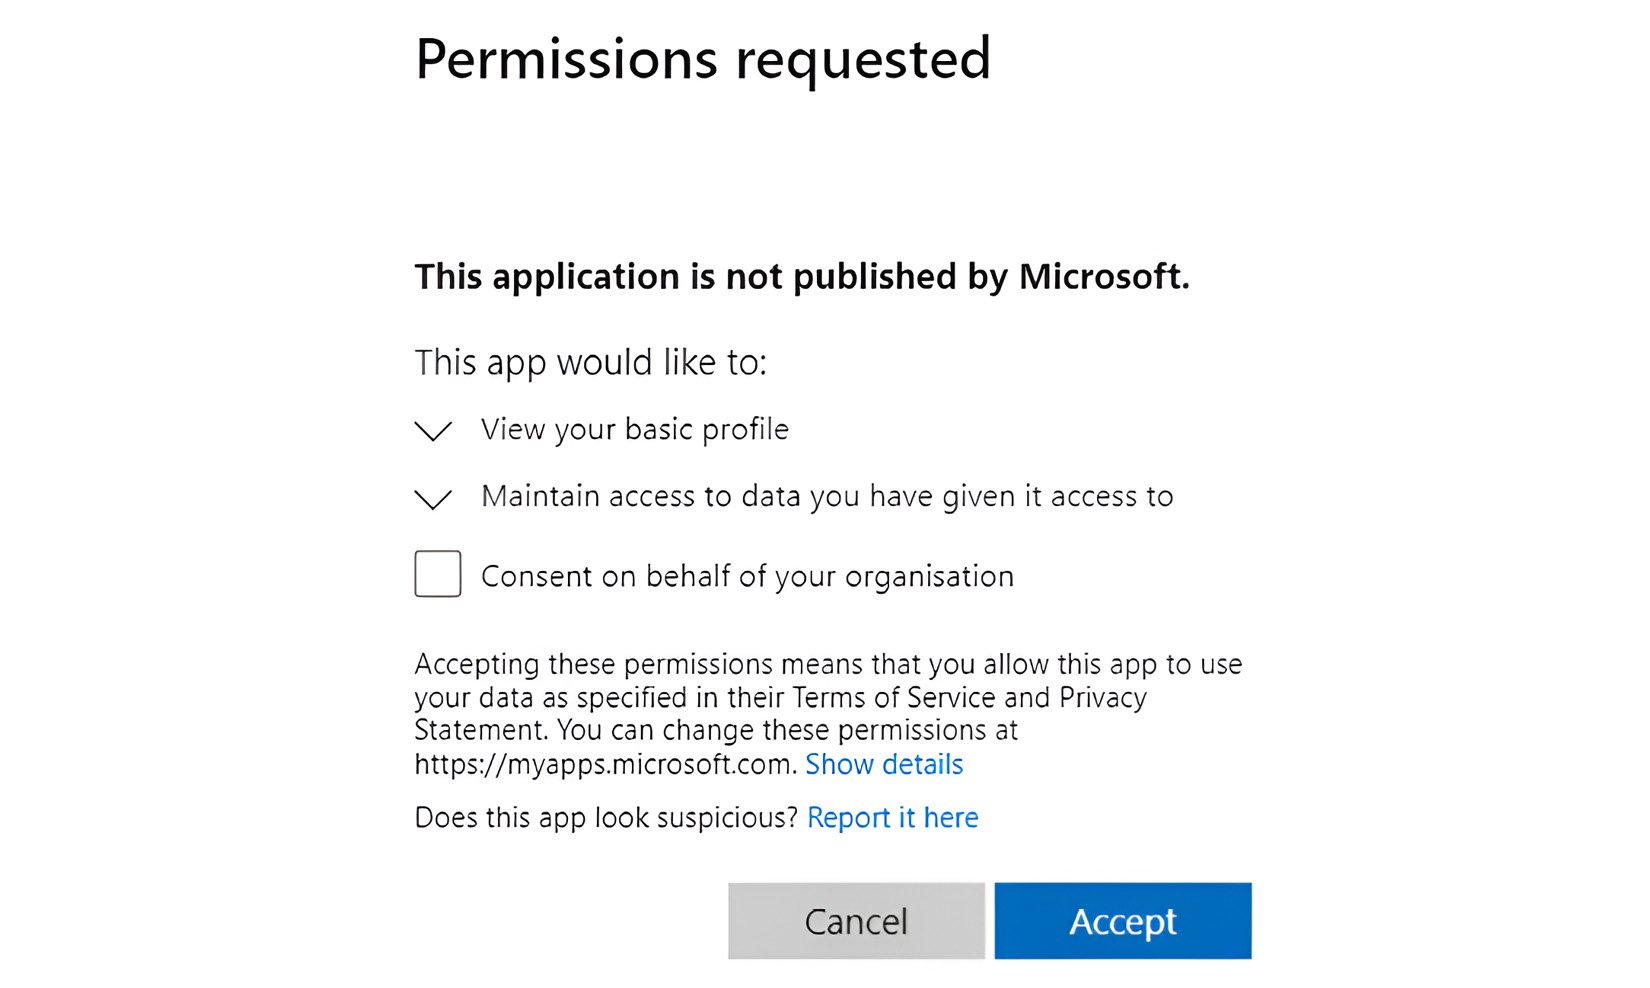
- Sign in with your account. Note that you have to consent to the permissions the app registration has configured, so accept them to proceed:

Figure 2.15: Permissions requested by the app registration
- Select the
callbackentry and, from the Payload tab, copy the value ofid_token(only copy the value, not theid_tokenwording or any other properties, which is easier to view parsed than source). The value should begin withey. The format of this token is JSON Web Token (JWT). - With the
id_tokenvalue copied, open a new tab and browse to https://jwt.ms, then paste theid_tokenvalue you just copied.On both the Decoded token and Claims tabs, you can see various properties related to your account and any app-specific roles your account has assigned, which have not been configured in this example.
- Go to the Cookies tab to see the AppServiceAuthSession cookie that was provided in the server’s response. Going to the Cookies tab for all subsequent network log entries will show that same authenticated cookie as a request cookie, which is in line with the authentication flow previously illustrated. Feel free to test it out; refresh the page and confirm that the cookie is indeed being used in all requests.
Going into that extra bit of detail and showing the authentication flow in action should help your understanding more than simply telling you the steps of the authentication flow. We’ll now move on to the final topic of our App Service exploration by briefly looking at some of the available networking features.
Networking Features
Unless you’re using an ASE, which is the network-isolated SKU mentioned earlier in this chapter, App Service deployments exist in a multitenant network. Because of this, you can’t connect your App Service directly to your corporate or personal networks. Instead, there are networking features available to control inbound and outbound traffic and allow your App Service to connect to your network.
Outbound Flows
First, let’s talk about outbound communication—that is, controlling communication coming from your application.
If you want your application to be able to make outbound calls to a specific TCP endpoint in a private network (such as your on-premises network, for example), you can leverage the Hybrid Connection feature. At a very high level, you would install a relay agent called Hybrid Connection Manager (HCM) on a Windows Server 2012 or newer machine within the network to which you want your app to connect.
HCM is a lightweight software application that will communicate outbound from your network to Azure over port 443. Both App Service and HCM make outbound calls to a relay in Azure, providing your app with a TCP tunnel to a fixed host and port on the other side of the HCM. When a DNS request from your app matches that of a configured Hybrid Connection endpoint, the outbound TCP traffic is redirected through the hybrid connection. This is one way to allow your Azure-hosted app to make outbound calls to a server or API within your on-premises network, without having to open a bunch of inbound ports in your firewall.
The other networking feature for outbound traffic is VNet integration. VNet integration allows your app to securely make outbound calls to resources in or through your Azure VNet, but it doesn’t grant inbound access. If you connect VNets within the same regions, you need to have a dedicated subnet in the VNet that you’re integrating with. If you connect to VNets in other regions (or a classic VNet within the same region), you need a VNet gateway to be created in the target VNet.
VNet integration can be useful when your app needs to make outbound calls to resources within a VNet and public access to those resources is blocked.
Inbound Flows
There are several features for handling inbound traffic, just as there are for outbound. If you configure your app with SSL, you can make use of the app-assigned address feature, which allows you to support any IP-based SSL needs you may have, as well as set up a dedicated IP address for your app that isn’t shared (if you delete the SSL binding, a new inbound IP address is assigned).
Access restrictions allow you to filter inbound requests using a list of allow and deny rules, similar to how you would with a network security group (NSG). Finally, there is the private endpoint feature, which allows private and secure inbound connections to your app via Azure Private Link. This feature uses a private IP address from your VNet, which effectively brings the app into your VNet. This is popular when you only want inbound traffic to come from within your VNet and not from any public source.
There’s so much more to Azure networking, but these are the headlines specific to Azure App Service. As you may imagine, there’s a lot more to learn about the features we’ve just discussed here. A link to more information on App Service networking can be found in the Further Reading section of this chapter, should you wish to dig deeper.
This ends our exploration of Azure App Service. Armed with this understanding, the remainder of this chapter should be a breeze in comparison. Now that we’ve gone into some depth regarding web apps, let’s look at some additional configuration options, as well as making use of logging with App Service.


