In this article by Neeraj Kumar et al, authors of the book, Drupal 8 Development Beginner's Guide - Second Edtion, explains a text-only site is not going to hold the interest of visitors; a site needs some pizzazz and some spice! One way to add some pizzazz to your site is by adding some multimedia content, such as images, video, audio, and so on. But, we don't just want to add a few images here and there; in fact, we want an immersive and compelling multimedia experience that is easy to manage, configure, and extend. The File entity (https://drupal.org/project/file_entity) module for Drupal 8 will enable us to manage files very easily. In this article, we will discover how to integrate the File entity module to add images to our d8dev site, and will explore compelling ways to present images to users. This will include taking a look at the integration of a lightbox-type UI element for displaying the File-entity-module-managed images, and learning how we can create custom image styles through UI and code.
The following topics will be covered in this article:
- The File entity module for Drupal 8
- Adding a Recipe image field to your content types
- Code example—image styles for Drupal 8
- Displaying recipe images in a lightbox popup
- Working with Drupal issue queues
(For more resources related to this topic, see here.)
Introduction to the File entity module
As per the module page at https://www.drupal.org/project/file_entity:
File entity provides interfaces for managing files. It also extends the core file entity, allowing files to be fieldable, grouped into types, viewed (using display modes) and formatted using field formatters. File entity integrates with a number of modules, exposing files to Views, Entity API, Token and more.
In our case, we need this module to easily edit image properties such as Title text and Alt text. So these properties will be used in the colorbox popup to display them as captions.
Working with dev versions of modules
There are times when you come across a module that introduces some major new features and is fairly stable, but not quite ready for use on a live/production website, and is therefore available only as a dev version. This is a perfect opportunity to provide a valuable contribution to the Drupal community. Just by installing and using a dev version of a module (in your local development environment, of course), you are providing valuable testing for the module maintainers. Of course, you should enter an issue in the project's issue queue if you discover any bugs or would like to request any additional features. Also, using a dev version of a module presents you with the opportunity to take on some custom Drupal development. However, it is important that you remember that a module is released as a dev version for a reason, and it is most likely not stable enough to be deployed on a public-facing site.
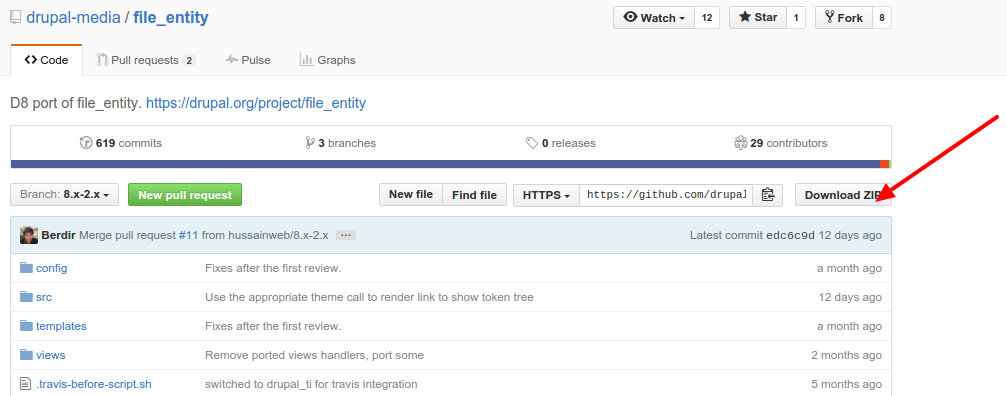
Our use of the File entity module in this article is a good example of working with the dev version of a module. One thing to note: Drush will download official and dev module releases. But at this point in time, there is no official port for the File entity module in Drupal, so we will use the unofficial one, which lives on GitHub (https://github.com/drupal-media/file_entity). In the next step, we will be downloading the dev release with GitHub.
Time for action – installing a dev version of the File entity module
In Drupal, we use Drush to download and enable any module/theme, but there is no official port yet for the file entity module in Drupal, so we can use the unofficial one, which lives on GitHub at https://github.com/drupal-media/file_entity:
- Open the Terminal (Mac OS X) or Command Prompt (Windows) application, and go to the root directory of your d8dev site.
- Go inside the modules folder and download the File entity module from GitHub. We use the git command to download this module: $ git clone https://github.com/drupal-media/file_entity. Another way is to download a .zip file from https://github.com/drupal-media/file_entity and extract it in the modules folder:
- Next, on the Extend page (admin/modules), enable the File entity module.
What just happened?
We enabled the File entity module, and learned how to download and install with GitHub.
A new recipe for our site
In this article, we are going to create a new recipe: Thai Basil Chicken. If you would like to have more real content to use as an example, and feel free to try the recipe out!
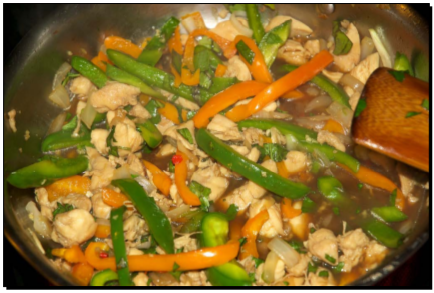
- Name: Thai Basil Chicken
- Description: A spicy, flavorful version of one of my favorite Thai dishes
- RecipeYield : Four servings
- PrepTime: 25 minutes
- CookTime: 20 minutes
- Ingredients :
- One pound boneless chicken breasts
- Two tablespoons of olive oil
- Four garlic cloves, minced
- Three tablespoons of soy sauce
- Two tablespoons of fish sauce
- Two large sweet onions, sliced
- Five cloves of garlic
- One yellow bell pepper
- One green bell pepper
- Four to eight Thai peppers (depending on the level of hotness you want)
- One-third cup of dark brown sugar dissolved in one cup of hot water
- One cup of fresh basil leaves
- Two cups of Jasmin rice
- Instructions:
- Prepare the Jasmine rice according to the directions.
- Heat the olive oil in a large frying pan over medium heat for two minutes.
- Add the chicken to the pan and then pour on soy sauce.
- Cook the chicken until there is no visible pinkness—approximately 8 to 10 minutes.
- Reduce heat to medium low.
- Add the garlic and fish sauce, and simmer for 3 minutes.
- Next, add the Thai chilies, onion, and bell pepper and stir to combine.
- Simmer for 2 minutes.
- Add the brown sugar and water mixture. Stir to mix, and then cover.
- Simmer for 5 minutes.
- Uncover, add basil, and stir to combine.
- Serve over rice.
Time for action – adding a Recipe images field to our Recipe content type
We will use the manage fields administrative page to add a Media field to our d8dev Recipe content type:
- Open up the d8dev site in your favorite browser, click on the Structure link in the Admin toolbar, and then click on the Content types link.
- Next, on the Content types administrative page, click on the Manage fields link for your Recipe content type:

- Now, on the Manage fields administrative page, click on the Add field link. On the next screen, select Image from the Add a new field dropdown and Label as Recipe images. Click on the Save field settings button.
- Next, on the Field settings page, select Unlimited as the allowed number of values. Click on the Save field settings button. On the next screen, leave all settings as they are and click on the Save settings button.
- Next, on the Manage form display page, select widget Editable file for the Recipe images field and click on the Save button.
- Now, on the Manage display page, for the Recipe images field, select Hidden as the label. Click on the settings icon. Then select Medium (220*220) as the image style, and click on the Update button. At the bottom, click on the Save button:

- Let's add some Recipe images to a recipe. Click on the Content link in the menu bar, and then click on Add content and Recipe. On the next screen, fill in the title as Thai Basil Chicken and other fields respectively as mentioned in the preceding recipe details.
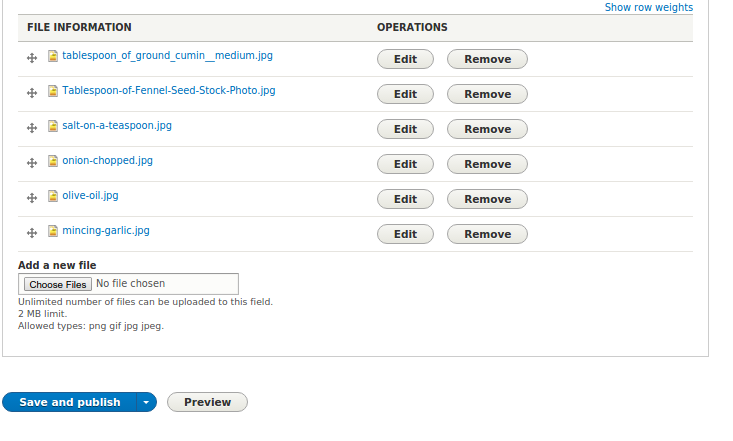
- Now, scroll down to the new Recipe images field that you have added. Click on the Add a new file button or drag and drop images that you want to upload. Then click on the Save and Publish button:
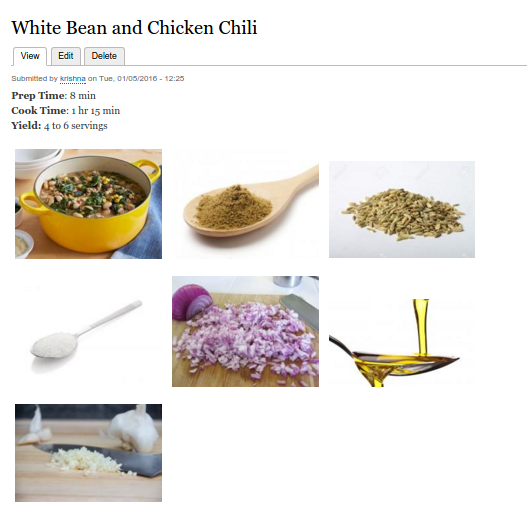
- Reload your Thai Basil Chicken recipe page, and you should see something similar to the following:
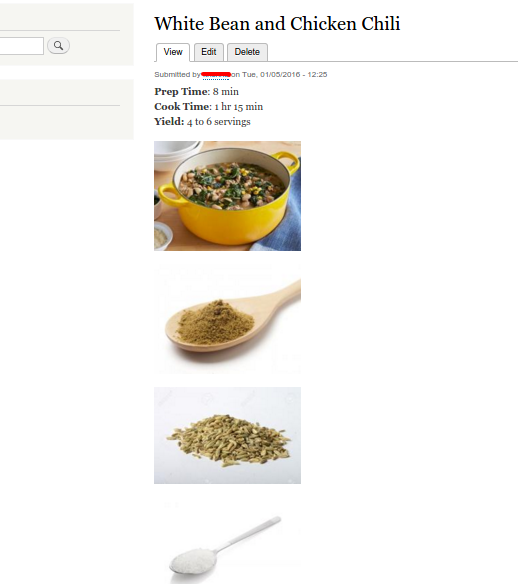
- All the images are stacked on top of each other. So, we will add the following CSS just under the style for field--name-field-recipe-images and field--type-recipe-images in the /modules/d8dev/styles/d8dev.css file, to lay out the Recipe images in more of a grid:
.node .field--type-recipe-images {
    float: none !important;
}
.field--name-field-recipe-images .field__item {
    display: inline-flex;
    padding: 6px;
}
- Now we will load this d8dev.css file to affect this grid style. In Drupal 8, loading a CSS file has a process:
Save the CSS to a file.
Define a library, which can contain the CSS file.
Attach the library to a render array in a hook.
- So, we have already saved a CSS file called d8dev.css under the styles folder; now we will define a library. To define one or more (asset) libraries, add a *.libraries.yml file to your theme folder. Our module is named d8dev, and then the filename should be d8dev.libraries.yml. Each library in the file is an entry detailing CSS, like this:
d8dev:
  version: 1.x
css:
    theme:
      styles/d8dev.css: {}
- Now, we define the hook_page_attachments() function to load the CSS file. Add the following code inside the d8dev.module file. Use this hook when you want to conditionally add attachments to a page:
/**
 * Implements hook_page_attachments().
 */
function d8dev_page_attachments(array &$attachments) {
   $attachments['#attached']['library'][] = 'd8dev/d8dev'; }
- Now, we will need to clear the cache for our d8dev site by going to Configuration, clicking on the Performance link, and then clicking on the Clear all caches button. Reload your Thai Basil Chicken recipe page, and you should see something similar to the following:
What just happened?
We added and configured a media-based field for our Recipe content type. We updated the d8dev module with custom CSS code to lay out the Recipe images in more of a grid format. And also we looked at how to attach a CSS file through a module.
Creating a custom image style
Before we configure a colorbox feature, we are going to create a custom image style to use when we add them in colorbox content preview settings. Image styles for Drupal 8 are part of the core Image module. The core image module provides three default image styles—thumbnail, medium, and large—as seen in the following Image style configuration page:
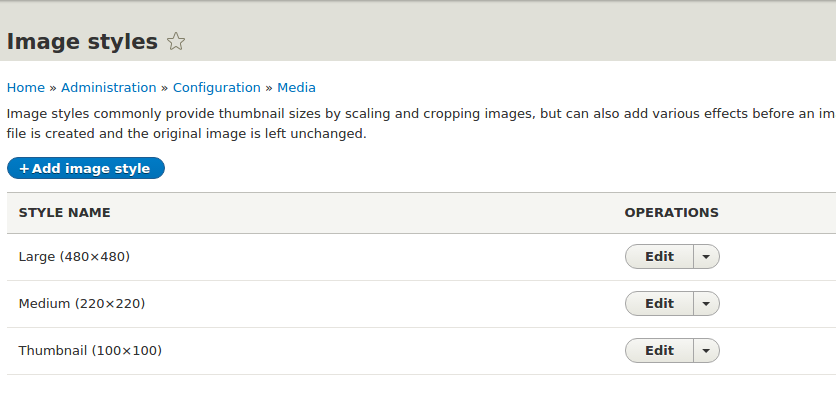
Now, we are going to add a fifth custom image style, an image style that will resize our images somewhere between the 100 x 75 thumbnail style and the 220 x 165 medium style. We will walkthrough the process of creating an image style through the Image style administrative page, and also walkthrough the process of programmatically creating an image style.
Time for action – adding a custom image style through the image style administrative page
First, we will use the Image style administrative page (admin/config/media/image-styles) to create a custom image style:
- Open the d8dev site in your favorite browser, click on the Configuration link in the Admin toolbar, and click on the Image styles link under the Media section.
- Once the Image styles administrative page has loaded, click on the Add style link.
- Next, enter small for the Image style name of your custom image style, and click on the Create new style button:

Unlock access to the largest independent learning library in Tech for FREE!
Get unlimited access to 7500+ expert-authored eBooks and video courses covering every tech area you can think of.
Renews at €18.99/month. Cancel anytime
- Now, we will add the one and only effect for our custom image style by selecting Scale from the EFFECT options and then clicking on the Add button.
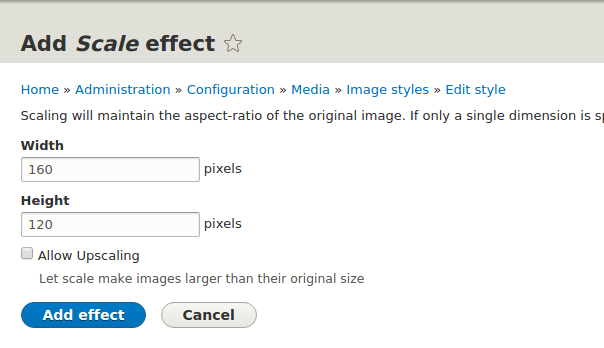
- On the Add Scale effect page, enter 160 for the width and 120 for the height. Leave the Allow Upscaling checkbox unchecked, and click on the Add effect button:
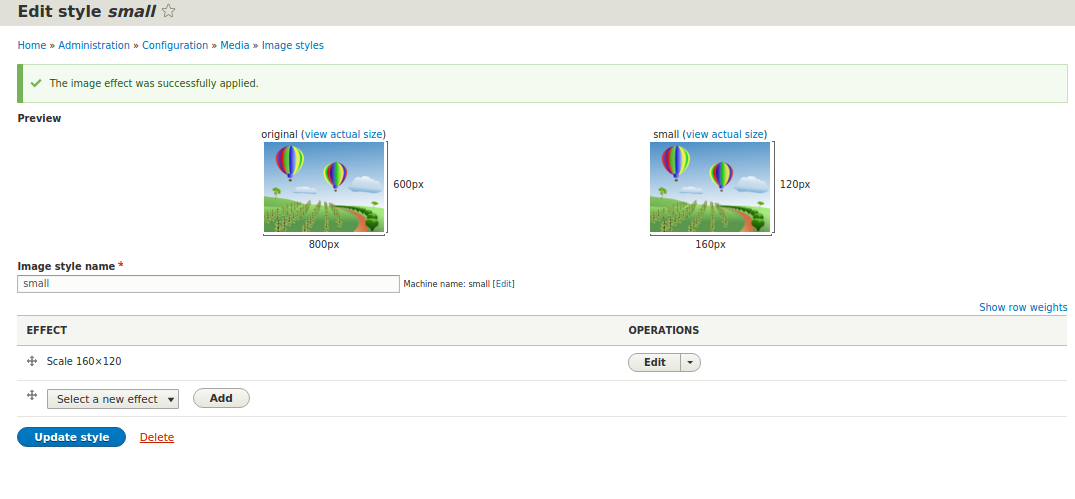
- Finally, just click on the Update style button on the Edit small style administrative page, and we are done. We now have a new custom small image style that we will be able to use to resize images for our site:
What just happened?
We learned how easy it is to add a custom image style with the administrative UI. Now, we are going to see how to add a custom image style by writing some code. The advantage of having code-based custom image styles is that it will allow us to utilize a source code repository, such as Git, to manage and deploy our custom image styles between different environments. For example, it would allow us to use Git to promote image styles from our development environment to a live production website. Otherwise, the manual configuration that we just did would have to be repeated for every environment.
Time for action – creating a programmatic custom image style
Now, we will see how we can add a custom image style with code:
- The first thing we need to do is delete the small image style that we just created. So, open your d8dev site in your favorite browser, click on the Configuration link in the Admin toolbar, and then click on the Image styles link under the Media section.
- Once the Image styles administrative page has loaded, click on the delete link for the small image style that we just added.
- Next, on the Optionally select a style before deleting small page, leave the default value for the Replacement style select list as No replacement, just delete, and click on the Delete button:

- In Drupal 8, image styles have been converted from an array to an object that extends ConfigEntity. All image styles provided by modules need to be defined as YAML configuration files in the config/install folder of each module.
- Suppose our module is located at modules/d8dev. Create a file called modules/d8dev/config/install/image.style.small.yml with the following content:
uuid: b97a0bd7-4833-4d4a-ae05-5d4da0503041
langcode: en
status: true
dependencies: {  }
name: small
label: small
effects:
c76016aa-3c8b-495a-9e31-4923f1e4be54:
uuid: c76016aa-3c8b-495a-9e31-4923f1e4be54
    id: image_scale
    weight: 1
    data:
      width: 160
      height: 120
      upscale: false
We need to use a UUID generator to assign unique IDs to image style effects. Do not copy/paste UUIDs from other pieces of code or from other image styles!
- The name of our custom style is small, is provided as the name and label as same. For each effect that we want to add to our image style, we will specify the effect we want to use as the name key, and then pass in values as the settings for the effect. In the case of the image_scale effect that we are using here, we pass in the width, height, and upscale settings. Finally, the value for the weight key allows us to specify the order the effects should be processed in, and although it is not very useful when there is only one effect, it becomes important when there are multiple effects.
- Now, we will need to uninstall and install our d8dev module by going to the Extend page. On the next screen click on the Uninstall tab, check the d8dev checkbox and click on the Uninstall button. Now, click on the List tab, check d8dev, and click on the Install button. Then, go back to the Image styles administrative page and you will see our programmatically created small image style.
What just happened?
We created a custom image style with some custom code. We then configured our Recipe content type to use our custom image style for images added to the Recipe images field.
Integrating the Colorbox and File entity modules
The File entity module provides interfaces for managing files. For images, we will be able to edit Title text, Alt text, and Filenames easily. However, the images are taking up quite a bit of room. Let's create a pop-up lightbox gallery and show images in a popup. When someone clicks on an image, a lightbox will pop up and allow the user to cycle through larger versions of all associated images.
Time for action – installing the Colorbox module
Before we can display Recipe images in a Colorbox, we need to download and enable the module:
- Open the Mac OS X Terminal or Windows Command Prompt, and change to the d8dev directory.
- Next, use Drush to download and enable the current dev release of the Colorbox module (http://drupal.org/project/colorbox):
$ drush dl colorbox-8.x-1.x-dev

Project colorbox (8.x-1.x-dev) downloaded to /var/www/html/d8dev/modules/colorbox.
[success]

$ drushencolorbox

The following extensions will be enabled: colorbox
Do you really want to continue? (y/n): y
colorbox was enabled successfully.
[ok]
- The Colorbox module depends on the Colorbox jQuery plugin available at https://github.com/jackmoore/colorbox. The Colorbox module includes a Drush task that will download the required jQuery plugin at the /libraries directory:
$drushcolorbox-plugin
Colorbox plugin has been installed in libraries
[success]
- Next, we will look into the Colorbox display formatter. Click on the Structure link in the Admin toolbar, then click on the Content types link, and finally click on the manage display link for your Recipe content type under the Operations dropdown:

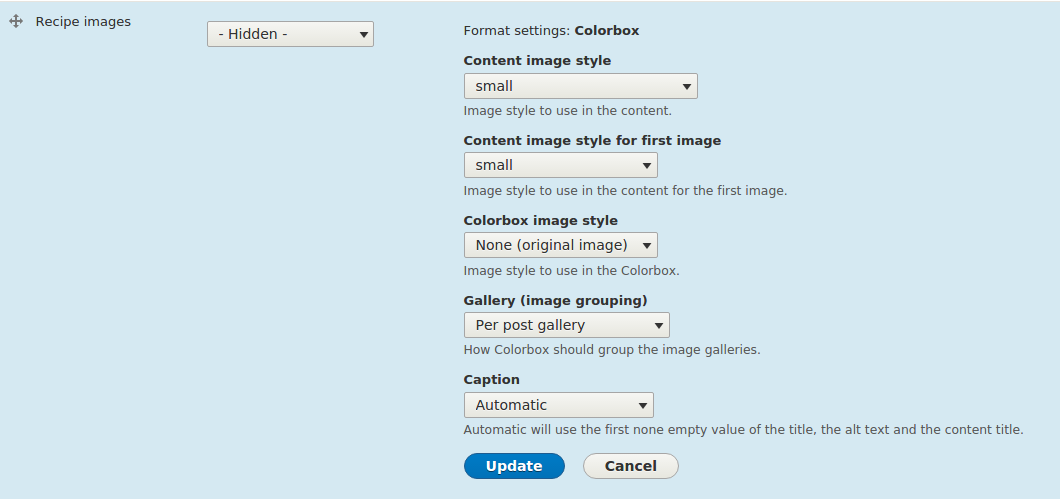
- Next, click on the FORMAT select list for the Recipe images field, and you will see an option for Colorbox, Select as Colorbox then you will see the settings change. Then, click on the settings icon:

- Now, you will see the settings for Colorbox. Select Content image style as small and Content image style for first image as small in the dropdown, and use the default settings for other options. Click on the Update button and next on the Save button at the bottom:
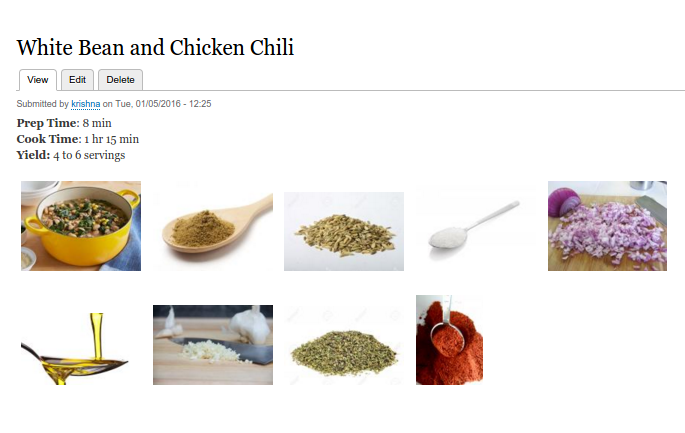
- Reload our Thai Basil Chicken recipe page, and you should see something similar to the following (with the new image style, small):
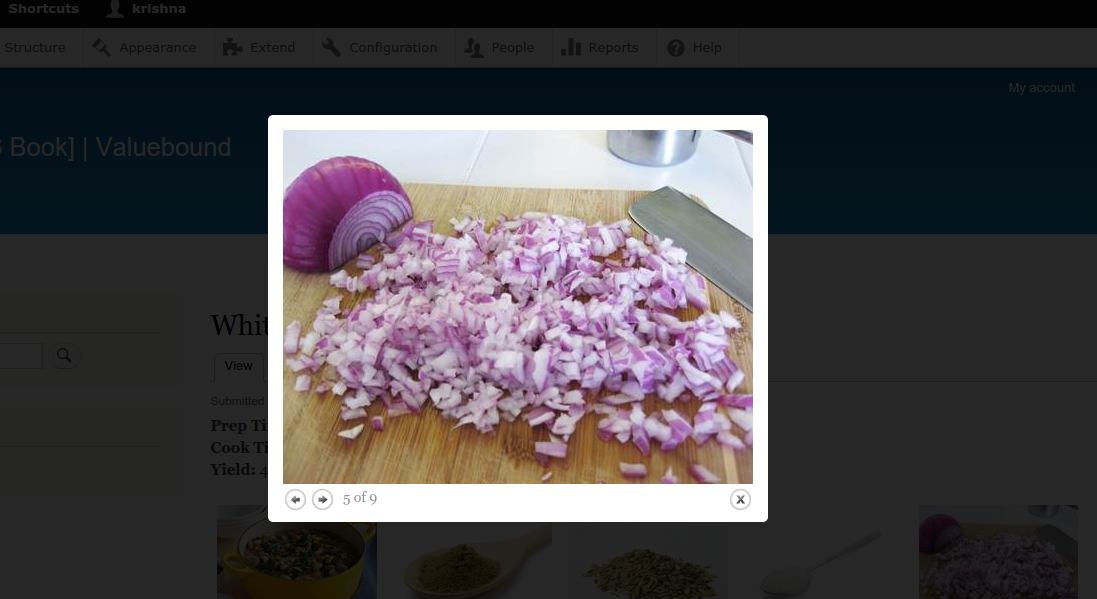
- Now, click on any image and then you will see the image loaded in the colorbox popup:
- We have learned more about images for colorbox, but colorbox also supports videos. Another way to add some spice to our site is by adding videos. So there are several modules available to work with colorbox for videos. The Video Embed Field module creates a simple field type that allows you to embed videos from YouTube and Vimeo and show their thumbnail previews simply by entering the video's URL. So you can try this module to add some pizzazz to your site!
What just happened?
We installed the Colorbox module and enabled it for the Recipe images field on our custom Recipe content type. Now, we can easily add images to our d8dev content with the Colorbox pop-up feature.
Working with Drupal issue queues
Drupal has its own issue queue for working with a team of developers around the world. If you need help for a specific project, core, module, or a theme related, you should go to the issue queue, where the maintainers, users, and followers of the module/theme communicate.
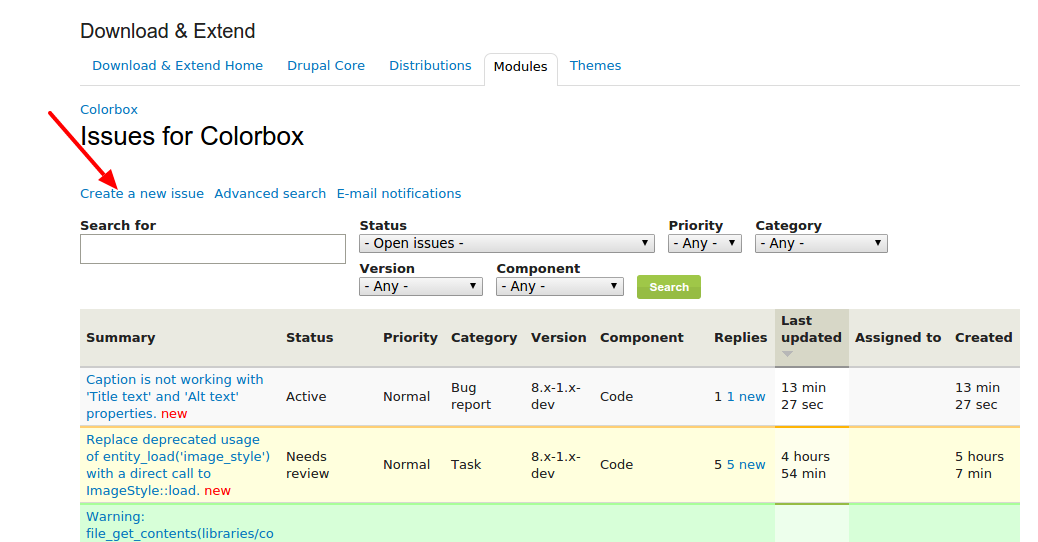
The issue page provides a filter option, where you can search for specific issues based on Project, Assigned, Submitted by, Followers, Status, Priority, Category, and so on.
We can find issues at https://www.drupal.org/project/issues/colorbox. Here, replace colorbox with the specific module name. For more information, see https://www.drupal.org/issue-queue.
In our case, we have one issue with the colorbox module. Captions are working for the Automatic and Content title properties, but are not working for the Alt text and Title text properties. To check this issue, go to Structure | Content types and click on Manage display. On the next screen, click on the settings icon for the Recipe images field. Now select the Caption option as Title text or Alt text and click on the Update button. Finally, click on the Save button. Reload the Thai Basil Chicken recipe page, and click on any image. Then it opens in popup, but we cannot see captions for this.
Make sure you have the Title text and Alt text properties updated for Recipe images field for the Thai Basil Chicken recipe.
Time for action – creating an issue for the Colorbox module
Now, before we go and try to figure out how to fix this functionality for the Colorbox module, let's create an issue:
- On https://www.drupal.org/project/issues/colorbox, click on the Create a new issue link:
- On the next screen we will see a form. We will fill in all the required fields: Title, Category as Bug report, Version as 8.x-1.x-dev, Component as Code, and the Issue summary field. Once I submitted my form, an issue was created at https://www.drupal.org/node/2645160. You should see an issue on Drupal (https://www.drupal.org/) like this:
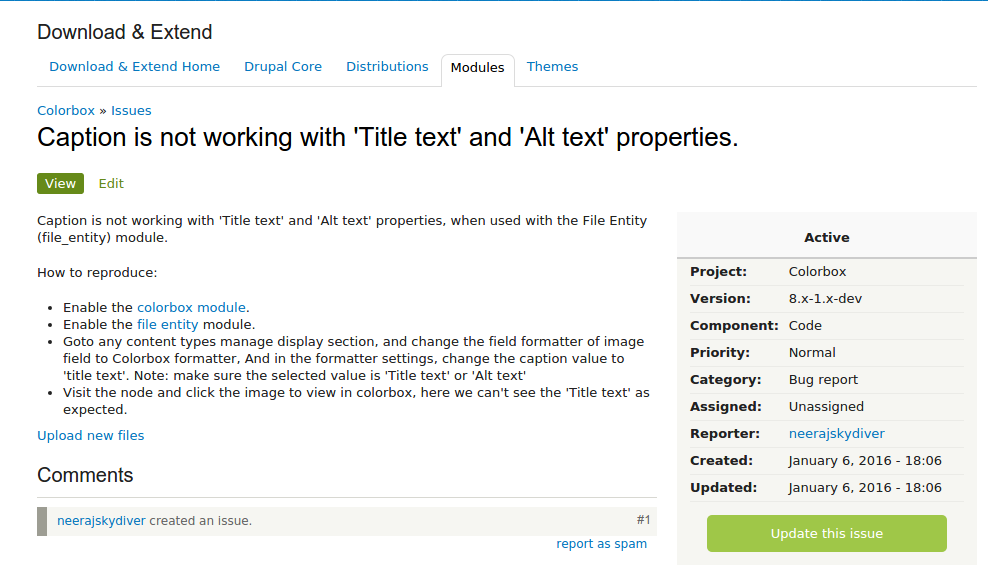
- Next, the Maintainers of the colorbox module will look into this issue and reply accordingly. Actually, @frjo replied saying "I have never used that module but if someone who does sends in a patch I will take a look at it." He is a contributor to this module, so we will wait for some time and will see if someone can fix this issue by giving a patch or replying with useful comments. In case someone gives the patch, then we have to apply that to the colorbox module. This information is available on Drupal at https://www.drupal.org/patch/apply .
What just happened?
We understood and created an issue in the Colorbox module's issue queue list. We also looked into what the required fields are and how to fill them to create an issue in the Drupal module queue list form.
Summary
In this article, we looked at a way to use our d8dev site with multimedia, creating image styles using some custom code, and learned some new ways of interacting with the Drupal developer community. We also worked with the Colorbox module to add images to our d8dev content with the Colorbox pop-up feature. Lastly, we looked into the custom module to work with custom CSS files.
Resources for Article:
Further resources on this subject:
 United States
 Great Britain
 India
India
 Germany
 France
 Canada
 Russia
 Spain
Spain
 Brazil
 Australia
 Singapore
 Hungary
 Ukraine
 Luxembourg
 Estonia
 Lithuania
 South Korea
 Turkey
 Switzerland
 Colombia
 Taiwan
 Chile
Chile
 Norway
 Ecuador
 Indonesia
 New Zealand
 Cyprus
 Denmark
 Finland
 Poland
 Malta
Malta
 Czechia
 Austria
 Sweden
 Italy
Italy
 Egypt
Egypt
 Belgium
 Portugal
 Slovenia
 Ireland
 Romania
 Greece
 Argentina
 Netherlands
 Bulgaria
 Latvia
 South Africa
 Malaysia
 Japan
Japan
 Slovakia
 Philippines
 Mexico
 Thailand


