Creating Databases
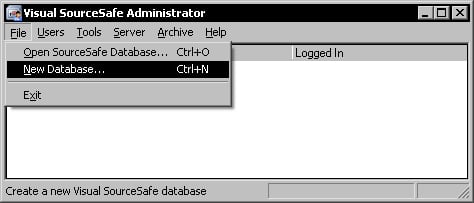
To create a new SourceSafe database, we use the Visual SourceSafe Administrator application. After opening this application, to create a new database, use the New Database command by going to File | New Database:

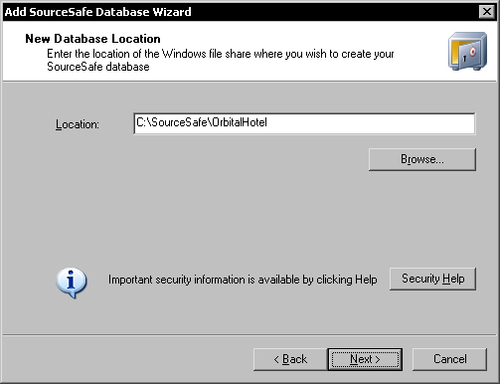
This will display the welcome dialog of the Add SourceSafe Database Wizard. To continue, click Next to advance to the second page. In the second dialog, we must specify a new empty folder to create the database in.

Note
Select a folder that is not under one of the operating system's folders. This will ease the database configuration process.
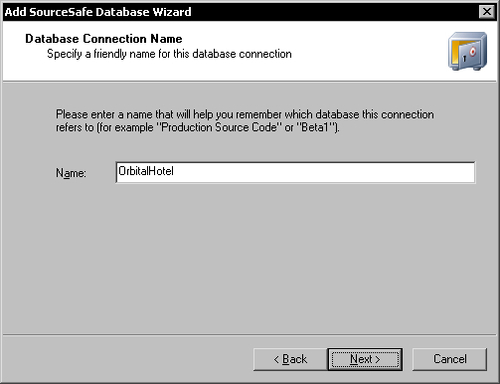
Click the Next button to advance to the next dialog. We can specify a friendly name for the new database in this dialog.

After specifying the friendly name for the database, click Next to advance to the Team Version Control Model dialog.

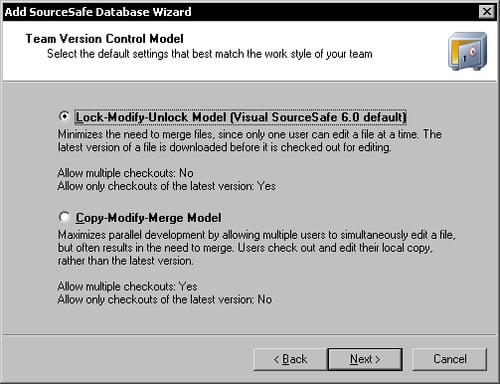
In this dialog, we must choose an initial version control model or checkout model for the database. Here we can choose between the two SourceSafe models:
Lock-Modify-Unlock Model or the Exclusive Checkout Model
Copy-Modify-Merge Model or the Multiple Checkout Model
This model can later be changed, if required, and we will see how in Appendix C.
After choosing the initial checkout model, the wizard has enough information to create the new database. Click Next to display the final summary dialog. If at this point you want to change any of the previous options, you can go back and make the necessary changes by clicking Back. To create the new database click Finish.
After the new database is created at the selected location, SourceSafe will display a security warning, informing about the necessary security settings that must be applied in order to secure the database.
Let's see how to enforce database security.


