The EPM Workspace
The EPM Workspace is similar to a portal, where all Oracle Hyperion applications, reports, and other files can be accessed and integrated using a shared security model. The Workspace is accessible through the web browser and contains a filesystem and other gadgets including personal pages and content subscription. Interactive Reporting is one of the many products that integrate with the Workspace, providing users a central location to save, share, and publish content.
Navigating the EPM Workspace
To navigate the Workspace, a user account must be created and provisioned with the necessary privileges to the Workspace and the Interactive Reporting components. After the user account is created, users can access the Workspace using a web browser.
Note
Each environment may be configured differently and have different login methods and start pages configured. However, this book provides examples based on the default product configuration.
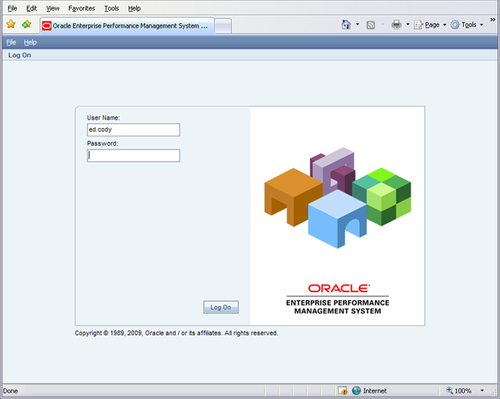
The following screenshot shows the default login page for the EPM Workspace in version 11. Once the user enters the assigned username and password, the default home page appears. Other configurations may be configured to use external authentication methods, where the user will bypass the initial login screen and start at the default start page for their configuration.
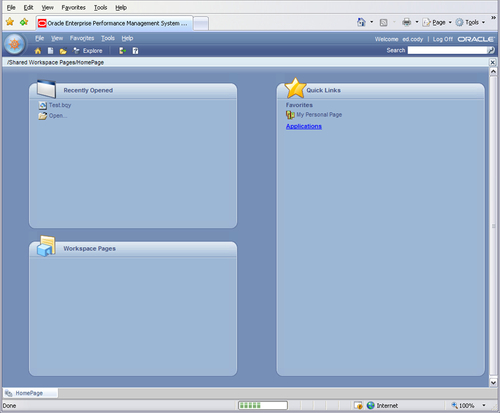
The default home page shown in the following screenshot is new to the Workspace in version 11. The new home page feature allows users to add Quick Links, browse recently opened documents, and view custom created Workspace pages.
If the desired content is not listed on the main home page, the Explorer can be accessed by clicking on the Explore image on the toolbar at the top of the page, allowing users to browse for content in the Workspace filesystem similar to Windows Explorer. The Explore window, shown in the following screenshot, opens to a page with two frames showing a folder structure on the left for navigating the file structure and the contents of the current folder on the right for managing and executing items. The main parent folder in the file system is called the Root folder and other files and folders can be added under the Root folder as desired. If there is a need to return to the previous page, the user can click on the HomePage tab at the bottom-left of the page. As additional items are opened in the Workspace, additional tabs are created at the bottom of the screen. The user can navigate through the different items opened by using the tabs across the bottom of the Workspace window. If desired, these tabs can be closed by right-clicking on the tab and selecting Close.
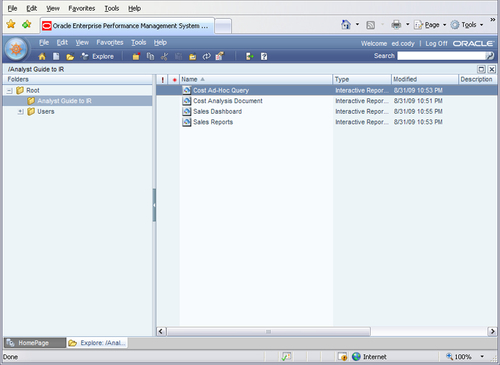
After navigating to the desired folder, the user can open the documents of interest. Files from different applications are designated with two unique identifiers in the Explore window. The first identifier is the image that is shown to the left of the name, and the second identifier is the object Type. The documents shown in the previous screenshot are Interactive Reporting documents and can be opened using the HTML viewer or the Interactive Reporting Web Client. Selecting the HTML option will render the document in a new tab, while opening the document in the Interactive Reporting Web Client will open the document in a new browser window.
Installing the Interactive Reporting Web Client
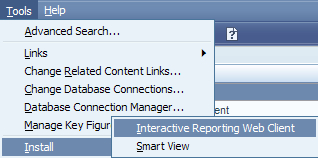
The Interactive Reporting Web Client software must be installed to open documents in the Web Client. This installation is a plug-in to the browser, where the browser will activate the Web Client software when an Interactive Reporting file is initiated. The installation will automatically execute upon opening the Interactive Reporting document in a browser without the Web Client installed, or the installation can be manually executed by accessing the Tools | Install | Interactive Reporting Web Client item as shown in the following screenshot:
Once the installation is initiated, a window appears with the ability to customize the installation by checking/unchecking options. The default installation will install all of the components of the tool and is recommended:
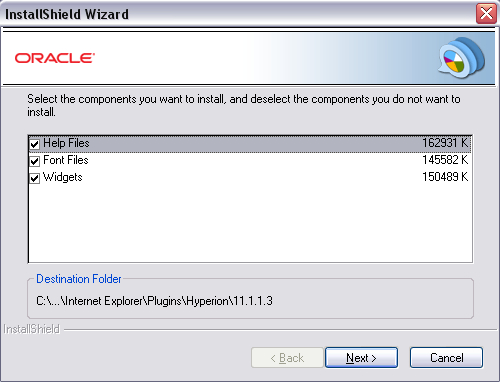
The installation will commence after clicking on the Next button on the configuration menu and will continue through the completion of the installation, signified by the following window:

Opening documents in the Workspace
Interactive Reporting documents are opened by double-clicking on the document in the Workspace or by highlighting and right-clicking the document, highlighting Open As, and selecting either HTML or Interactive Reporting Web Client from the menu as shown in the following screenshot.
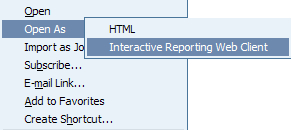
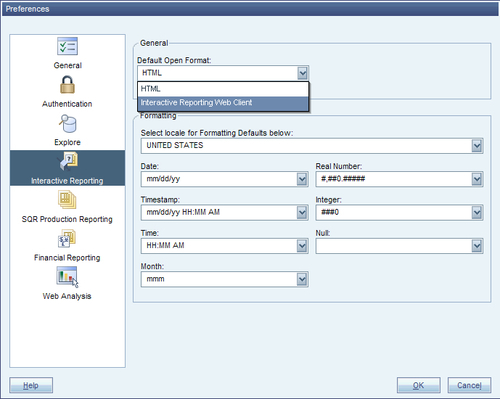
When the document is double-clicked, the default configuration method for opening the document is invoked by Interactive Reporting. Initially the software is configured to use the HTML viewer as the default, but the default preference can easily be changed by modifying the Default Open Format of the document in the Interactive Reporting preferences of the Workspace. The main Preferences window is opened by accessing the File menu and selecting the Preferences menu item, as shown in the following screenshot. Once the Preferences window is open, the Default Open Format is found under the Interactive Reporting tab on the left menu of the window. To change the default format from HTML to the Interactive Reporting Web Client, click on the drop-down arrow, select the Interactive Reporting Web Client item, and then click on the OK button on the Preferences window. In addition to the file open format, other preferences can be modified in this window to address changing formats for date, time, and currency.
Opening documents from the local machine
Interactive Reporting documents can be saved and opened from the local machine by opening the document using the web browser with Web Client installed. To open the document from the local machine, highlight and right-click on the Interactive Reporting file and select Open With from the menu that appears. If the web browser of choice is not listed, select Choose Program from the list. Browse the window, select the web browser with the plug-in installed, and check the checkbox at the bottom to Always use the selected program to open this kind of file in order to always open the Interactive Reporting document in the selected web browser. Then select OK in the window to open the Interactive Reporting document with the web browser.
The web browser will open and the Web Client will load the document into the viewing window. If offline mode is not turned on, the document will open a window to authenticate with the Workspace. If no connection can be established with the Workspace, only the data sections will be visible when the document is opened. If the connection can be established and the file saved to the desktop still exists in the Workspace, then the document will load with proper permissions to the file and the document can be processed as if it was opened from the Workspace. If the file is not located in the Workspace, then the file can be imported by the user if the user has import permissions. Instructions for importing are found in the importing section of this chapter.


