


Using the post-processor
Now that we have completed the setup process and simulated the printing process, we can safely generate the G-code for our 3D printer via a post-processor.
As you may recall, a post-processor is a program whose scope is translating CAM operations into G-code files. Fusion 360 has quite a large set of post-processors for most of the desktop 3D printers on the market.
Let’s start the command. You can find the Post Process command in the ADDITIVE tab under the ACTIONS drop-down menu:
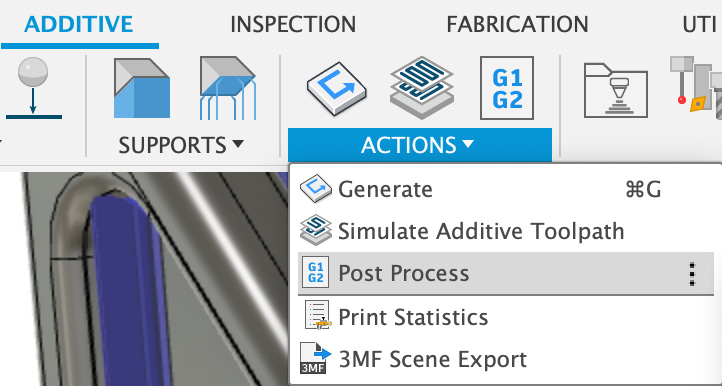
Figure 16.27: The Post Process command
This will launch the following Post Process window:
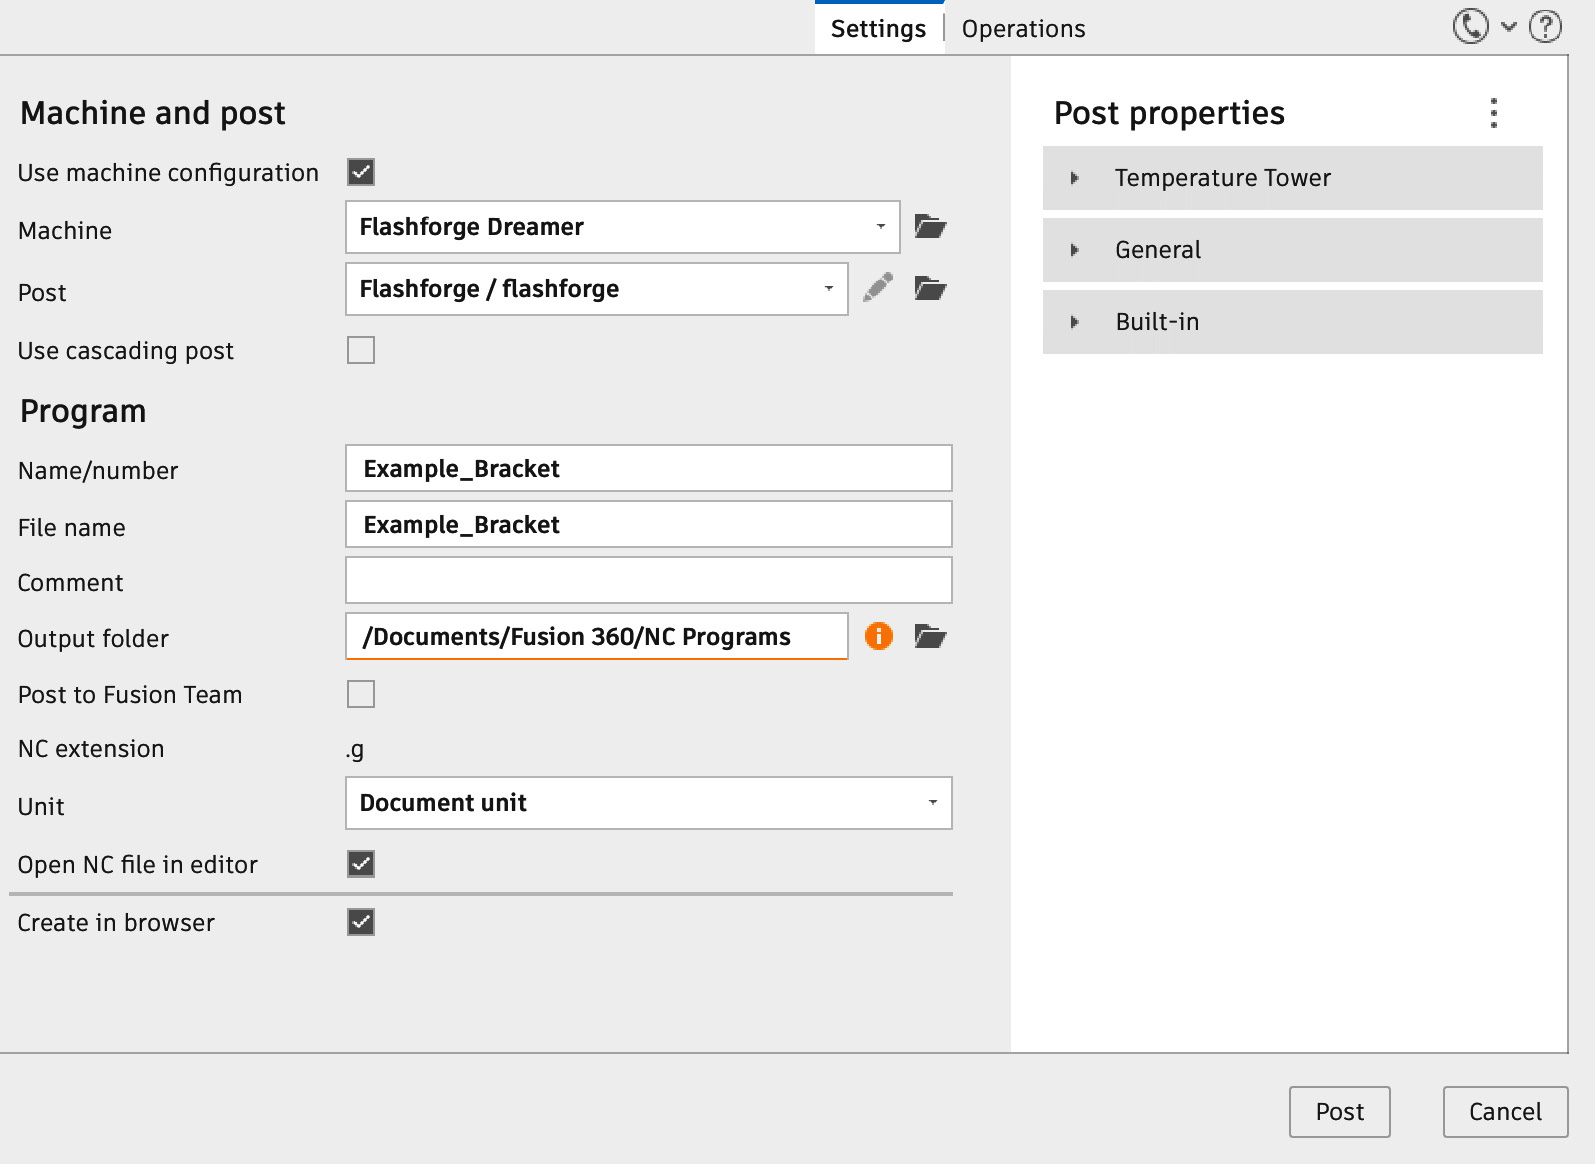
Figure 16.28: The Post Process window
The only option we will care about here is the machine model. We can browse all supported 3D printers from the Machine drop-down menu (I picked Flashforge Dreamer).
If our printer is supported by Fusion 360, there is not much else we have to do here as the default settings will work...


