Search icon CANCEL
Subscription
0
Cart icon
Your Cart (0 item)
Close icon
You have no products in your basket yet
Arrow left icon
Explore Products
Best Sellers
New Releases
Books
Videos
Audiobooks
Learning Hub
Newsletter Hub
Free Learning
Arrow right icon
timer SALE ENDS IN
0 Days
:
00 Hours
:
00 Minutes
:
00 Seconds
Arrow up icon
GO TO TOP
Linux Mint Essentials

You're reading from   Linux Mint Essentials A practical guide to Linux Mint for the novice to the professional

Arrow left icon
Product type Paperback
Published in May 2014
Publisher Packt
ISBN-13 9781782168157
Length 324 pages
Edition 1st Edition
Arrow right icon
Author (1):
Arrow left icon
Jay LaCroix Jay LaCroix
Author Profile Icon Jay LaCroix
Jay LaCroix
Arrow right icon
View More author details
Toc

Table of Contents (17) Chapters Close

Preface 1. Meet Linux Mint FREE CHAPTER 2. Creating Boot Media and Installing Linux Mint 3. Getting Acquainted with Cinnamon 4. An Introduction to the Terminal 5. Utilizing Storage and Media 6. Installing and Removing Software 7. Enjoying Multimedia on Mint 8. Managing Users and Permissions 9. Connecting to Networks 10. Securing Linux Mint 11. Advanced Administration Techniques 12. Troubleshooting Linux Mint A. Reinstalling Mint while Retaining Data B. Using the MATE Edition of Linux Mint C. Using the KDE Edition of Linux Mint Index

Viewing photos


In Mint, viewing photos works pretty much as you would expect. If you double-click on an image, it will open up in Mint's default image viewer program. This program is simply called Image Viewer in the Applications menu. The following photo is opened in the Image Viewer:
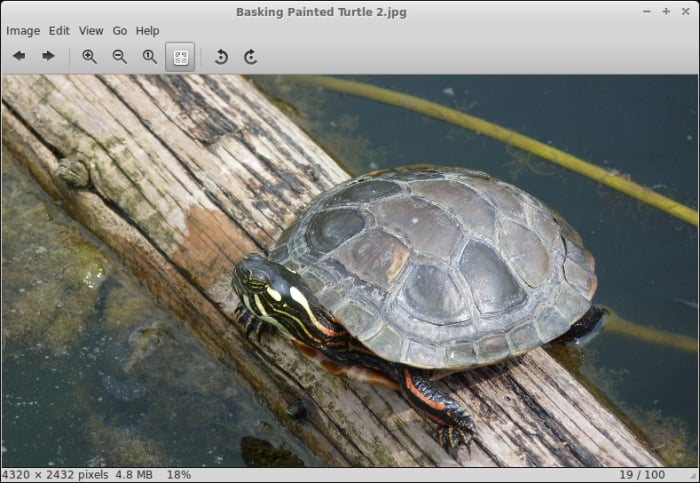
Once you've opened a photo, you're able to cycle through any additional photos that may exist in the same directory. At the top of the window, you'll see icons to move left and right through any additional pictures that may exist in the same location, and you'll also see icons for zooming in and out as well as rotating the picture.

Note

Although the title of Mint's default image viewer is Image Viewer in the menu, you may see it listed as Eye of GNOME depending on where you look, as this was its original name. In fact, if you want to launch the Image Viewer from the command line, the command is eog and not imageviewer as you may first expect.

For performing any advanced editing such as cropping, you'll need to...

lock icon The rest of the chapter is locked
Register for a free Packt account to unlock a world of extra content!
A free Packt account unlocks extra newsletters, articles, discounted offers, and much more. Start advancing your knowledge today.
Unlock this book and the full library FREE for 7 days
Get unlimited access to 7000+ expert-authored eBooks and videos courses covering every tech area you can think of
Renews at $19.99/month. Cancel anytime