Organizing your project assets
When we talk about organizing assets and resources in our project, we are referring to how we want the folder structure in the Project panel to look. There is not a single established way to do this – it depends on how we like and feel more comfortable working. Unity recommends a series of points you should take into account when doing this, as well as to avoid file problems.
The following are recommendations for organizing our project:
- Establish a folder and file naming guide before starting.
- Don’t lose track of the folder naming throughout the project. On many occasions, we will add files and resources and forget to rename them.
- Do not use blank spaces in folders or individual files.
- Separate the files to be used in testing from the production files by creating another folder dedicated to them.
- Always use the
Assetsroot folder; everything you create should hang from this folder. Avoid creating other folders at the same level as theAssetsfolder. - Keep your private files separate from downloaded assets or Unity’s resources.
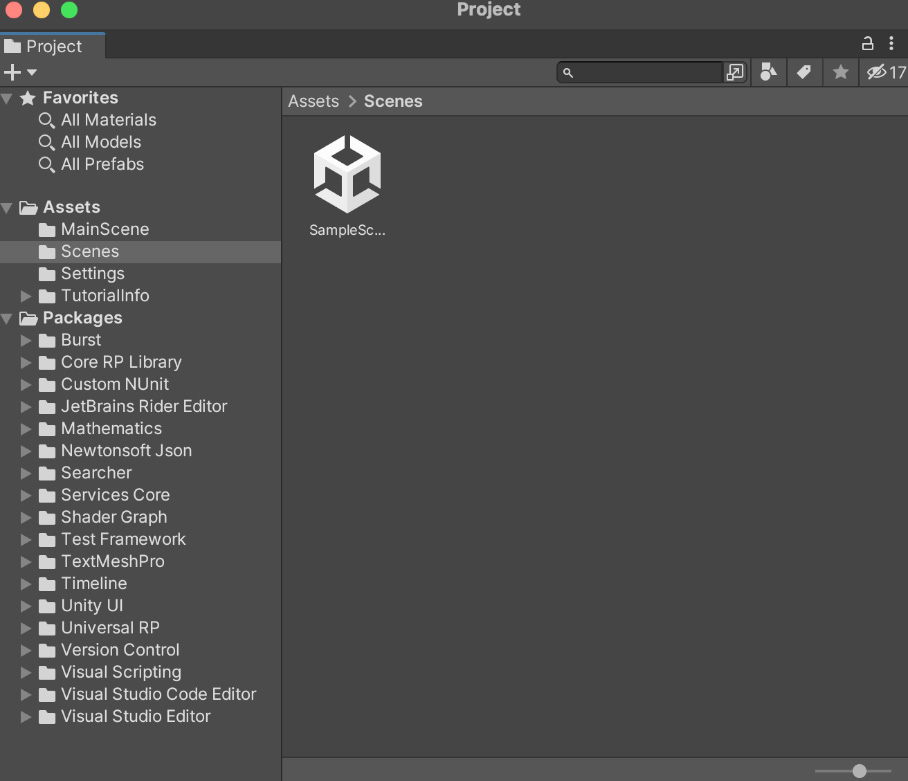
As we have said before, there is no standard way to organize projects in Unity. I use a technique that helps me have good order and be more efficient when working. Figure 1.19 is the default structure that can be seen when creating a project:

Figure 1.19 – Detailed view of the Project panel
As shown in the preceding figure, under the root Assets folder, we have MainScene, Scenes, Settings, and TutorialInfo. At first sight, this seems like a good form of organization, but in reality, it is not quite like that. Let me explain why.
As the project grows, you will be downloading assets and installing them in the project. This will cause an infinite number of new folders that hang from the Assets folder to be created. These folders are sorted alphabetically, and this can become chaotic if you try to locate your own folders, mixed in among the folders of third parties.
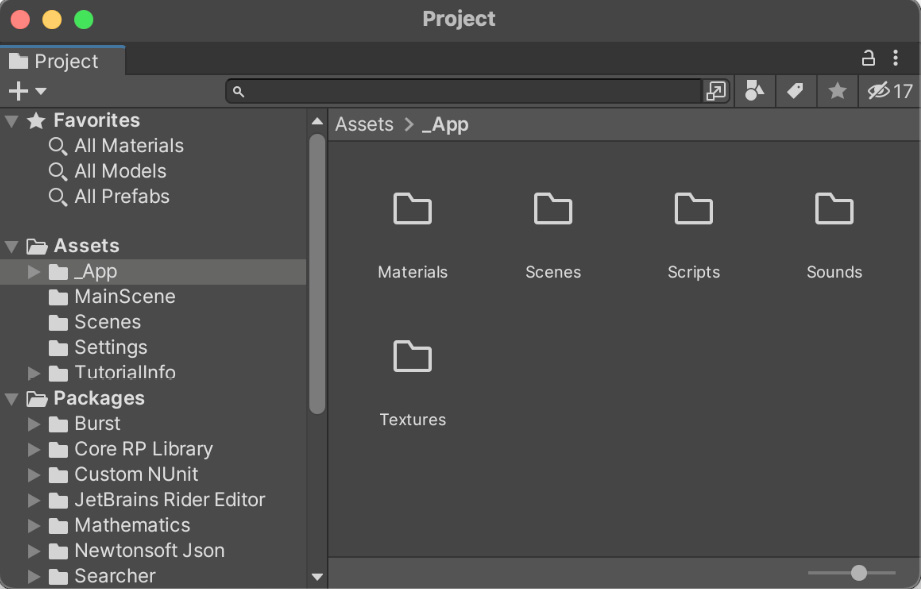
A widespread technique among Unity programmers is to identify your folders with the underscore symbol (_) so that they always appear at the top, as shown in Figure 1.20:

Figure 1.20 – Custom organization
This way, you will no longer care that third-party plugins can create an infinite number of folders in your Assets root folder since you will always have yours at the top of your _App folder.
Within the _App folder, you can create the folder relationship that suits you best. From my experience, most assets can be perfectly organized into materials, scenes, scripts, sounds, or textures.
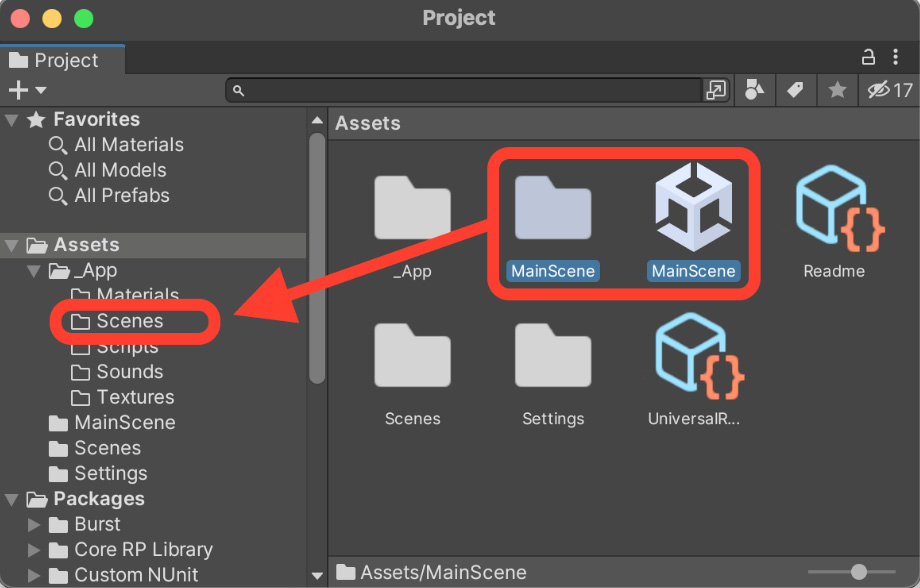
To finish organizing the project as a whole, we will move the scene we have created to its new location and delete what Unity has created:
- Move the
MainScenescene file, along with its configuration folder, inside_App|Scenes:

Figure 1.21 – Reorganizing our assets
- Delete the
TutorialInfofolder from the rootAssetsfolder. - Delete the old
Scenesfolder located in the rootAssetsfolder. Inside this is theSampleSceneexample scene, but don’t worry, we don’t need that either.
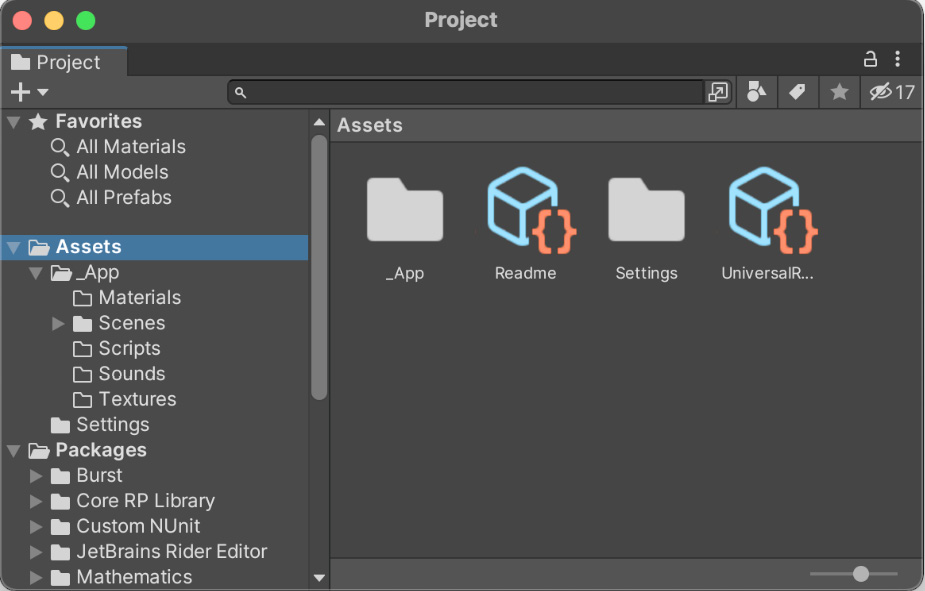
Once we have reorganized our assets and removed the sample material, our Project panel will look something like Figure 1.22:

Figure 1.22 – Screenshot of what the new organization should look like
Note
If you want to dive deeper into this matter, I recommend https://unity.com/how-to/organizing-your-project and https://docs.unity3d.com/Manual/SpecialFolders.html.
Good job! With that, you have learned everything you need to have your work well organized. Over time and when you have worked on multiple projects, you will notice the difference if you have your files well organized. As projects grow, if we don’t apply some technique to keep everything organized, we will lose a lot of time looking for the assets we need. Next, we will cover a very easy and interesting point regarding how to configure our project so that later, in Chapter 2, Preparing Our Player, we can move our character with the keyboard and mouse.


