Opening and Uploading workflows for CAD models and Mesh files
Fusion is a cloud-connected CAD/CAM/CAE and PCB design tool. You can create new designs or open designs created in other tools that are saved as CAD or mesh files. In this section, we will cover all the ways you can open models created by other software in Fusion so that we can start getting them ready for 3D printing.
As Fusion is cloud-connected software, it has cloud storage and data-sharing capabilities built in. As a Fusion user, you automatically get access to a cloud-connected data storage and management tool called Fusion Team. This tool also allows you to administer your team of Fusion users by giving you tools for permissions, version control, markup, and comments. According to an Autodesk Knowledge Network article, Fusion users automatically get unlimited storage for Fusion data and 500 GB of data storage for non-Fusion documents. That is a generous amount of storage to tackle any project.
Important note
For more information on how cloud data storage works, you can refer to this article at https://knowledge.autodesk.com/support/fusion-360/learn-explore/caas/sfdcarticles/sfdcarticles/How-big-is-the-cloud-storage-for-Fusion.html.
After creating an Autodesk account and gaining access to Fusion, regardless of your licensing level, you can log in to your Fusion Team account (https://myhub.autodesk360.com/) and start your Fusion data management journey.
If you are an individual user, you don’t have to worry about changing teams. However, if you work for an organization with multiple Fusion users, your organization may have multiple teams already set up. For example, each user may have their own team. You can switch the active team by selecting the profile icon in the top-right corner of the screen, as shown in the following screenshot:
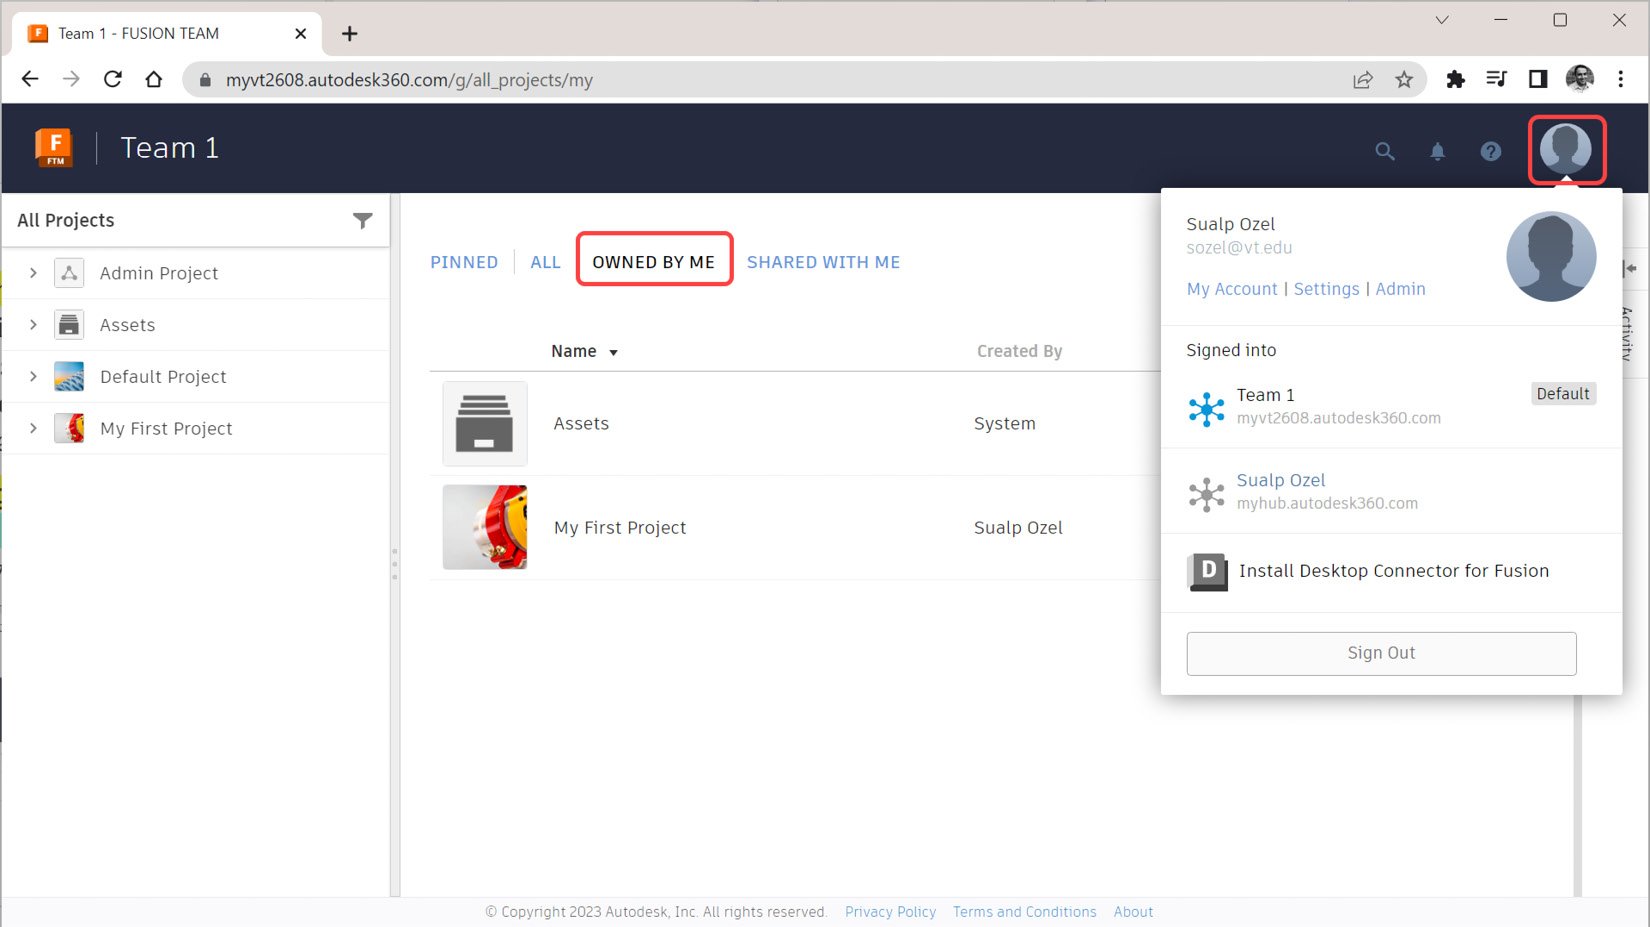
Figure 1.1 – My FUSION TEAM view with an OWNED BY ME filter applied
Figure 1.1 shows my Fusion TEAM view on a Google Chrome browser with the OWNED BY ME filter applied to the list of projects. If I were part of an organization with multiple teams, I would select the Profile icon in the top-right corner and change my active team to participate in a project stored in another team’s hub. Figure 1.1 also shows that, by default, we have two items that are owned by me – Assets and My First Project.
In Figure 1.2, you can see that by selecting My First Project and expanding Project Details, we can edit the project name and image and manage members who can contribute to and view the contents of this project:
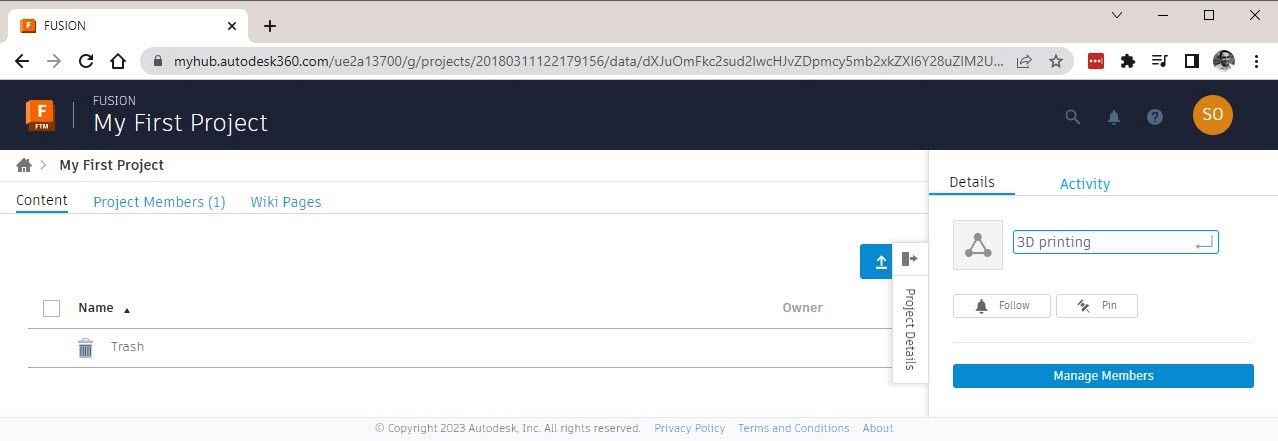
Figure 1.2 – You can rename projects on the Project Details screen
Once the project has a name we approve (in Figure 1.2, I renamed the project 3D printing), we can take a look at various methods we have available to upload designs and other documents to Fusion Team and Fusion.
The first option we have to upload our designs and documents to Fusion Team is within the created project itself. As shown in Figure 1.3, we are in a project named 3D printing, and we can select the blue Upload button to see the various options we have to upload things, such as File, Folder, Assembly, and From Dropbox. If we select File from that dropdown, we can upload any file stored on our local storage directly to our active project on Fusion TEAM. If the files we upload contain mesh or CAD geometry (for example, STL, STEP, SAT, Inventor, or Solidworks), we will be able to open those designs in Fusion for further editing and manufacturing. If they are non-CAD files (for example, Microsoft Word documents or PDF files), we won’t have native access to them in Fusion, but we can still view them in our internet browser or mobile apps.
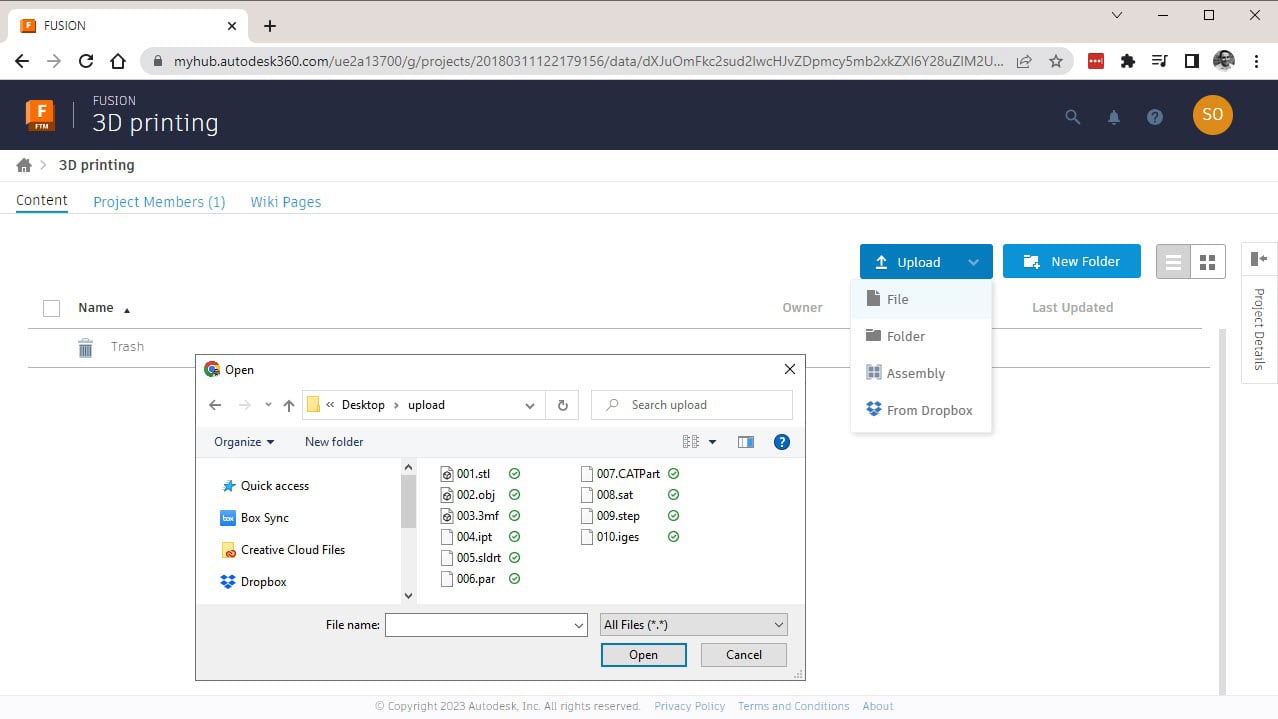
Figure 1.3 – Uploading local files to our 3D printing project on Fusion TEAM
If you are used to traditional desktop CAD software, uploading files to a Fusion project using FUSION TEAM may not have the intuitive workflow you are familiar with. However, it is a useful way to quickly upload multiple files associated with a project to your Autodesk cloud storage.
If you seek a more traditional workflow to open your CAD or mesh files, you will want to have Fusion installed on your computer. You can download and install Fusion from the following link: https://www.autodesk.com/content/autodesk/global/en/products/fusion-360/trial-intake.
Once Fusion is installed and started, you can access the File dropdown and select Open. When you do, you will be greeted with the Open dialog. As shown in Figure 1.4, select the Open from my computer… option within this dialog, and you will be able to select from a list of supported mesh and CAD file types, as shown in Figure 1.5:
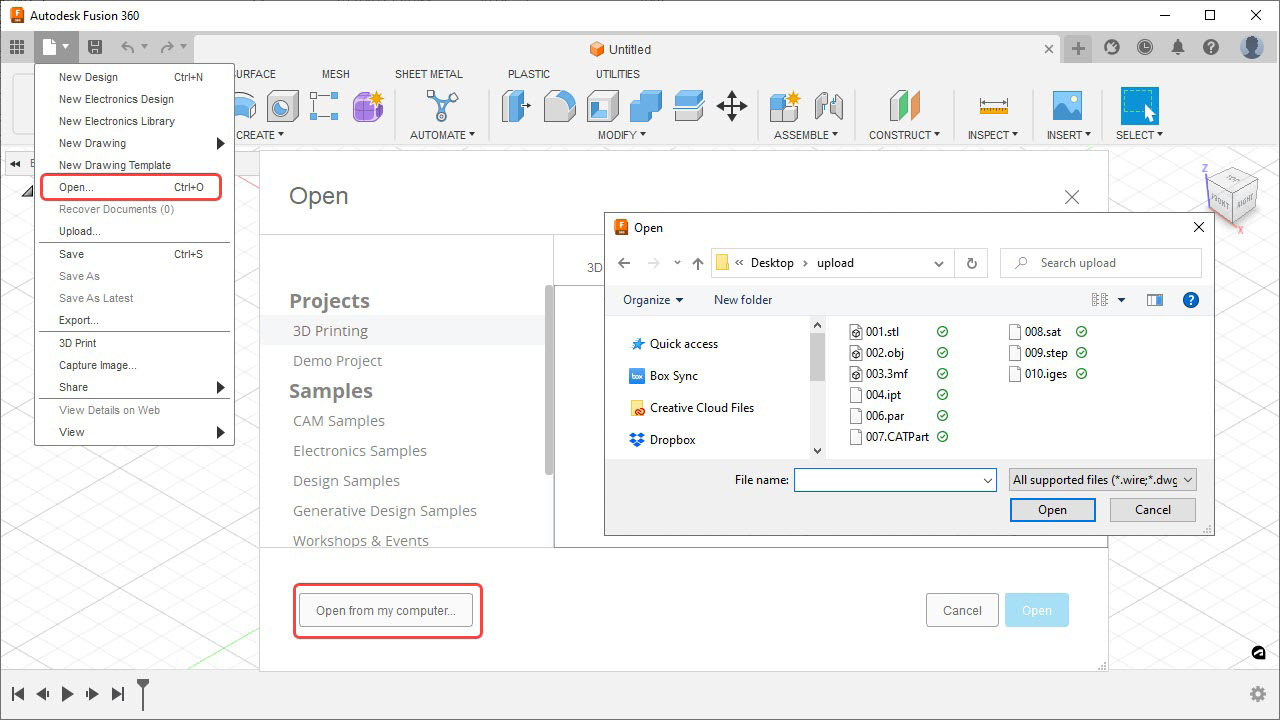
Figure 1.4 – The File | Open... workflow allows you to open CAD and mesh files from your computer
In this dialog, you will have the option to open any of the Mesh or CAD file types that Fusion supports. As Autodesk regularly updates Fusion, you never have to worry about not having access to the latest CAD translators:
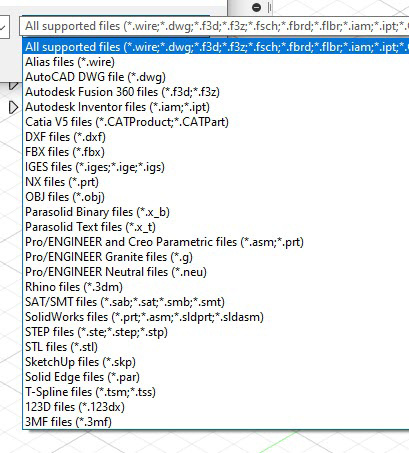
Figure 1.5 – A list of the available CAD and MESH file types that Fusion can open
This is a great option to open a single file quickly, but there are several downsides to this option:
- You can only open one file at a time using this method.
- When using this method, you end up in Direct Modeling mode upon opening a CAD file. If you want to capture design history, you will need to manually turn on the design history using the browser. Modeling with the Design history and Direct modeling methods will be covered in detail in Chapter 2.
- You do not get a chance to set the units or part placement when opening STL/OBJ files.
In conclusion, if you try to open STL or OBJ files, this is not the option I would recommend. However, if you open a CAD file (for example, STEP or SAT) or a 3MF file, this is a quick and easy option that you may want to use. Don’t forget to manually turn on Capture Design History if you want to store your edits in the timeline, as shown in Figure 1.6:
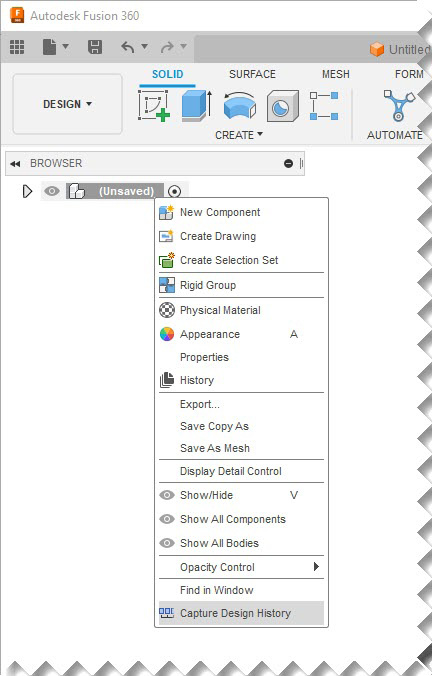
Figure 1.6 - After a File | Open... workflow, turn on Capture Design History via the browser
Another option available when opening CAD and Mesh files is within Fusion's Data Panel. You can access the Data Panel window by selecting the Show Data Panel icon, located in the top-left corner of the interface, as shown in Figure 1.7.
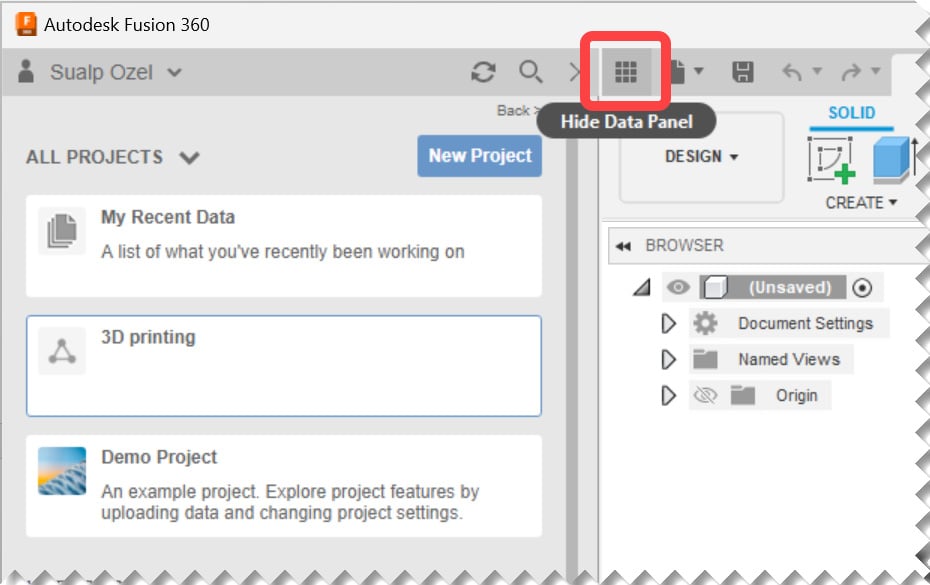
Figure 1.7 - Show/Hide Data Panel
Once the data panel is visible, you can navigate to the team and project where you wish to upload your design data. Once in the appropriate project, you can create new folders to organize your designs and documents further. Once you are in the desired project/folder location, you can use the Upload button, as shown in Figure 1.8, and select or drag and drop files to the upload dialog that is on your screen. Either option will allow you to upload multiple CAD or mesh files to the designated team/project/ folder location. Please note that each uploaded file will become its own Fusion design document.
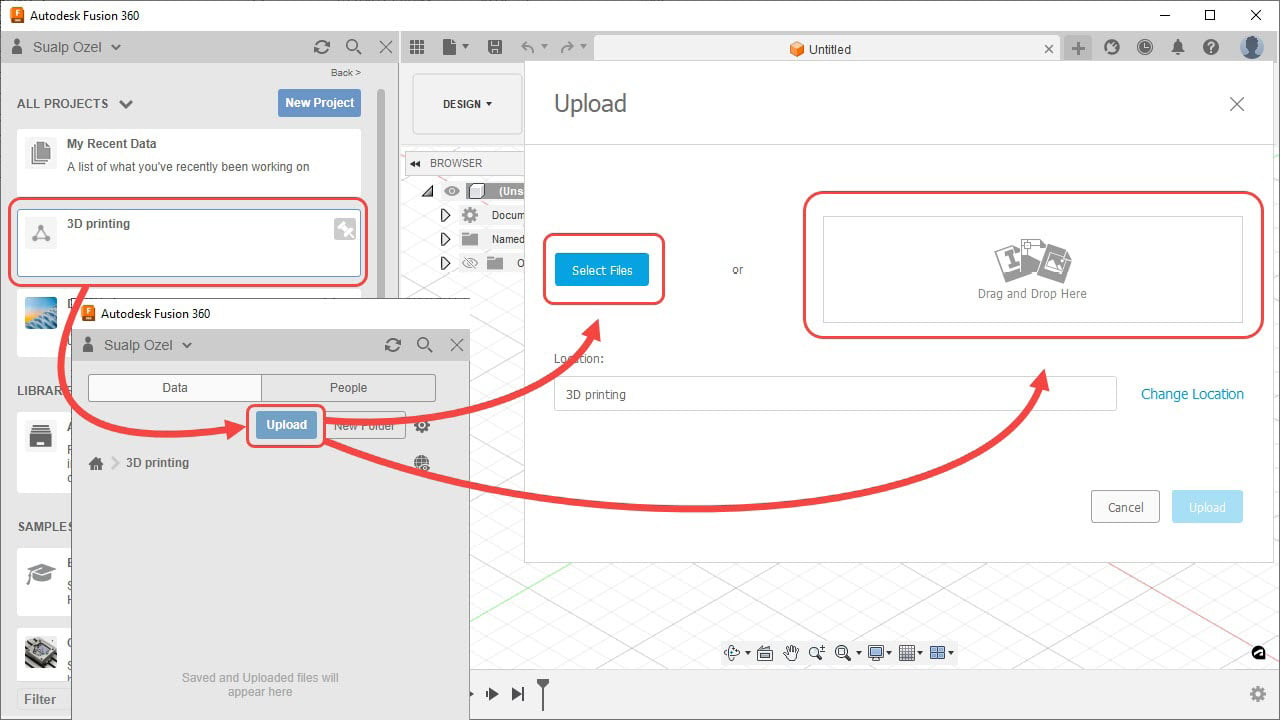
Figure 1.8 – Uploading multiple Mesh and CAD documents to Fusion using the Data Panel
This is a great option to upload multiple CAD models to Fusion. However, just like the previous option, you will have to turn on Capture Design History if you want to store your edits in the timeline, as shown in Figure 1.6. And just like the previous option, this method is not one I would recommend opening STL or OBJ files, as it does not give you initial control over units of part placement during the import process.
Another lesser known but rather useful option is based on the Fusion mobile app. If you have a mobile device, you can download the Fusion app from the relevant app store, and you can browse for and upload CAD or Mesh files stored on your phone or tablet, as shown in Figure 1.9:
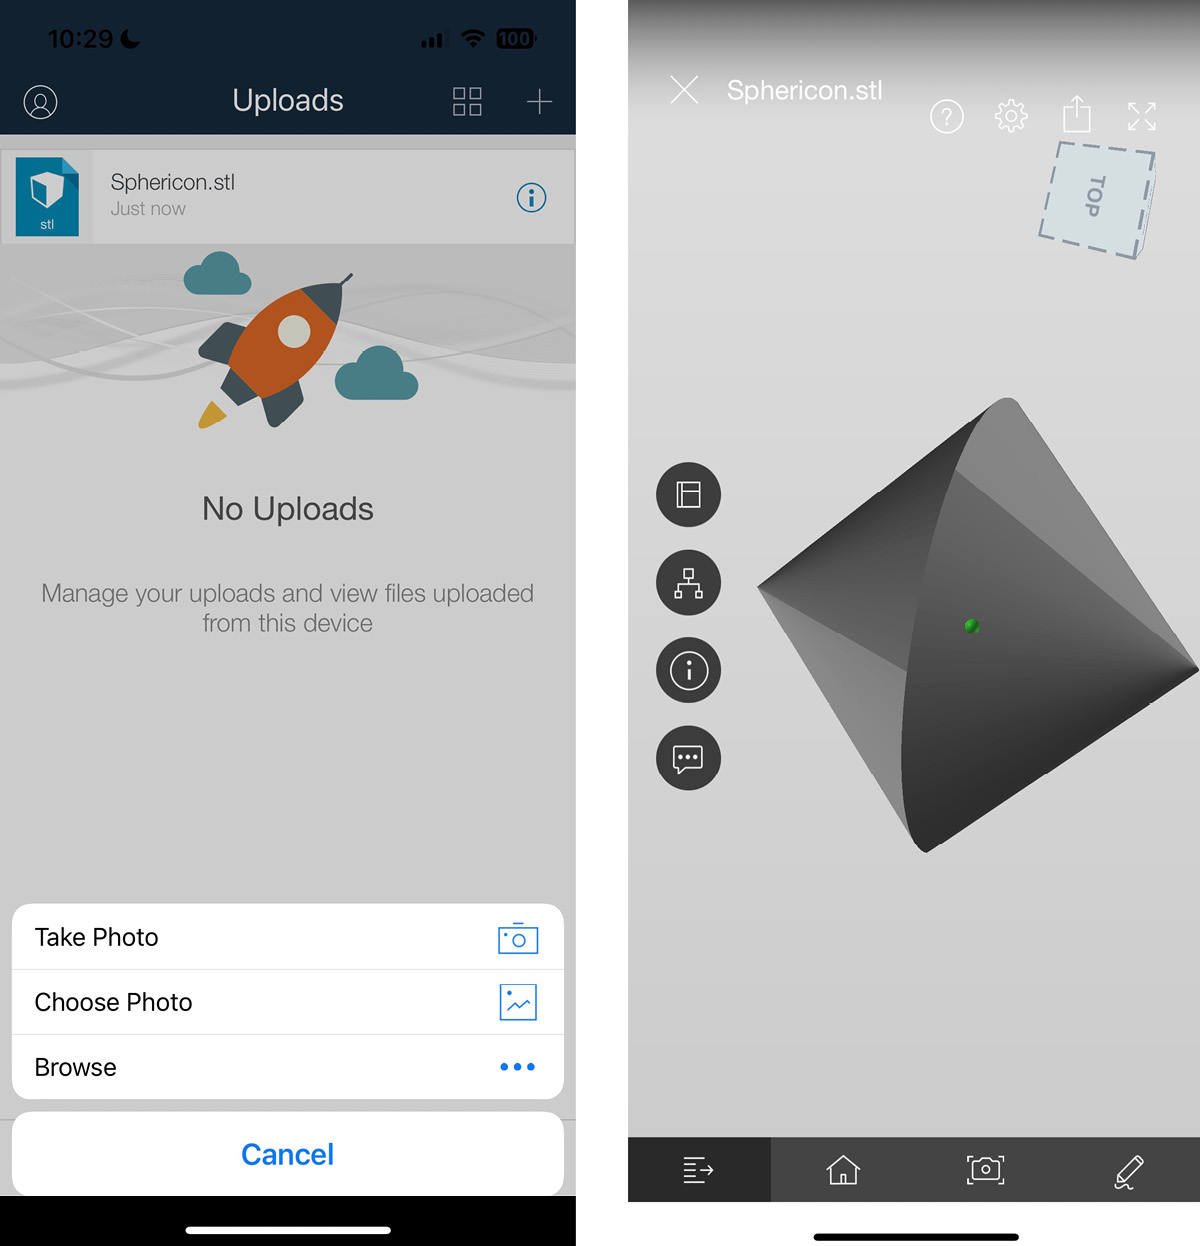
Figure 1.9 – A view on a mobile device after uploading an STL file to Fusion Team
This method is particularly useful if you do not have your computer available when you receive a CAD or mesh file. In such instances, you can quickly upload the design to your Fusion Team/project/folder so that you and your team members can start working on the design right away. Just like the previous methods, this method also requires that you manually turn on the Capture Design History within Fusion's browser if you want to store your edits in the timeline, as shown in Figure 1.6.
Important note
If you upload an STL/OBJ file to Fusion Team or the Fusion app, after opening it in Fusion, you will have to inspect the units and the position of the mesh body to make sure it matches the original design intent. Fusion uses centimeters as the default unit system when creating Fusion design documents from mesh file types with no units.
For example, imagine an STL file that represents a sphere with a diameter of 10 mm. As STL files do not contain unit data, if we use the upload workflow on this STL, as shown in Figure 1.8, to Fusion Team, the resulting Fusion design document will be a sphere with a diameter of 10 cm.
Now that we have learned about the various ways we can open and upload both CAD and mesh files, it’s time to start focusing on workflows specific to mesh bodies. In the next section, we will learn how to insert mesh files directly into our Fusion design documents.


