Once you have downloaded the Visual Studio 2017 installer, follow these steps to install the correct workload:
- Once you have run the installer, it will show you the following screen. Click on Continue:

- Wait for a few minutes to let the installer prepare itself for the installation process. A progress bar will show you the status of the current progress:

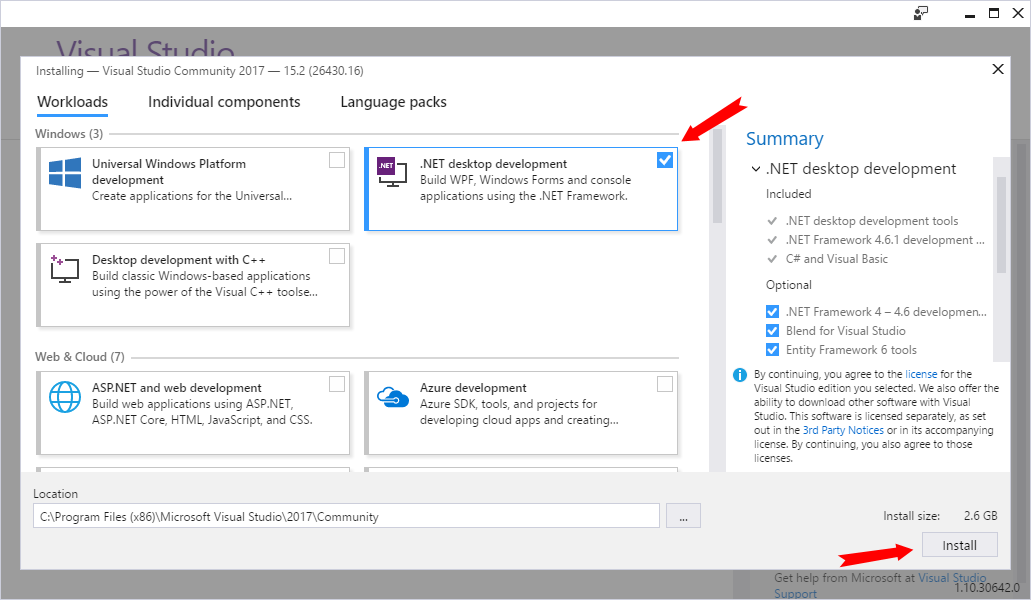
- Then the following screen will pop up, where it will ask you to select the workloads or components that you want to install:

- To build WPF applications targeting .NET Framework, select the .NET desktop development workload, as shown in the preceding screenshot.
- Click on the Install button to continue with the installation.
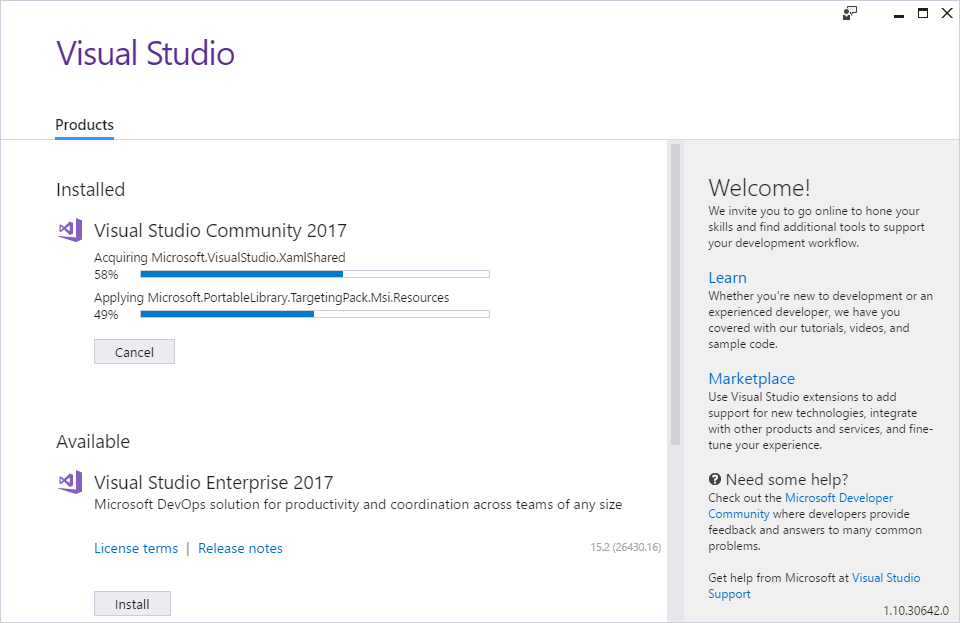
- The following screen will be displayed, showing the status of the installation. It will take some time, based on your internet bandwidth, as it's going to download the required components, based on your selection, from the Microsoft servers and install them one by one:

- Once the installation has completed, you may have to restart your system for the changes to take effect. In this case, a popup will appear on the screen, asking you to reboot your PC.
Once you have installed the .NET desktop development component and restarted your system, you are good to go with building your first WPF application.


