Adding a custom field to a model
Adding a custom field to an existing form is a common customization, and it can be done from the UI without the need to create a custom module.
For our to-do list app, we want to select a group of people that will be able to collaborate on to-do items. We will identify them by setting a flag on their partner form. To do that, we will add an Is Work Team? flag to the Contact model.
The Contact model is part of the Odoo core and is available even if you haven't installed any apps yet. However, you may not have a menu option available to visit it.
If the Contacts app is not available in the main menu, you should install it now. To do this, open the Apps item in the top menu, look up this application, and install it.
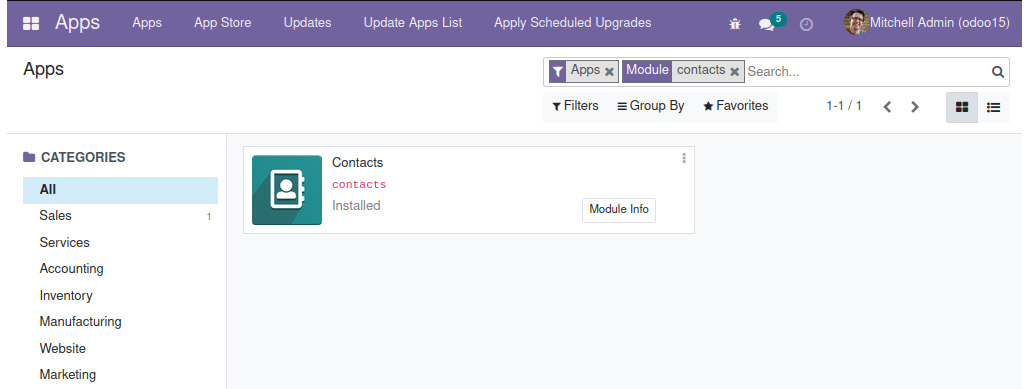
Figure 1.5 – The Contacts app listed in the Apps menu
Once the app is installed, the Contacts application top menu option will be available.
Adding a field to a model
We will start by adding a custom field to the data model.
To do this, click the Contacts app menu item to see the Contacts main view. Click the developer tools bug icon and select the View Fields option.
Changes in Odoo 12
The View Fields option in the developer menu was added in Odoo 12. For earlier versions, fields can be added and edited in the Settings | Technical | Database Structure menu. You can either use the Models or the Fields option.
Now, you will see a list with all the existing fields for the current model: Contact. Click the Create button in the top left and fill in the details for this new field:
- Field Name:
x_is_work_team - Field Label:
Is Work Team? - Field Type: boolean
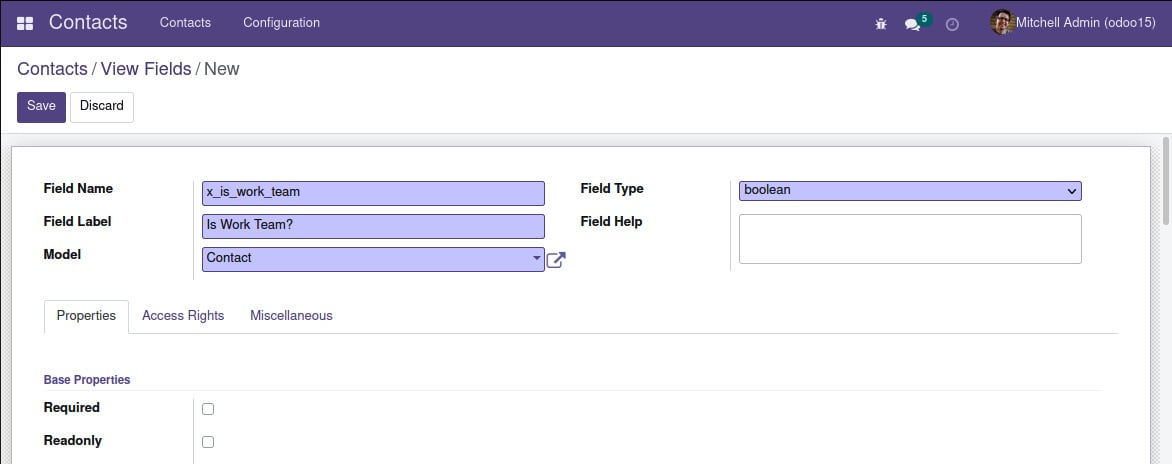
Figure 1.6 – Creating the Is Work Team? field
The Field Name field entry must start with the x_ prefix. This is mandatory for models and fields created from the developer tools. Customizations made through addon modules don't have this limitation.
Click Save, and our new field should have been added to the fields list. By default, the list view is limited to 80 records, so you will need to use the right arrow in the upper-left corner to navigate to the next page to see the new field, or you can edit the number of records to present next to the page navigation arrows.
Adding a field to a form view
Our new field is now available in the Contact model (as noted previously, this is also known as the Partner model). But it is not visible in the UI. It now needs to be given a view. We will add it to the contact's form view.
Go back to the Contacts list and open the form view, either by selecting one of the existing contacts or by clicking on the Create button.
We should now decide where in the form we want to add the field. For example, we could add it after the Tags field. This will be the extension point to use.
Hovering the mouse pointer over the field shows us useful technical details for it, as shown in the following screenshot:
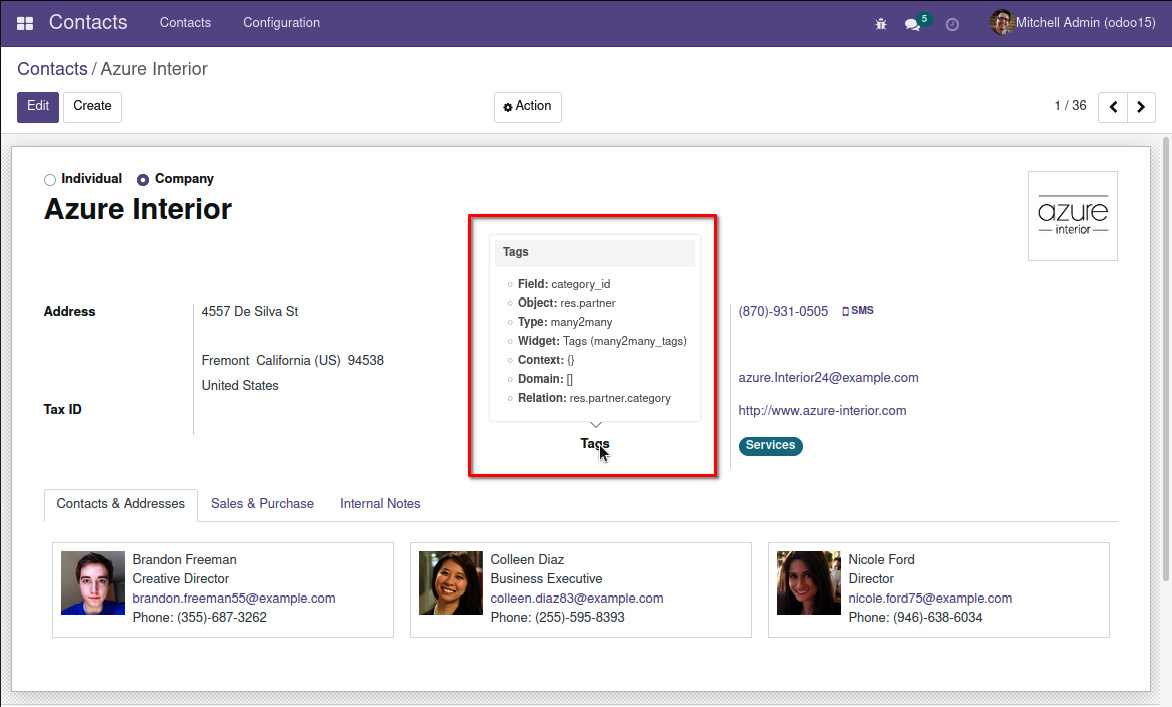
Figure 1.7 – The Tags field tooltip with technical details
Next, we need to find out the technical name of that field. We can find this by hovering the mouse pointer over the field's label. By doing so, we can see that the field name is category_id.
We can now extend the form view to add that field. Click the developer tools bug icon and select the Edit View: Form option. This will open a window with the form's definition.
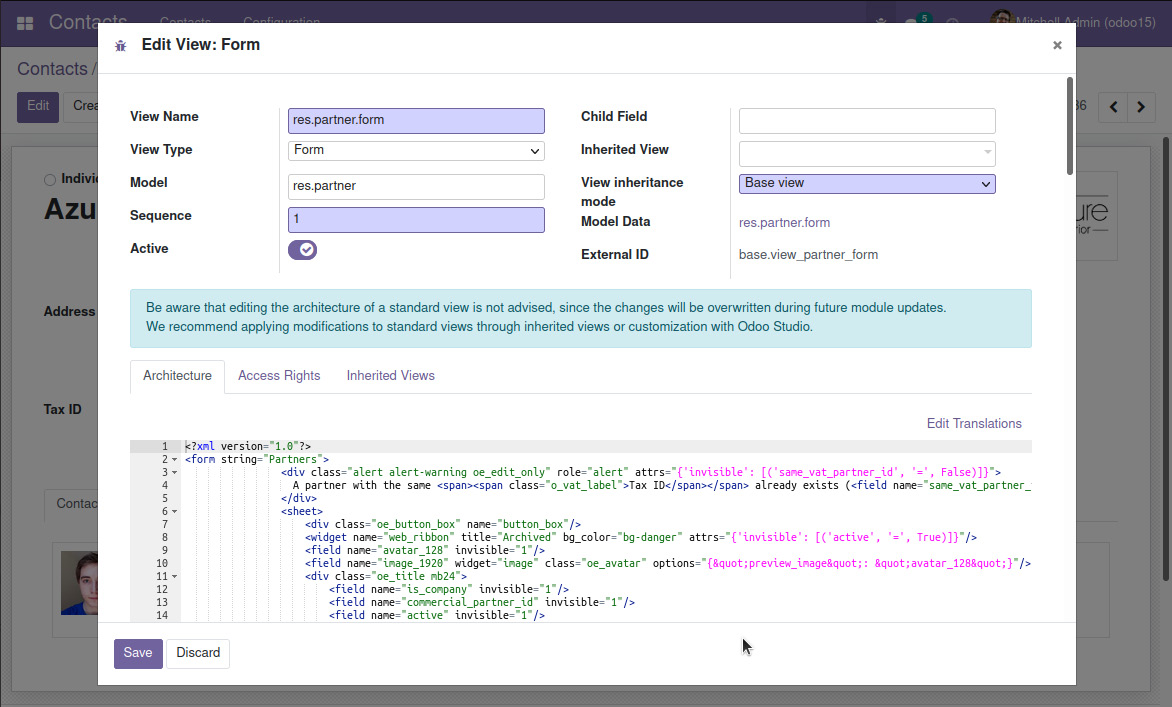
Figure 1.8 – The Edit View: Form window
In the Architecture tab, we can see the XML for the base view. We could edit this directly, but this is not a good idea because those changes will be lost in the case that the module adding it is upgraded. The correct way to edit it is by creating an extension view.
When additional modules are installed, they can add more fields and visual elements to the base view. This is done using extension views, and we can see them in the Inherited Views tab. This is where we will be adding our own extension to the contacts form view.
On the Inherited Views list, click Add a line at the bottom and create the extension view using these values:
- View Name: Add some short description such as
Contacts Form extensions for To-do App. - Architecture: This requires an XML fragment specifying an extension point and the content to add. Use
<field name="category_id" position="after"><field name="x_is_work_team"/></field>.
The extension view should look like the following figure:
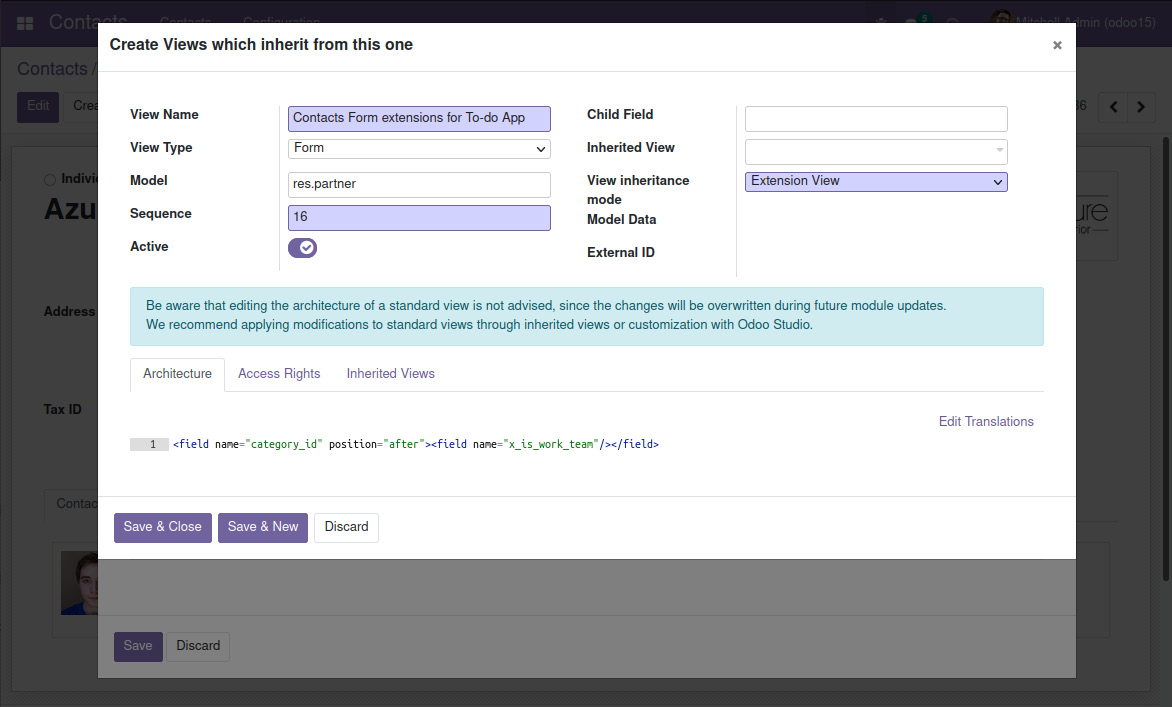
Figure 1.9 – Creating an extension view to add the category_id field
Now, click Save & Close – if your XML is correct, you get back to the Inherited Views list, where our extension will also be included. Click Save to finalize the form changes, and close the Edit Form: View window by clicking the x button in the top right.
The change is made, but the form needs to be reloaded for us to see it. Reload the page, and the Is Work Team? field should now be visible below the Tags field, as shown in the following figure:
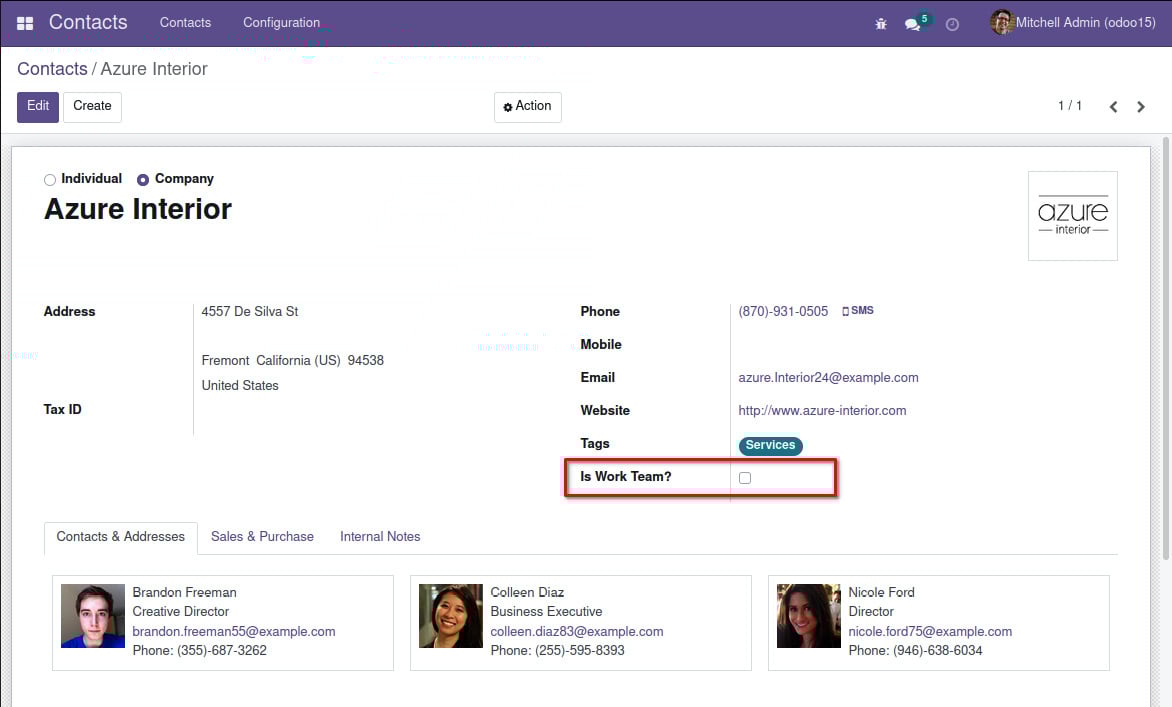
Figure 1.10 – The Contacts form view with the Is Work Team? field visible
This completes the steps needed to add a custom field to a form view. Forms are one of the view types available. The following section discusses view types in more detail.
Understanding view types
We just interacted with a particular view type, the form view. But the user interface also uses other view types.
The initial view type for Contacts is a kanban view, showing the records in data cards. Kanban views can also group the cards in columns. For example, the CRM app uses this in the initial view, the Pipeline view. In a kanban view, the developer menu will show an Edit View: Kanban option.
The list view (sometimes referred to as the tree view) displays the records as a list. In a list view, the developer menu will show an Edit View: List option.
Finally, the search view controls the behavior of the search box on the top-right of the kanban and list views, as well as the buttons under it: Filters and Group By. When a search box is visible, the developer menu will show an Edit View: ControlPanelView option.
The view types available are not limited to these; there are others available that will be explored in Chapter 10, Backend Views – Designing the User Interface.
We can see all the view definitions via the Settings | Technical | User Interface | Views menu option.
A more focused alternative is to use Settings | Technical | Database Structure | Models to find the model we want (in this case, res.partner, alternatively known as Contact), and open the Views tab.
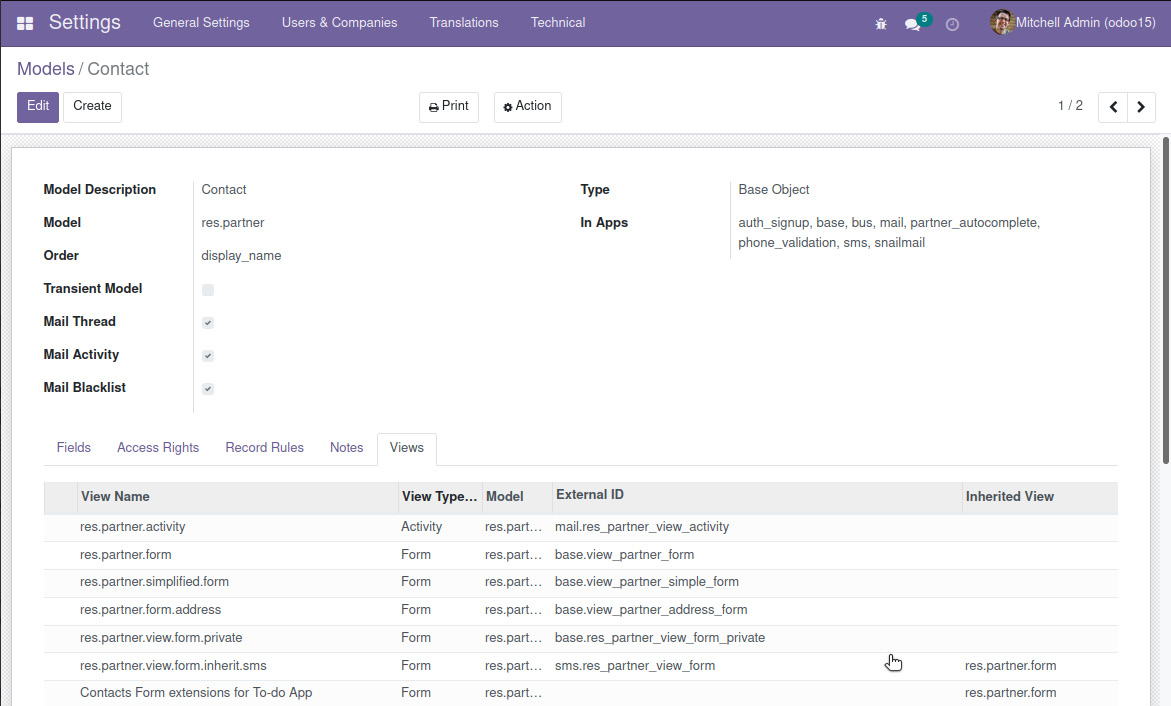
Figure 1.11 – The database structure for the Contact model
Here, we can see all the view definitions for the selected model. We can see records for the different view types – identified by the View Type column – and for base views and their extensions. Changing or adding view records is immediately effective, and the changes will be visible the next time the view is reloaded.
Sorting the list by view type is helpful to see all the extensions related to the same view type together.
The base view is the one with an empty Inherited View field. A view type is not limited to a single base view. For example, the Contact model (res.partner) has multiple base views available for the form view, such as base.view_partner_form and base.view_partner_simple_form.
Views also have a Sequence field. The base view with the lowest Sequence number is the one displayed by default. When visiting the form for the view definition, we will see a field with this Sequence value. Window actions, which are used in menu items, can specify a particular base view to use. As mentioned, if no specific view is defined, the one with the lowest sequence will be used.


