Defining the item forms and fields
We will start the defining process by reviewing the forms for each of your client’s critical item types – Inventory, Non-Inventory, Service, and Discount – and making sure they are set up to work as per the client’s requirements. (This can be done by going to Customization | Forms | Entry Forms.)
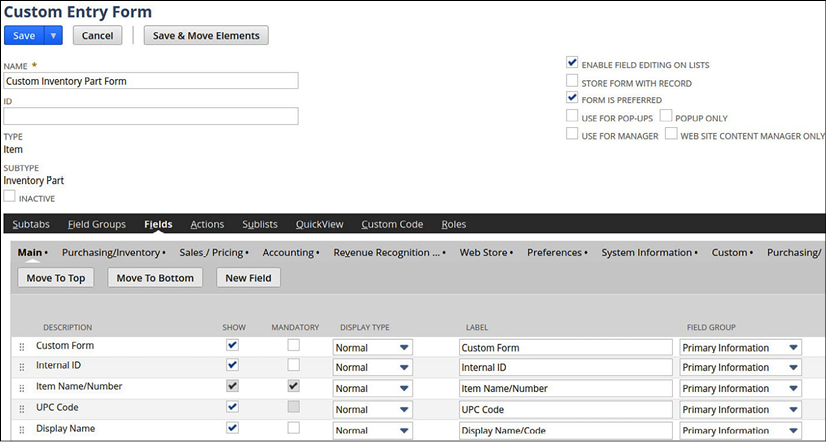
Here is what the default form screen looks like for Inventory Part items:

Figure 11.2 – The default inventory item form with the fields list
As I have mentioned in prior chapters, take this time to remove anything the users do not need to see while you are doing this. Create a copy of each of the standard forms with a name, including the client’s initials, and save each item type form. Some clients will need multiple forms for one type, such as for Inventory or Assembly Items. We always try to stick to just one form per item type, but special circumstances drive us to solutions like this sometimes...


