Chapter 6. Keeping States with Sessions
We already used Meteor's session object when we implemented our lazy load technique in an earlier chapter. In this chapter, we want to take a deeper look at it and learn how it can be used to create template-specific reactive functions.
In this chapter, we will cover the following topics:
- What sessions are
- How hot code pushes affect sessions
- Rerunning template helpers using sessions
- Rerunning functions
- Creating template-specific reactive functions
Note
If you've jumped right into the chapter and want to follow the examples, download the previous chapter's code examples from either the book's web page at https://www.packtpub.com/books/content/support/17713 or from the GitHub repository at https://github.com/frozeman/book-building-single-page-web-apps-with-meteor/tree/chapter5.
These code examples will also contain all the style files, so we don't have to worry about adding CSS code along the way.
Meteor's session object
The
Session object provided by Meteor is a reactive data source and serves mainly to preserve global states throughout hot code reloads, though it won't preserve its data when the page is manually reloaded, making it different from PHP sessions.
Note
A hot code reload happens when we upload new code and the server pushes those updates to all clients.
The
Session object is a reactive data source. This means wherever this session variable is used in a reactive function, it will rerun that function when its value changes.
One use of the session variable can be to maintain global states of our app, for example, to check whether the user has their sidebar visible or not.
The session object is not useful for simple data communication between templates and other parts of the app, as maintaining this would quickly become a nightmare and naming collisions could occur.
A better way for simple reactivity
If we wanted to use something for intra-app communication, it's better to use Meteors reactive-var package, which comes with a Session like ReactiveVar object.
To use it, we can simply add it using $ meteor add reactive-var.
This object then needs to be instantiated and comes with a reactive get() and set() function like the session object:
Var myReactiveVar = new ReactiveVar('my initial value');

// now we can get it in any reactive function
myReactiveVar.get();

// and set it, to rerun depending functions
myReactiveVar.set('my new value');
For more custom reactivity, we can build our own custom reactive object using Meteor's Tracker package. To read more about this, refer to Chapter 9, Advanced Reactivity.
Tip
For reactive variables that are tied to a specific template instance, check out my frozeman:template-var package at https://atmospherejs.com/frozeman/template-var.
Using sessions in template helpers
As all template helper functions are reactive functions, a good place to use a session object is inside such a helper.
Reactive means that when we use a reactive object inside this function, that function will rerun when the reactive object changes, additionally rerendering this part of the template.
Note
Template helpers are not the only reactive functions; we can also create our own using Tracker.autorun(function(){…}), as we saw in earlier chapters.
To demonstrate the usage of sessions in a template helper, perform the following steps:
- Let's open our
my-meteor-blog/client/templates/home.jsfile and add the following helper code anywhere in the file:Template.home.helpers({ //... sessionExample: function(){ return Session.get('mySessionExample'); } });This creates the
sessionExamplehelper, which returns the value of themySessionExamplesession variable. - Next, we need to add this helper to our home template itself by opening the my-meteor-blog/client/templates/home.html file and adding the helper above our {{#each postsList}} block helper:
<h2>This comes from our Session: <strong>{{sessionExample}}</strong></h2> - Now, let's open up our browser at
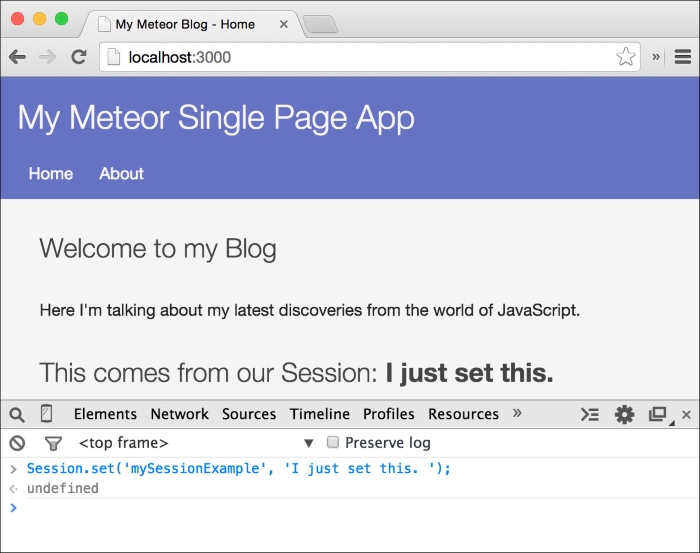
http://localhost:3000. We will see the static text we add appearing in our blog's home page. Yet, to see Meteor's reactive session at work, we need to open up the browser's console and type the following line of code:Session.set('mySessionExample', 'I just set this.');This is illustrated in the following screenshot:

Immediately after we pressed Enter, we saw the text added to our template. This is because when we call Session.set('mySessionExample', ...), Meteor will rerun every reactive function wherein we called Session.get('mySessionExample') before. For template helpers, this will rerun only this specific template helper, rerendering only this part of the template.
We can try this by setting different values for the mySessionExample session variable so that we can see how the text will change at all times.
Session and hot code pushes
A hot code push is when we change files and the Meteor server pushes these changes to the clients. Meteor is smart enough to reload the page, without losing the values of HTML forms or sessions. Therefore, sessions can be used to keep user states consistent over hot code pushes.
In order to see this, we set the value of mySessionExample to anything we want and see the website updating to this value.
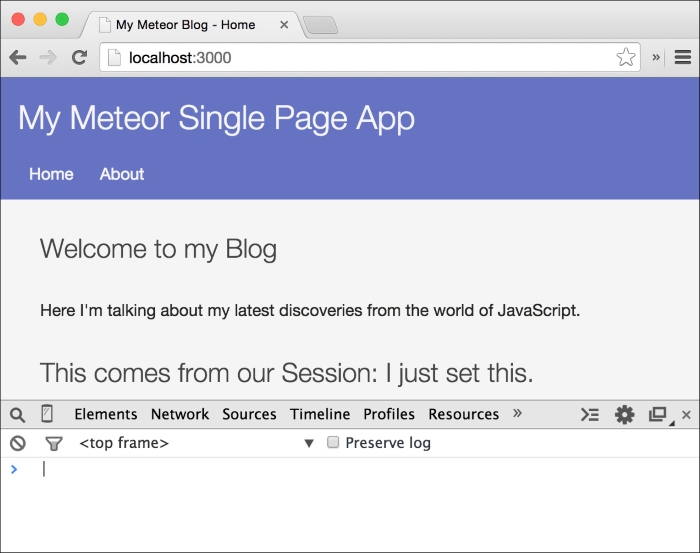
When we now go to our home.html file and make a minor change, for example, removing <strong> around the {{sessionExample}} helper and saving the file, we see that our sessions state is kept, even though the page reloads with the new changed template. This is demonstrated in the following screenshot:

Note
If we manually reload the page using the browser's refresh button, the session will not be able to persist the change and the text will disappear.
To overcome this limitation, there are many packages in Meteor's package repository that reactively store data in the browser's local storage to persist across page reloads. One of them is called
persistent-session and can be found at http://atmospherejs.com/package/persistent-session.
Session and hot code pushes
A hot code push is when we change files and the Meteor server pushes these changes to the clients. Meteor is smart enough to reload the page, without losing the values of HTML forms or sessions. Therefore, sessions can be used to keep user states consistent over hot code pushes.
In order to see this, we set the value of mySessionExample to anything we want and see the website updating to this value.
When we now go to our home.html file and make a minor change, for example, removing <strong> around the {{sessionExample}} helper and saving the file, we see that our sessions state is kept, even though the page reloads with the new changed template. This is demonstrated in the following screenshot:

Note
If we manually reload the page using the browser's refresh button, the session will not be able to persist the change and the text will disappear.
To overcome this limitation, there are many packages in Meteor's package repository that reactively store data in the browser's local storage to persist across page reloads. One of them is called
persistent-session and can be found at http://atmospherejs.com/package/persistent-session.
Rerunning functions reactively
To rerun functions based on session changes, Meteor provides the Tracker.autorun() function, which we used before to change the lazy load subscription.
The Tracker.autorun() function will make every function we pass to it reactive. To see a simple example, we will create a function that will alert a text every time the function reruns.
Note
The Tracker package is what the session uses under the hood to make the reactivity work. In Chapter 9, Advanced Reactivity, we will take a deeper look at this package.
Perform the following steps to rerun functions reactively:
- Let's create a new file called
main.js, but this time in the root of themy-meteor-blogfolder, with the following content:if(Meteor.isClient) { Tracker.autorun(function(){ var example = Session.get('mySessionExample'); alert(example); }); }Note
We will need the
main.jsfile in later chapters. Therefore, we created it in the root folder, making it accessible on the client and the server.However, as Meteor's session object is only available on the client, we will use the
if(Meteor.isClient)condition in order to execute the code only on the client.When we now check out our browser, we will see an alert that displays
undefined. This is because the function passed toTracker.autorun()will also run when the code is executed, at a time when we haven't set our session. - To set a session variable's default value, we can use
Session.setDefault('mySessionExample', 'My Text'). This will set the session without running any reactive functions, when the value of the session is undefined. If the value of the session variable was already set,setDefaultwon't change the variables at all. - In our example, we probably don't want an alert window to appear when the page is loaded. To prevent this first run, we can use the
Tracker.Computationobject, which is passed as the first argument to our function and which provides us with a property calledfirstRun. This property will be set totrueat the first run of the function. When we use this, we can prevent the display of the alert at the start:Tracker.autorun(function(c){ var example = Session.get('mySessionExample'); if(!c.firstRun) { alert(example); } }); - Now let's go to the browser's console and set the session to any value to see the alert appear:
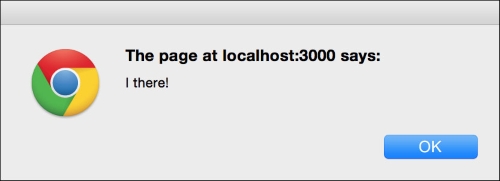
Session.set('mySessionExample','Hi there!');
The output of this code is demonstrated in the following screenshot:

Note
When we run the same command again, we will not see the alert window show up, as Meteor is smart enough to prevent reruns when the session's value doesn't change. If we set it to another value, the alert will appear again.
Stopping reactive functions
The
Tracker.Computation object, passed as the first argument, also gives us a way to stop the function from being reactive at all. To try this, we will change the function so that it stops its reactivity when we pass the stop string to the session:
Tracker.autorun(function(c){
    var example = Session.get('mySessionExample');

    if(!c.firstRun) {
        if(Session.equals('mySessionExample', 'stop')) {
            alert('We stopped our reactive Function');
            c.stop();
        } else {
            alert(example);
        }
    }
});
Now, when we go to our browser's console and run Session.set('mySessionExample', 'stop'), the reactive function will stop being reactive. To test this, we can try to run Session.set('mySessionExample', 'Another text') and we will see that the alert window won't appear.
Note
If we make a code change and a hot code reload happens, the reactive function will become reactive again, as the code was executed again.
The preceding example also uses a function called Session.equals(). This function can compare two scalar values while preventing unnecessary recomputations, compared to using Session.get('mySessionExample) === 'stop'. Using Session.equals() would only rerun this function when the session variable changes to or from that value.
Note
In our example, however, this function doesn't make a difference, as we called Session.get() before as well.
Using autorun in a template
Although it could be useful to use Tracker.autorun() globally in our app in some cases, it can become quickly hard to maintain those global reactive functions as our app grows.
Therefore, it is good practice to bind reactive functions to the templates for which they perform actions.
Luckily, Meteor offers a special version of Tracker.autorun() that is tied to a template instance and stops automatically when the template gets destroyed.
To make use of this, we can start the reactive function in the created() or rendered callback. To start, let's comment out our previous example from the main.js file so that we won't get two alert windows.
Open our home.js file and add the following lines of code:
Template.home.created = function(){

    this.autorun(function(){
        alert(Session.get('mySessionExample'));
    });
};
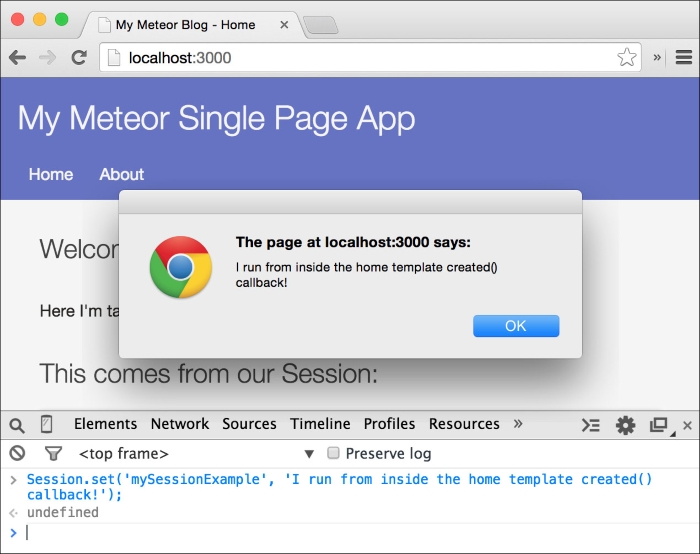
This will create the reactive function when the home template is created. When we go to the browser's console and set the mySessionExample session to a new value, we will see the alert window appear, as shown in the following screenshot:

Now, when we switch the templates by clicking on the About link in the menu and we set the mySessionExample session variable again to another value using the browsers console, we won't see the alert window appear as the reactive this.autorun() was stopped when the template was destroyed.
Note
Note that all Tracker.autorun() functions return a Tracker.Computation object, which can be used to stop the reactivity of the autorun at any time using Tracker.Computation.stop():
Var myReactiveFunction = Tracker.autorun(function(){...});
// Do something which needs to stop the autorun
myReactiveFunction.stop();
The reactive session object
We've seen that the session object can rerun a function when its value is changed. This is the same behavior as that of the find() and findOne() functions of collections, which will rerun functions when the underlying data in the collection changes.
We can use sessions to keep user states across hot code pushes, such as states of drop-down menus or pop-ups. However, keep in mind that without a clear naming convention, these session variables can soon become hard to maintain.
For more specific reactive behavior, it is good to build a custom reactive object using Meteor's Tracker core package, which we will cover in Chapter 9, Advanced Reactivity.
Summary
In this chapter, we learned what we can do with Meteor's reactive session object. We used it to rerun template helpers and our own custom functions, and we made a reactive function template specific using the created() and destroyed() callbacks.
To dig deeper, take a look at Meteor's documentation about sessions and reactivity at the following resources:
You can find this chapter's code examples at https://www.packtpub.com/books/content/support/17713 or on GitHub at https://github.com/frozeman/book-building-single-page-web-apps-with-meteor/tree/chapter6.
In the next chapter, we will create the admin user and backend for our blog, laying down the foundation to create and edit posts.


