Search icon CANCEL
Subscription
0
Cart icon
Your Cart (0 item)
Close icon
You have no products in your basket yet
Arrow left icon
Explore Products
Best Sellers
New Releases
Books
Videos
Audiobooks
Learning Hub
Free Learning
Arrow right icon
Arrow up icon
GO TO TOP
Learn Three.js

You're reading from   Learn Three.js Program 3D animations and visualizations for the web with JavaScript and WebGL

Arrow left icon
Product type Paperback
Published in Feb 2023
Publisher Packt
ISBN-13 9781803233871
Length 554 pages
Edition 4th Edition
Languages
Arrow right icon
Author (1):
Arrow left icon
Jos Dirksen Jos Dirksen
Author Profile Icon Jos Dirksen
Jos Dirksen
Arrow right icon
View More author details
Toc

Table of Contents (21) Chapters Close

Preface 1. Part 1: Getting Up and Running
2. Chapter 1: Creating Your First 3D Scene with Three.js FREE CHAPTER 3. Chapter 2: The Basic Components that Make up a Three.js Application 4. Chapter 3: Working with Light Sources in Three.js 5. Part 2: Working with the Three.js Core Components
6. Chapter 4: Working with Three.js Materials 7. Chapter 5: Learning to Work with Geometries 8. Chapter 6: Exploring Advanced Geometries 9. Chapter 7: Points and Sprites 10. Part 3: Particle Clouds, Loading and Animating Models
11. Chapter 8: Creating and Loading Advanced Meshes and Geometries 12. Chapter 9: Animation and Moving the Camera 13. Chapter 10: Loading and Working with Textures 14. Part 4: Post-Processing, Physics, and Sounds
15. Chapter 11: Render Postprocessing 16. Chapter 12: Adding Physics and Sounds to Your Scene 17. Chapter 13: Working with Blender and Three.js 18. Chapter 14: Three.js Together with React, TypeScript, and Web-XR 19. Index 20. Other Books You May Enjoy

Custom UV modeling in Blender

In this section, we’re going to start with a new empty Blender scene, and we’ll use the default cube to experiment with. To get a good overview of how UV mapping works, you can use something called a UV grid, which looks something like this:
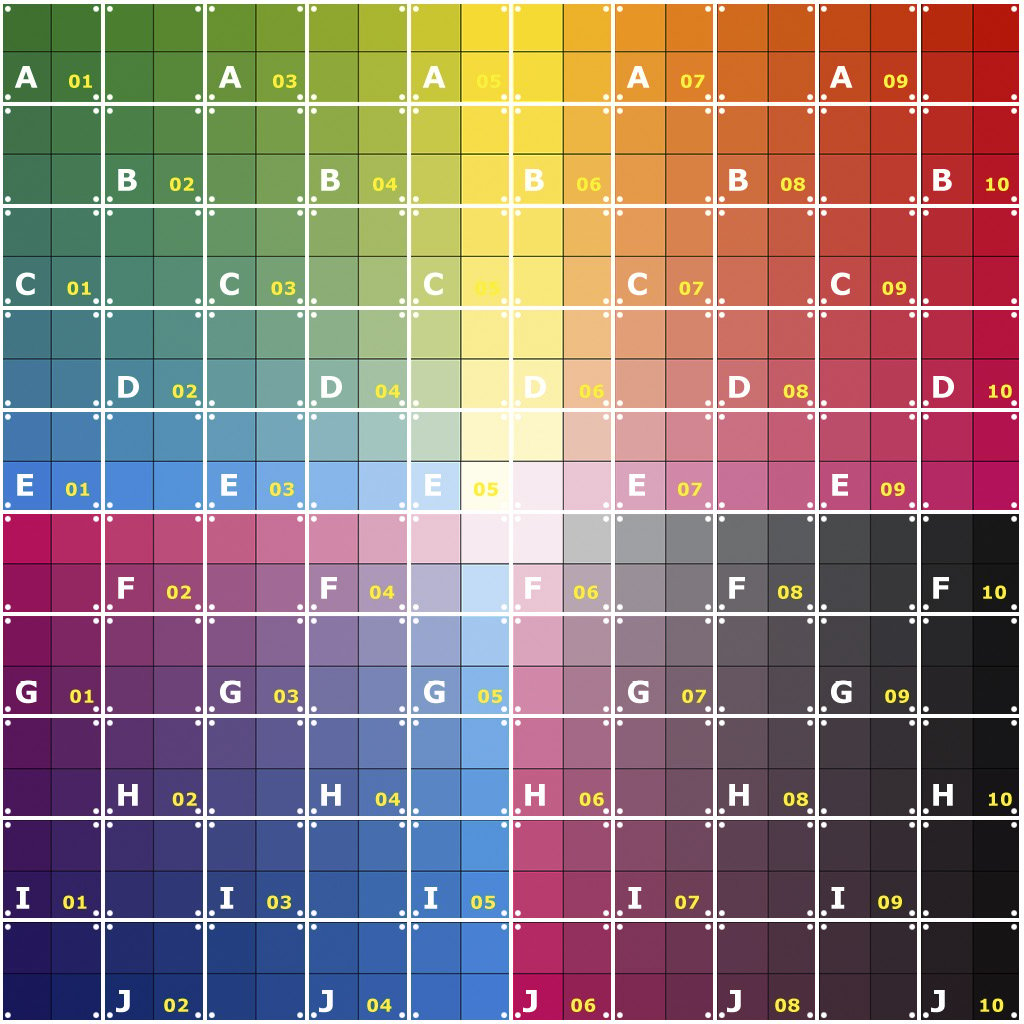
Figure 13.35 – A sample UV texture

Figure 13.35 – A sample UV texture

When you apply this as the texture of the default cube, you’ll see how the various vertices of a mesh map to a specific location on the texture. To use this, the first thing we need to do is define this texture. You can easily do this from Material Properties in the Properties view on the right of the screen. Click on the yellow dot before the Base Color property and select Image Texture. This allows you to browse for an image to use as texture:
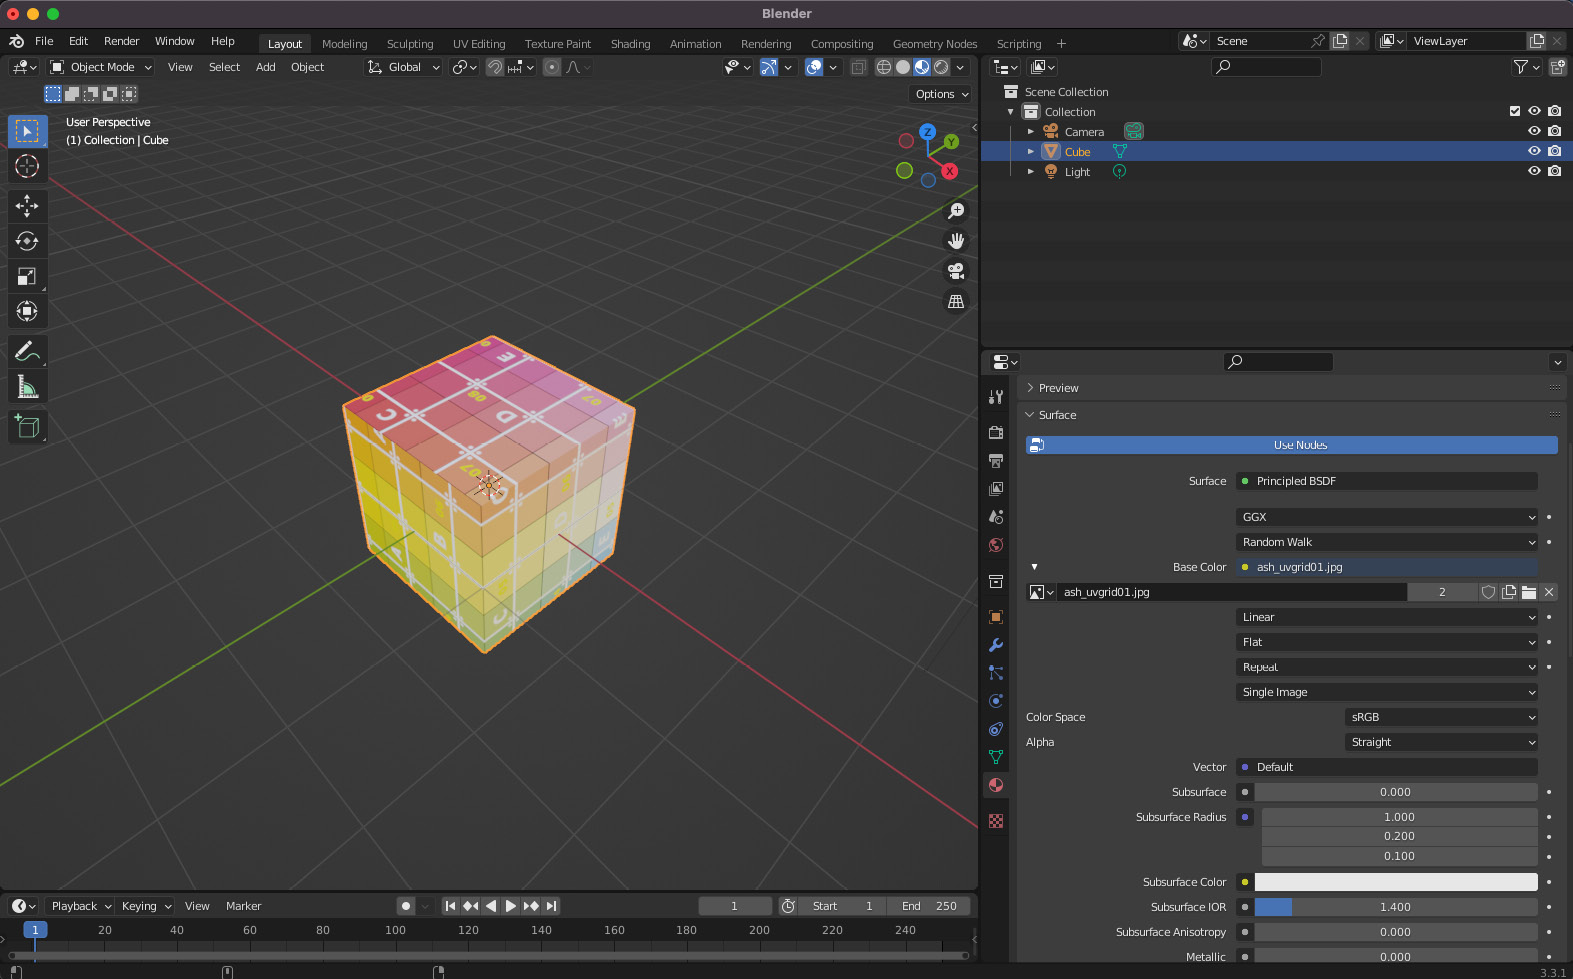
Figure 13.36 – Adding a texture to a mesh in Blender

Figure 13.36 – Adding a texture to a mesh in Blender

You can already see in the main viewport how this texture is applied to the cube. If we export...

lock icon The rest of the chapter is locked
Register for a free Packt account to unlock a world of extra content!
A free Packt account unlocks extra newsletters, articles, discounted offers, and much more. Start advancing your knowledge today.
Unlock this book and the full library FREE for 7 days
Get unlimited access to 7000+ expert-authored eBooks and videos courses covering every tech area you can think of
Renews at $19.99/month. Cancel anytime
Banner background image