The Blueprint Class Editor interface
The Blueprint Class Editor contains several panels. Each panel is used to edit one aspect of a Blueprint. The Blueprint Class Editor is usually simply called the Blueprint Editor. The main panels of the Blueprint Editor are listed as follows:
- Toolbar
- Components
- My Blueprint
- Details
- Viewport
- Event Graph
These panels can be found in the next screenshot. We will use the BP_ThirdPersonCharacter Blueprint of the Third Person template as an example. It is located in the ThirdPerson/Blueprints folder. Double-click the BP_ThirdPersonCharacter Blueprint to open the Blueprint Class Editor.
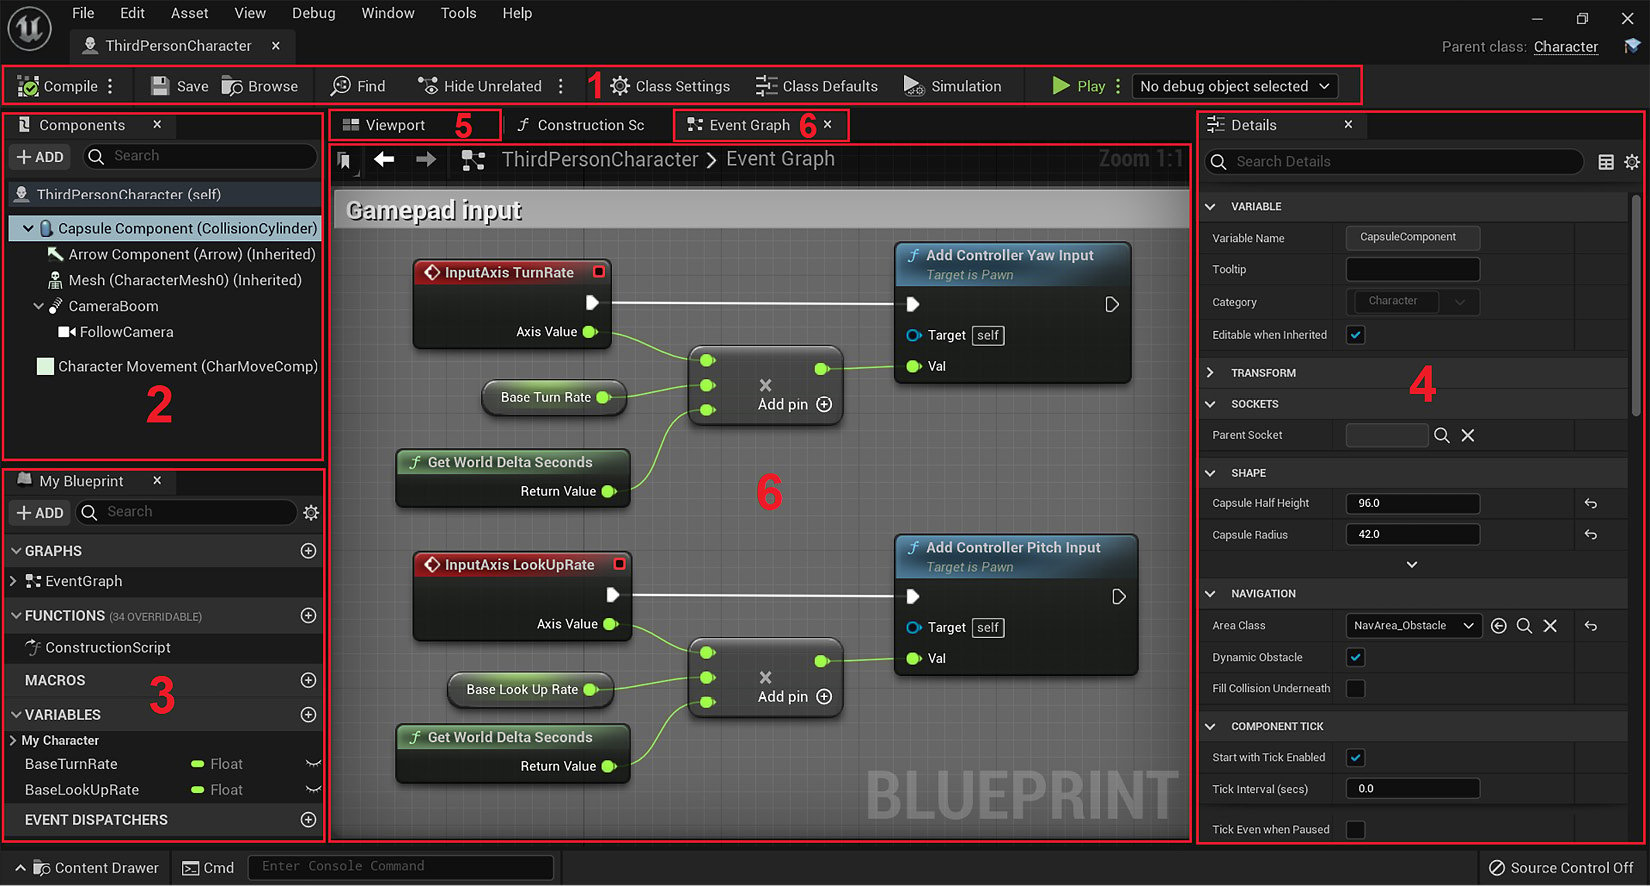
Figure 1.8 – Blueprint Editor panels
The Toolbar panel
The Toolbar panel is located at the top of the Blueprint Class Editor and contains some essential buttons for editing Blueprints:

Figure 1.9 – Toolbar panel
The buttons are described as follows:
- Compile: Converts the Blueprint script into a lower-level format that can be executed. That means a Blueprint must be compiled before running the game or the changes made will not be reflected. Click this button to compile the current Blueprint. A green check icon will appear if there is no error.
- Save: Saves all changes made to the current Blueprint.
- Browse: Shows the current Blueprint Class in the Content Browser.
- Find: Searches within a Blueprint.
- Hide Unrelated: When active, it hides the nodes unrelated to the selected nodes.
- Class Settings: Allows editing of the settings for the class in the Details panel. The Class Settings options contain properties such as Description, Category, and Parent Class.
- Class Defaults: Allows editing of the Class Defaults in the Details panel. Class Defaults are the initial values of the Blueprint variables.
- Simulation: Allows the execution of the Blueprint inside the Blueprint Editor.
- Play: Allows you to play the current Level.
- Debug Object: This dropdown allows the selection of an object to debug. If none is selected, it will debug any object created with the current Blueprint Class.
The Components panel
The Components panel shows all the Components that are part of the current Blueprint.
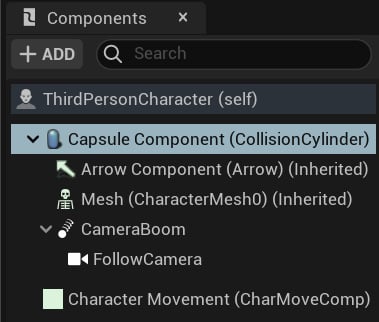
Figure 1.10 – Components panel
Components are ready-to-use objects that can be added to Blueprints. To do this, click on the Add button of the Components panel. A Blueprint can be created with various features just by using Components.
The properties of a selected Component can be edited on the Details panel and the visual representation of some Components can be seen on the Viewport panel.
Static Meshes, lights, sounds, box collisions, particle systems, and cameras are examples of Components found in the Components panel.
The My Blueprint panel
My Blueprint is a panel where we can create Variables, Macros, Functions, and Graphs for the Blueprint:
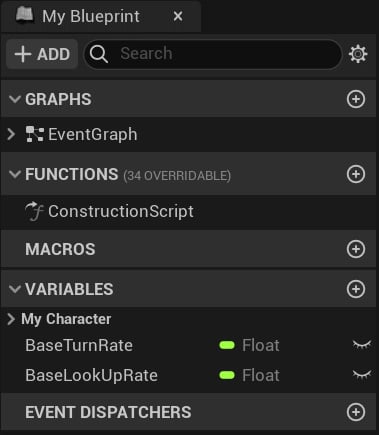
Figure 1.11 – My Blueprint panel
New elements can be added by clicking on the Add button at the top of the panel, or the + button next to each category.
The properties of a selected element can be edited in the Details panel.
The Details panel
The Details panel allows you to edit the properties of a selected element of a Blueprint. The selected element can be a Component, Variable, Macro, or Function element. The properties shown in the Details panel are organized into categories.
The next screenshot shows the properties of a CapsuleComponent. There is a Search box at the top of the panel that can be used to filter the properties.
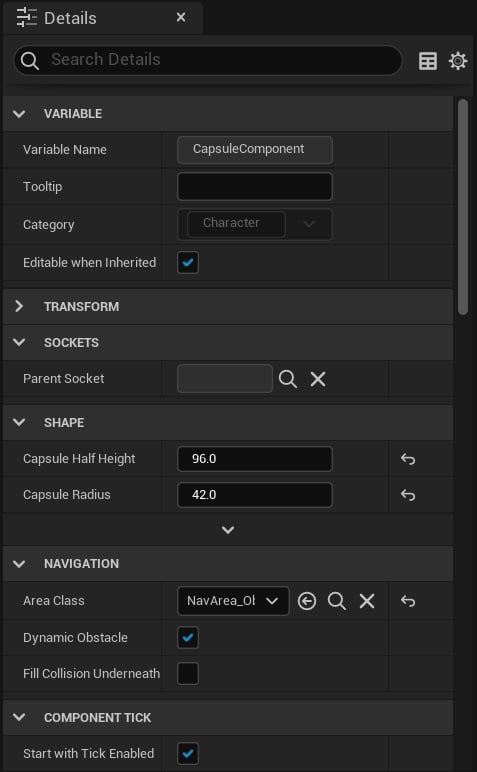
Figure 1.12 – Details panel
The Viewport panel
The Viewport panel shows the visual representation of a Blueprint and its Components. The Viewport panel has controls similar to the Level Editor, which you can use to manipulate the location, rotation, and scale of the Components.
The following screenshot shows the Viewport panel. There is a SkeletalMesh Component that represents the player, a Camera Component that defines the view of the player, and a Capsule Component used for collision detection.
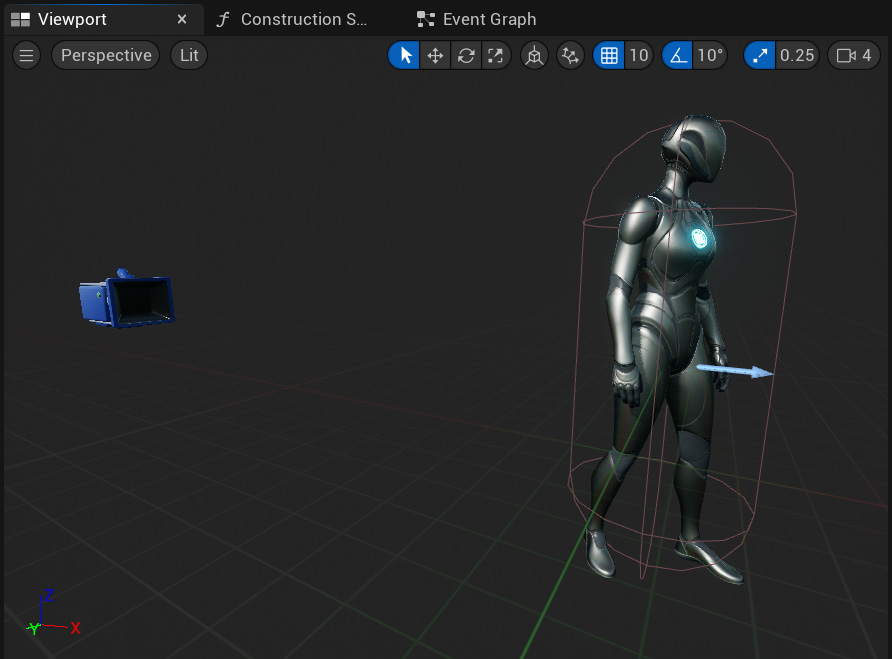
Figure 1.13 – Viewport panel
The Event Graph panel
It is in the Event Graph panel that we are going to program the behavior of a Blueprint. The Event Graph contains Events and Actions that are represented by nodes and connected by wires.
An Event is represented by a red node and is triggered by gameplay Events. A Blueprint can have several Actions that will be performed in response to an Event. The next screenshot shows two Events: InputAxis TurnRate and InputAxis LookUpRate:
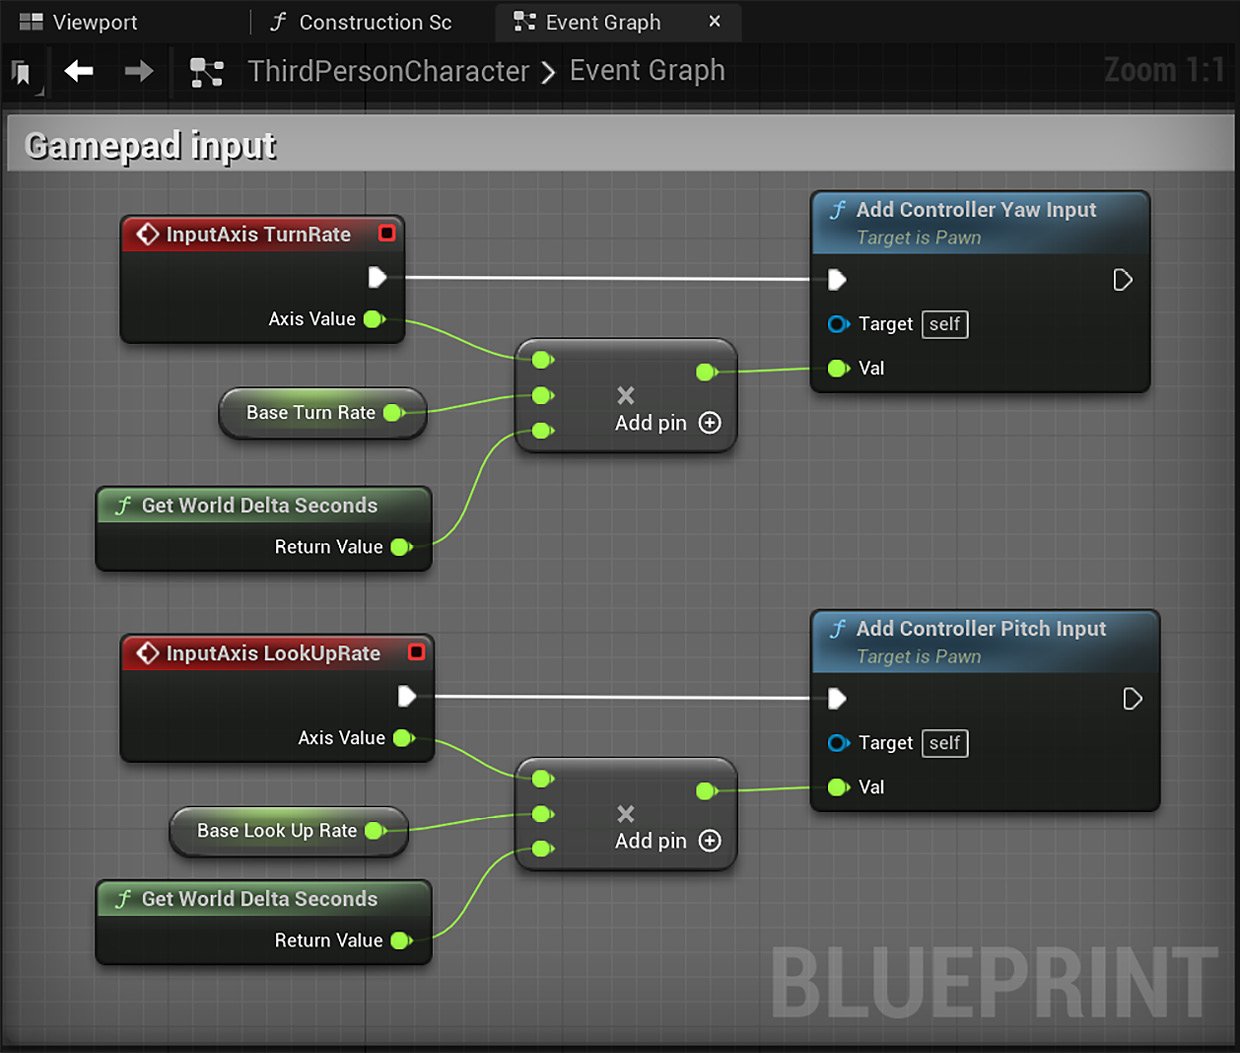
Figure 1.14 – Event Graph panel
You can move around the Event Graph by right-clicking and dragging it to see the other Events.
The other nodes are Actions representing functions, operators, and variables. We will learn about these elements in Chapter 2, Programming with Blueprints.
After this overview of the Blueprint Editor panels, we are now able to create our first Blueprint. Close the Blueprint Class Editor and navigate back to the Level Editor.


