Essential development tools for microcontrollers
In this section, we will explore the essential tools that form the backbone of our development process. Understanding these tools is important, as they will be our companions in transforming ideas into functioning firmware.
When selecting tools for firmware development, we have two primary options.
- IDEs: An IDE is a unified software application offering a Graphical User Interface (GUI) tailored to crafting software – in our context, firmware. Popular IDEs for microcontroller firmware development include the following:
- Keil uVision (also known as Keil MDK): Developed by ARM Holdings
- STM32CubeIDE: Developed by STMicroelectronics
- IAR Embedded Workbench: Developed by IAR Systems
These IDEs boast a GUI-centric design, enabling users to conveniently create new files, build, compile, and step through code lines interactively. For the demonstrations and exercises in this book, we’ll use the STM32CubeIDE. It has all the requisite features and is generously available for free, without any code size constraints.
- Toolchains: At its core, a toolchain is a cohesive set of development tools, sequenced in distinct stages, to produce the final firmware build for the target microcontroller. This approach bypasses the comfort of a GUI. Instead, firmware is written using basic text editors such as Notepad or Notepad++, with the command line used to execute the various phases of the build process –commands such as
assemble,compile, andlinkare often used. In this book, we’ll use the open source GNU Arm Embedded Toolchain. Based on the renowned open source GNU Compiler Collection (GCC), this integrates a GCC compiler tailored for ARM, the GNU Debugger (GDB) debugger, and several other invaluable utilities.
In the following section, we will carefully go through the process of setting up our preferred IDE, the STM32CubeIDE.
Setting up the STM32CubeIDE
Throughout this book, we’ll use both the STM32CubeIDE and the GNU Arm Embedded Toolchain to develop our firmware. Leveraging an IDE such as STM32CubeIDE enables us to easily analyze and compare the linker script and startup files, autogenerated by the IDE, against those we’ll construct from the ground up.
Let’s start by downloading and installing STM32CubeIDE:
- Launch your web browser and navigate to st.com.
- Click on STM32 Developer Zone, and then select STM32CubeIDE.
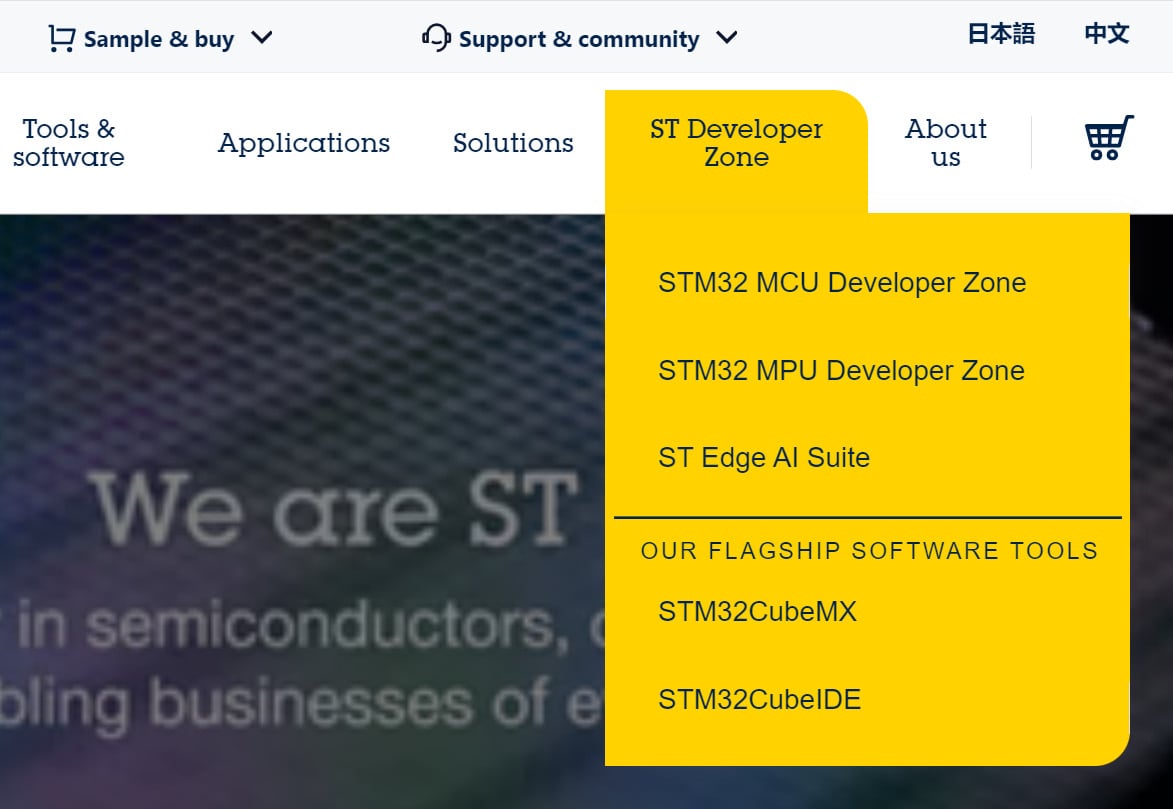
Figure 1.1: The home page of st.com
- Scroll down to the All software versions section of the page and click on Download Software. You’ll need to log into your ST account before proceeding with the download.

Figure 1.2: The All software versions section of the stm32cubeide page
- If you don’t have an account, click on Login/Register to sign up. If you already have one, simply log in.
- Complete the registration form with your first name, last name, and email address.
- Click on Download to start the download process. A
.zipfile will be downloaded into yourDownloadsfolder.
Let’s install the STM32CubeIDE:
- Unzip the downloaded package.
- Double-click the
st-stm32cubeidefile to initiate the installer. - Retain default settings by clicking Next throughout the setup process.
- On the Choose Components page, ensure that both SEGGER J-Link drivers and ST-LINK drivers are selected. Then, click Install.
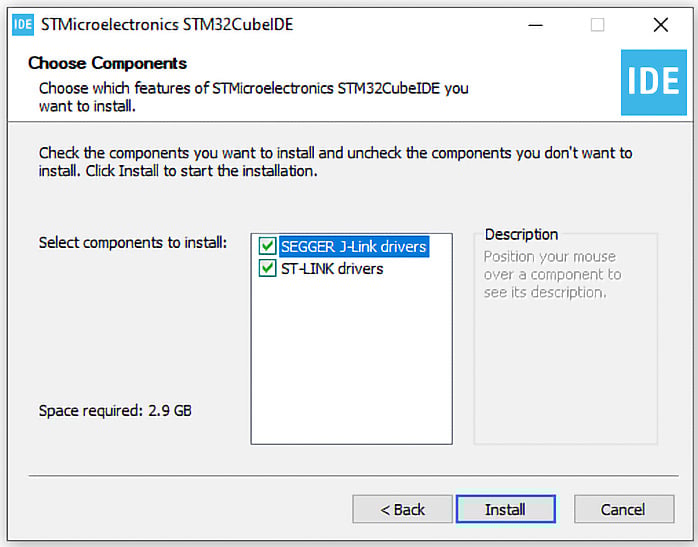
Figure 1.3: The installer showing the Choose Components page
Having successfully installed STM32CubeIDE on our computer, we will now proceed to configure our alternate development tool, the GNU Arm Embedded Toolchain.
Setting up the GNU Arm Embedded Toolchain
In this section, we will go through the process of setting up the GNU Arm Embedded Toolchain – an important tool for developing firmware for ARM-based microcontrollers:
- Launch your web browser and navigate to https://developer.arm.com/downloads/-/gnu-rm.
- Scroll down the page to find the download link appropriate for your operating system. For those of you using Windows, like myself, opt for the
.exeversion. For Linux or macOS users, choose the corresponding.tarfile for your operating system. - After the download completes, double-click the installer to begin the installation process.
- Read through the license agreement. Then, choose to install in the default folder location by clicking Install.
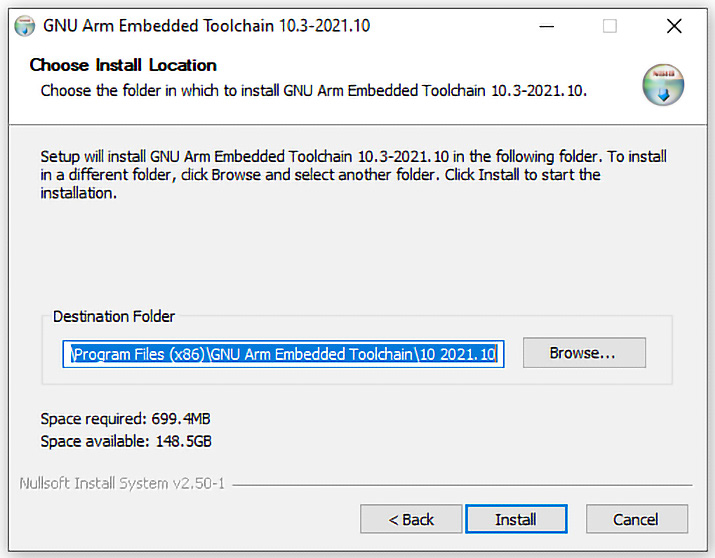
Figure 1.4: The GNU Arm Embedded Toolchain installer
- When the installation is complete, ensure that you check the Add path to environment variable option.
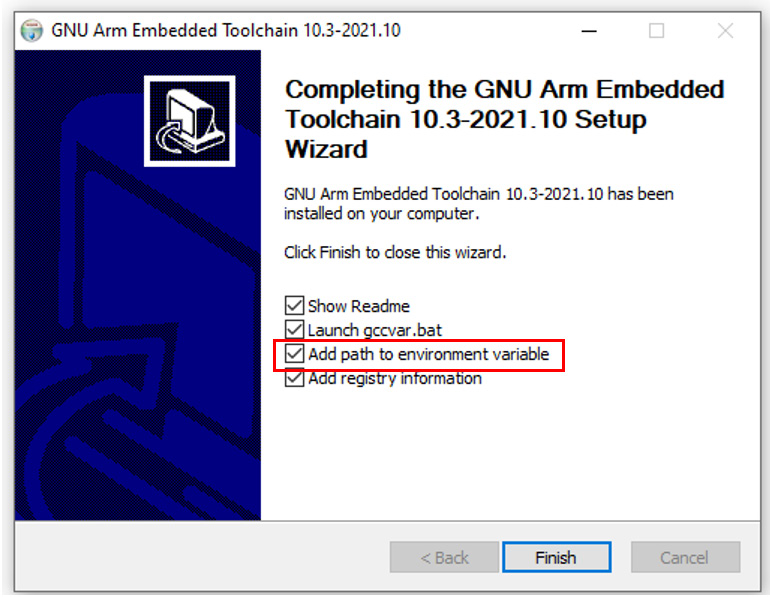
Figure 1.5: The installer showing the Add path to environment variable option
- Click Finish to finalize the setup.
Setting up OpenOCD
For firmware development with the GNU Arm Toolchain, OpenOCD plays an integral role, facilitating both the downloading of firmware into our microcontroller and the debugging of code in real time.
Let’s set up OpenOCD:
- Launch your web browser and navigate to https://openocd.org/pages/getting-openocd.html.
- Scroll to the section titled Unofficial binary packages.
- Click on the link for multiplatform binaries.

Figure 1.6: The Unofficial binary packages section
- Identify the latest version compatible with your operating system. For an exhaustive list, click on Show all 14 assets.
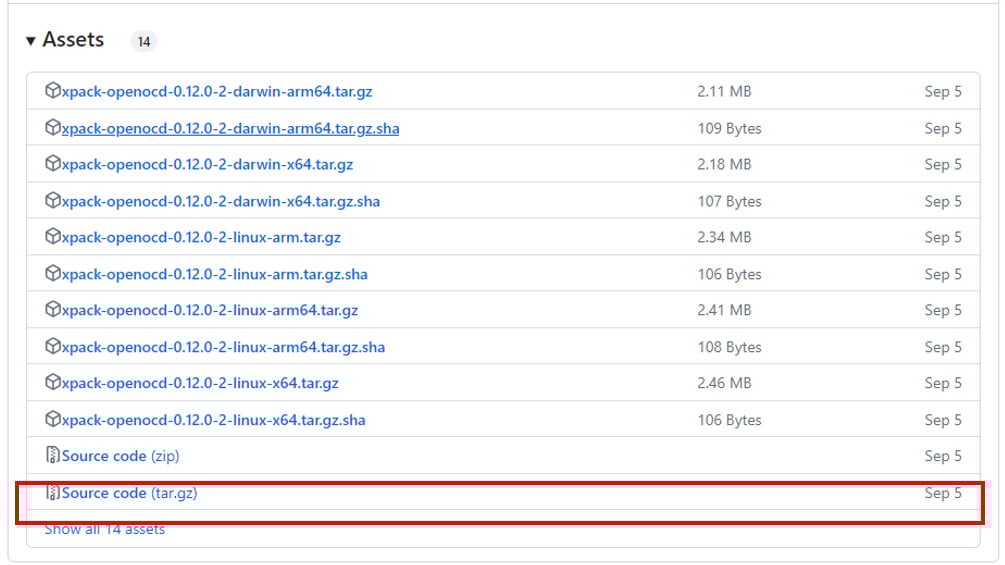
Figure 1.7: The OpenOCD packages
- For Windows users, download the
win32-x64.zipversion. For Linux or macOS users, download the corresponding.tarfile for your operating system. - Once downloaded, unzip the package.
- Navigate to the extracted folder, and then the
binsubfolder. Here, you’ll find theopenocd.exeapplication. This is the application we shall call in the command prompt together with the specific script of our chosen microcontroller, in order to debug or download code onto the microcontroller.
Within the xpack-openocd-0.12.0-2 | openocd | scripts directory structure, you’ll find scripts tailored for various microcontrollers and development boards.
Next, we need to add OpenOCD to our environment variables:
- Begin by relocating the entire
openocdfolder to yourProgramFilesdirectory.
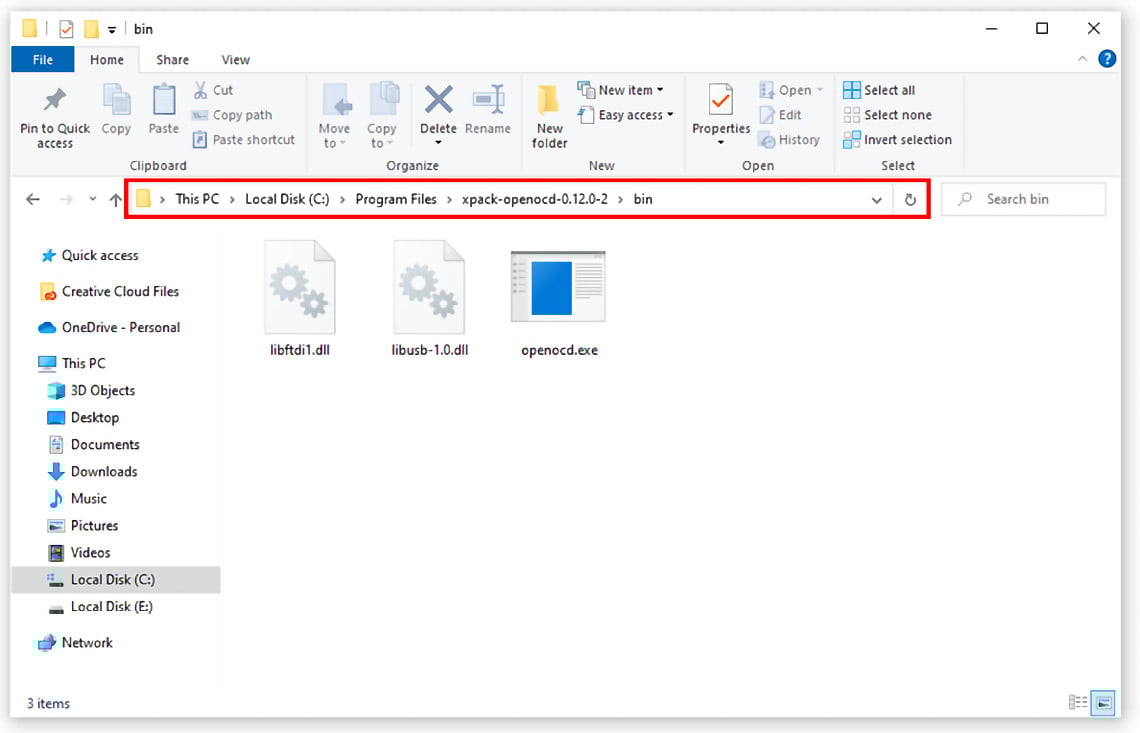
Figure 1.8: OpenOCD moved to Program Files, showing the path to the bin folder
- Copy the path to the
openocdbinfolder. - Right-click on This PC, and then choose Properties.
- Search for and select Edit the system environment variables.
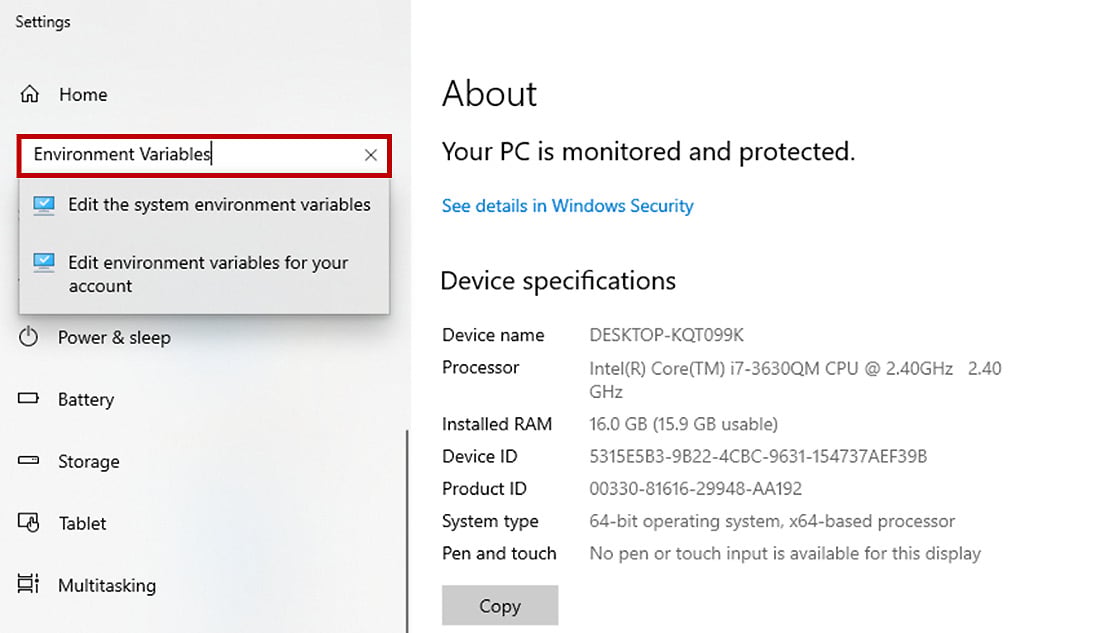
Figure 1.9: The This PC properties page
- Click the Environment Variables button in the System Properties pop-up window.
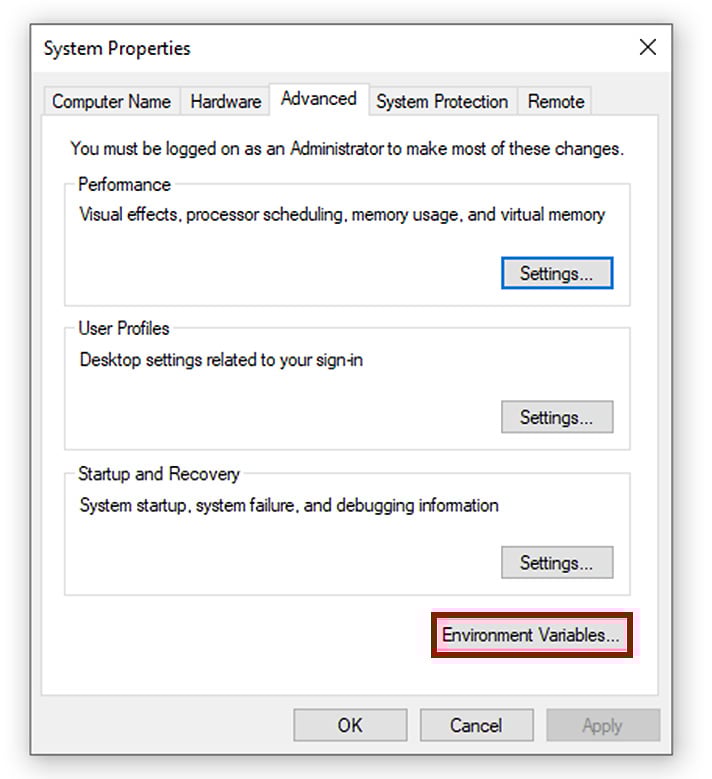
Figure 1.10: The System Properties pop-up window
- Under the User variables section of the Environment Variables popup, double-click the Path entry.
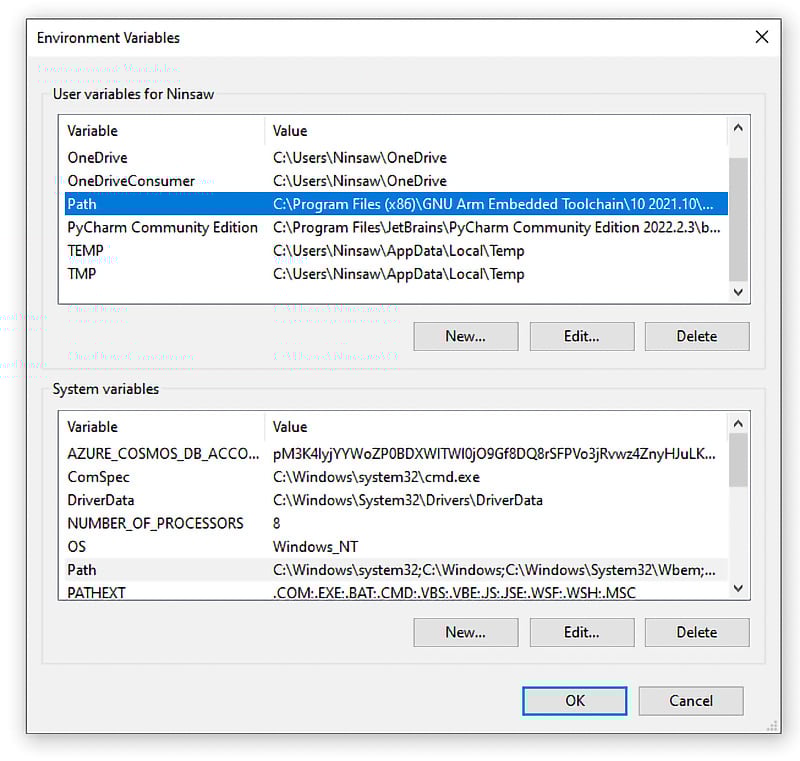
Figure 1.11: The Environment Variables popup
- In the Edit environment variable popup, click on New to create a row for a new path entry.
- Paste the previously copied OpenOCD path into this new row.
- Confirm your changes by clicking OK on the various pop-up windows.
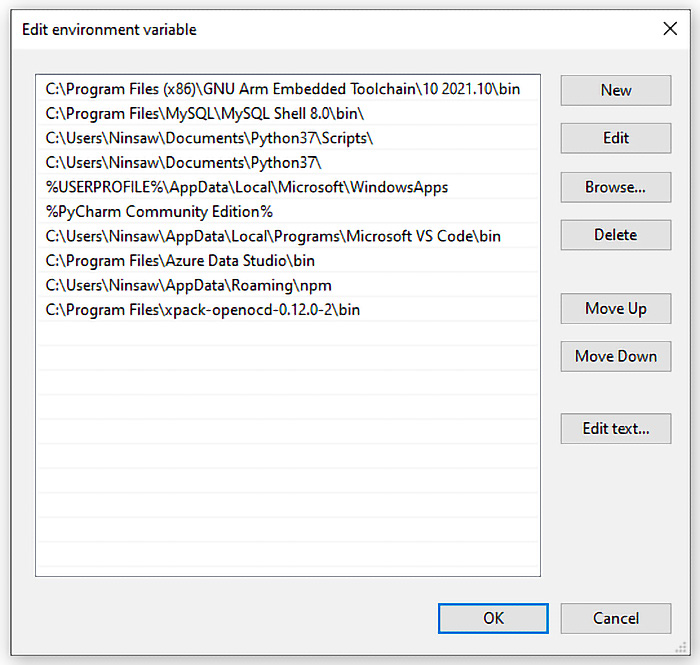
Figure 1.12: The Edit environment variable popup
Finally, we have successfully completed the setup process. We have configured two essential, standalone tools to develop firmware for STM32 microcontrollers – the STM32CubeIDE for an IDE, and the GNU Arm Embedded Toolchain, complemented by OpenOCD, to develop and debug our firmware without an IDE.
Next, we will turn our attention to our development board.


