Creating a Zapier account
For you to get started with Zapier, the first thing you will need to do is create a Zapier account.
Important note
The Zapier team are very proactive with trying to create the best experience for the user and often test different User Interface (UI) changes on user groups. UI updates, new features, and changes to navigation are released regularly, so don't be surprised if as you work through this book, the screenshots we have used differ slightly from the current, live state.
Work through the following steps to create your new Zapier account:
- Open your web browser and navigate to the Zapier website home page: https://zapier.com/.
- Create a Zapier account by entering your business email address and your first and last name, and then click on Get Started Free, as shown in the following screenshot. Alternatively, you can sign up using your Google or Facebook credentials:

Figure 1.2 – The sign-up area on the Zapier home page
- Add a password and click on Sign Up, as shown in the following screenshot:

Figure 1.3 – Filling in details on Zapier's home page sign-up area
- Complete the first step in the onboarding process by identifying your role and clicking Continue, as shown in the following screenshot:

Figure 1.4 – The first step of the Zapier sign-up onboarding process
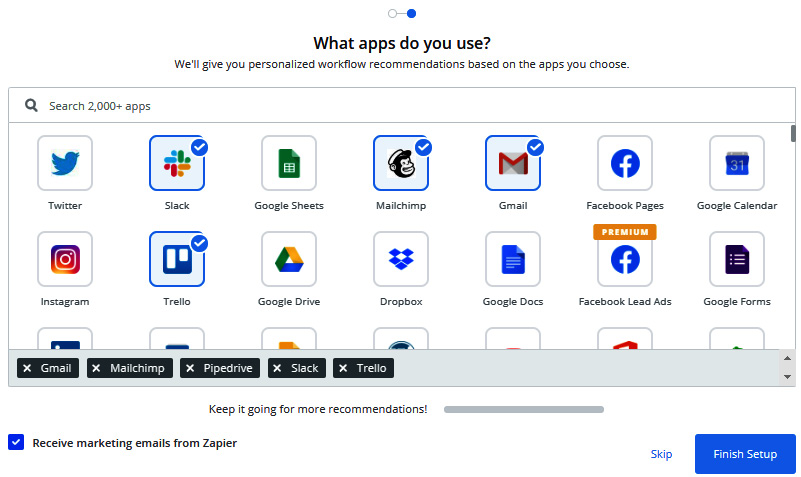
- Complete the second step in the onboarding process by selecting the apps that you use in your business, then choose whether you want to receive marketing emails from Zapier and click Finish Setup, as shown in the following screenshot:

Figure 1.5 – The second step of the Zapier sign-up onboarding process
Important note
By completing this two-step onboarding process accurately, Zapier will be able to customize your user experience and provide you with tailored workflow suggestions. These recommendations will give you ideas of what types of tasks you can automate using your business apps as examples. You can choose to fill this information in as appropriate or skip these steps.
Now that you have set up your Zapier account, you're one step closer to building your first workflow automation. In the next section, we cover navigation on the Zapier platform.


