Search icon CANCEL
Subscription
0
Cart icon
Your Cart (0 item)
Close icon
You have no products in your basket yet
Save more on your purchases! discount-offer-chevron-icon
Savings automatically calculated. No voucher code required.
Arrow left icon
Explore Products
Best Sellers
New Releases
Books
Videos
Audiobooks
Learning Hub
Free Learning
Arrow right icon
Arrow up icon
GO TO TOP
Unity 2018 By Example

You're reading from   Unity 2018 By Example Learn about game and virtual reality development by creating five engaging projects

Arrow left icon
Product type Paperback
Published in Jul 2018
Publisher
ISBN-13 9781788398701
Length 484 pages
Edition 2nd Edition
Languages
Tools
Arrow right icon
Author (1):
Arrow left icon
Alan Thorn Alan Thorn
Author Profile Icon Alan Thorn
Alan Thorn
Arrow right icon
View More author details
Toc

Table of Contents (14) Chapters Close

Preface 1. Unity Fundamentals FREE CHAPTER 2. Creating a Collection Game 3. Creating a Space Shooter 4. Continuing the Space Shooter 5. Creating a 2D Adventure Game 6. Continuing the 2D Adventure 7. Creating Artificial Intelligence 8. Continuing with Intelligent Enemies 9. Entering Virtual Reality 10. Completing the VR Game A. Test Your Knowledge Answers Other Books You May Enjoy Index

Polishing


In this section, we'll add the final touches to the game. First on the agenda is to fix the game background! Until now, the background has simply displayed the default background color associated with the game camera. However, as the game is set in space, we should display a space background. To do this, create a new Quad object in the Scene that'll display a space image. Navigate to GameObject | 3D Object | Quad from the menu. Then rotate the object and move it downward so that it displays a flat, vertically-aligned backdrop. You may need to scale the object to look correct. See Figure 4.39:
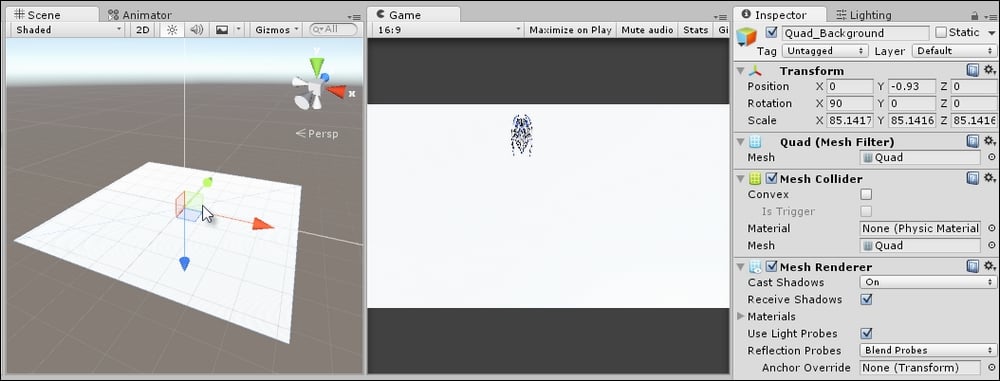
Figure 4.39: Creating a backdrop for the level and building a Quad

Now, drag and drop the space texture from the Project panel to Quad in the Scene to apply it as a material. Once assigned, select the Quad and change the Tiling settings from the material properties in the Object Inspector. Increase the X and Y tiling to 3. See Figure 4.40:
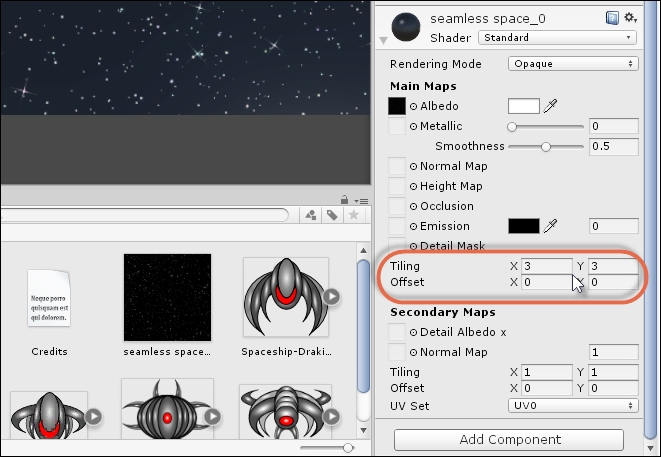
Figure 4.40: Configuring the texture tiling

If texture...

lock icon The rest of the chapter is locked
Register for a free Packt account to unlock a world of extra content!
A free Packt account unlocks extra newsletters, articles, discounted offers, and much more. Start advancing your knowledge today.
Unlock this book and the full library FREE for 7 days
Get unlimited access to 7000+ expert-authored eBooks and videos courses covering every tech area you can think of
Renews at $19.99/month. Cancel anytime
Banner background image