Creating and managing timetables (Must know)
Like all teachers, you will be juggling between classes, making notes on the homework of each class, noting down assignments to be given or collected, managing your papers to do all these tasks, and then wishing someone could just remind you of all this when your class is beginning. We have the iPad to fulfill this wish of yours. In this recipe we will look at the Classes, a simple app that will let you conveniently manage your weekly timetable and associated class information.
Getting ready
As always, let us get ready to use Classes by downloading it from the App Store. To begin with, it is preferable to download the Classes Lite version that provides all features of the full version but limits the number of subjects, classes, and homework. The Lite version is free while the complete version costs $0.69, which is also pretty cheap.
How to do it...
Launch the Classes Lite app from your iPad home screen and you will see your weekly timetable directly open up in a clear and simple landscape format. As it is your first launch of the app, you will see your timetable blank.
To add a class to your timetable, tap on the Add (+) button on top of the timetable. A popup appears where you can specify the class details such as the subject, location, instructor, timings, class frequency, and reminder options. Tap on the Done button after specifying all details to save this class and place it on your timetable. You can repeat this process for adding more classes. The number of classes that you can add are limited in the Lite version but the full version lets you add unlimited number of classes. The following screenshot of the Classes Lite app depicts this class addition process:

You must have planned some content, homework, or assignment for your classes. To add this information, use the Add Task (+) button on the extreme right edge of the screen. In the popup that appears, specify the task's subject, due date, content, type, and so on and tap on the Done button after specifying all details. The task addition popup is illustrated in the next screenshot:

After creating a timetable for you, let's look at the app settings and extra tasks you can specify. Tap on the Settings (gear) button at the top-left corner of the screen and a pop-up window with different settings options will open up. You can have a preview at these options in the next screenshot:

You can specify your list of subjects, types, and instructors here. Display can be customized using the Display option. The Manage Data is one of the most useful features. Using this feature you can e-mail your timetable to yourself to create backup with the Create Backup option or even to your students to keep them updated with the latest changes. The timetable is e-mailed in the form of an attachment that can be opened from the Classes app on an iOS device. The entire timetable can be cleared off from here by tapping on Delete Data. This is shown in the next screenshot:

How it works...
All your classes and related information is in one place in the Classes app and you get reminders of all of your classes. This way, you don't miss out on your lectures and make your students do in class what you have actually planned for them!
There's more...
Apart from Classes, there is another app—Timetable Pad which can let you manage your timetable in a simple, effective manner.
Timetable Pad
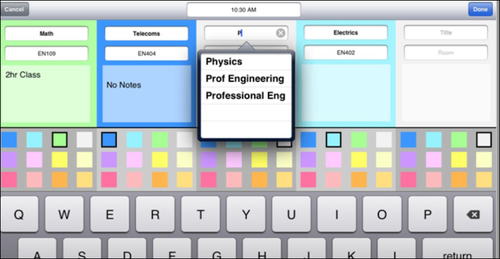
The Timetable Pad app costs $1.99 and is also a timetable creation app with different colors to mark different subjects. Apart from class details and notes entry, this app lets you share your timetable via e-mail or print with an AirPrint enabled printer. It provides text suggestions for quicker text entry and even a provision to create two weekly timetables for those with alternating schedules.


