Exercise – accessing the Geometry Node system
Now, you’ll learn how to access the handy Geometry Nodes tool in Blender.
Make sure you at least have Blender 3.2, but in this book and chapter, we will be using Blender 3.3. Let’s begin:
- Firstly, let’s start by opening Blender.
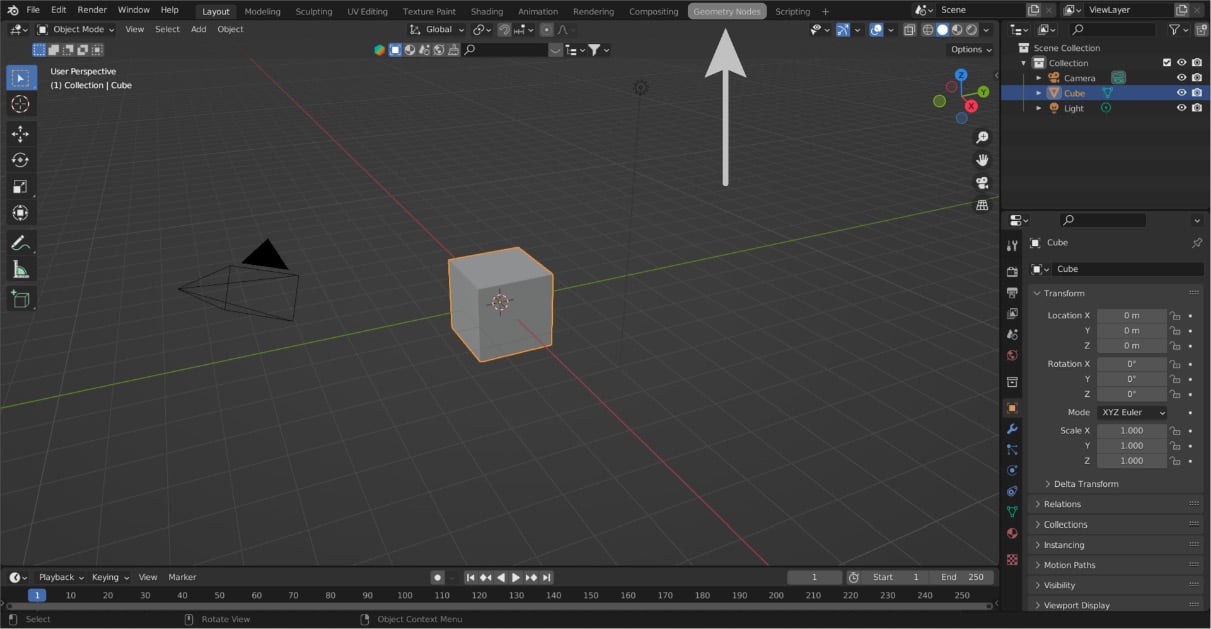
- Then, you can head on to the Geometry Nodes tab in the top section of your screen. Now your journey begins.

Figure 1.16: Blender startup screen
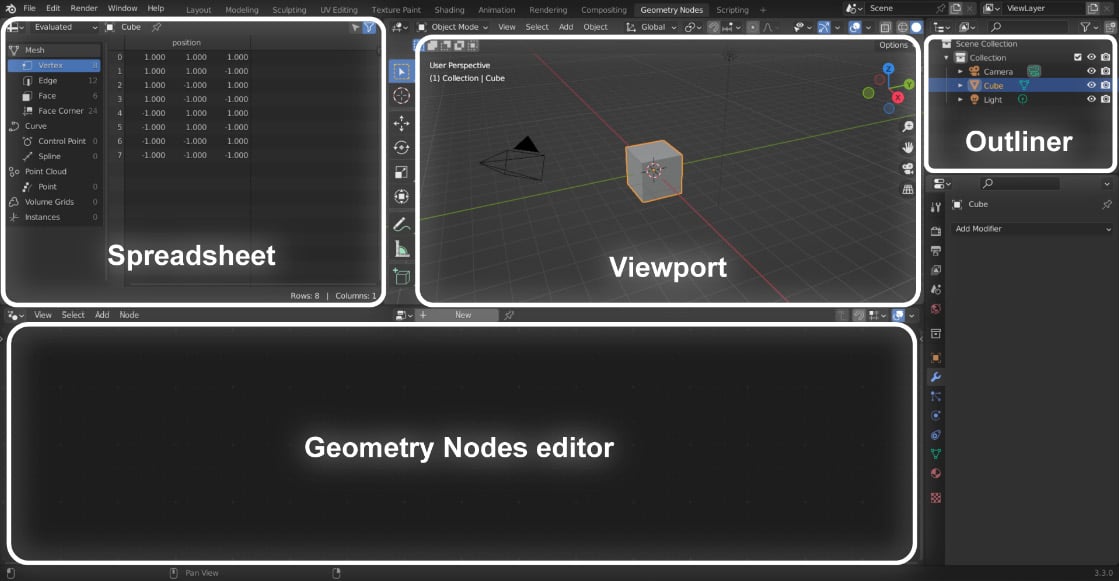
When you click on the Geometry Nodes tab at the top of your screen, you’ll see the following:

Figure 1.17: Geometry Node editor tab with info overlayed
This might look overwhelming at first sight, but don’t worry, this book will guide you through all the parts of this node editor.
There are four parts you’ll need to know about on this screen:
- Spreadsheet
This is a separate window that allows you to see various bits of information about elements of your geometry, such as, for example, the properties of instances.
- Viewport
This is your main view in Blender. It allows you to see the project in 3D space.
- Outliner
This is a list of all the objects in your current scene. This makes it easy to create instances by sliding your object from the outliner right into the Geometry Node editor.
- Geometry Node editor
The Geometry Nodes editor is your main editing workspace for working with Geometry Node trees.
To start working on Geometry Nodes, it’s important to learn how to add a node tree to your projects. There are two ways to do this:
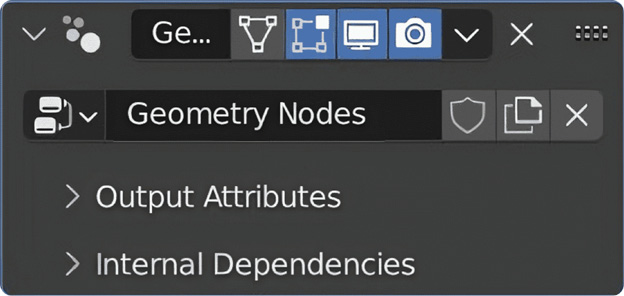
- One way to do this is to add a Geometry Nodes Modifier from the Modifiers tab in the Properties tab:

Figure 1.18: Geometry Nodes Modifier
After you’ve added the Modifier to the Modifier stack, you’ll need to press the New button. You’ve now successfully created a new node group.
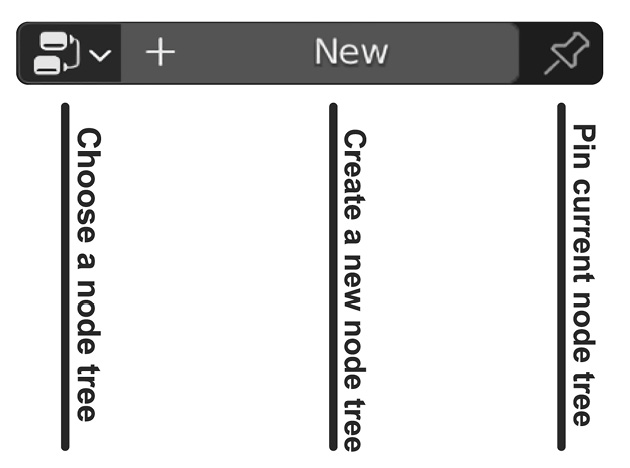
- The other way to do this (and the quicker way since we’re already in the Geometry Nodes workspace) is to just click the New button in the Geometry Node editor. This automatically adds a new Geometry Nodes Modifier along with a beginning and end node. The following figure shows the New button you’ll find at the top of the Geometry Nodes workspace to add a new node tree, along with all the functions of the button.

Figure 1.19: Node group selection box
This is the end of the chapter. In this chapter, you’ve learned about the various node connections you will come across in the node editor, along with how to access the node editor.
Congratulations! You now know the basics of the Geometry Node editor.


