Creating your first simulation
Now that we understand what creating a Mantaflow simulation in Blender looks like, let’s create one together. In this section, we will go through the entire process of creating a fire simulation in Blender; this process will include doing the following:
- Adding the objects
- Creating the simulation
- Creating a material for the fire
- Setting up the camera
- Rendering the animation
This may sound like a lot, but don’t get overwhelmed. I will be going through every step and together, we will create something awesome! This section is aimed at beginners, but it also assumes you have basic knowledge of Blender’s interface and how to use it.
With that out of the way, let’s get started!
Adding the objects
Let’s start by adding the objects we will need in the scene. Remember, we need a domain object and a flow object for every simulation. With the default scene open in Blender, we already have a cube that we can use for the domain object. Currently, it’s a bit small, so let’s scale it up:
- To scale an object in Blender, make sure it’s selected and press S. You can now move your mouse to scale the cube, or you can type a number in. Let’s scale the cube by 2 and then press Enter. I also think it can be a bit taller, so let’s scale it along the Z axis. To do this, press S, then Z, and then use 1.5 as the value.
- Once you are happy with the scale of your object, you can add the flow. You can use whatever object you like but for my simulation, I’m going to add a UV sphere. Press Shift + A, then select Mesh | UV Sphere. Scale it down to around 0.75 and place it near the bottom of the domain.
If you did all that correctly, it should look something like this:
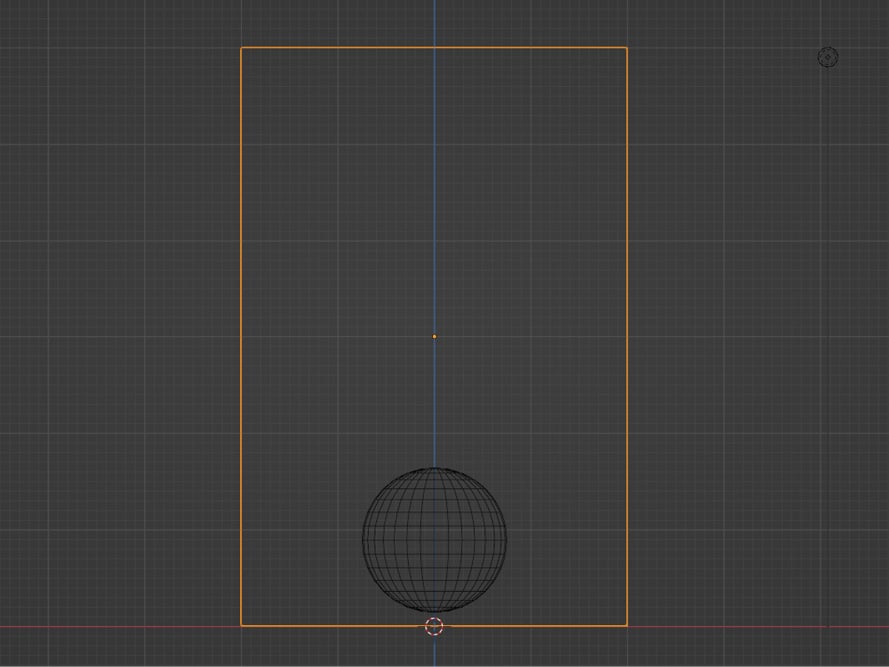
Figure 1.9 – Domain and flow
Now that we have our objects in place, it’s time to start working with the domain and flow!
Creating the simulation
Everything is in place, so the next step is to assign the cube as a domain object and change the settings. After that, we will create the flow and edit some of the values.
Domain
Let’s start by setting up our domain object:
- Select your domain and head over to the Physics Properties panel on the right-hand side (it should look like a circle with another circle inside it):
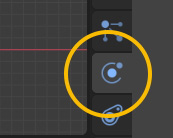
Figure 1.10 – The Physics Properties panel
- Once you’re there, click on Fluid, and for Type, select Domain.
(Yes, I know, there are quite a lot of settings; let’s take it one step at a time.)
- The first thing we should do is change the cache type. Scroll down until you see the Cache panel. We don’t need to bake in 250 frames, so let’s set the End Frame property of the simulation to 150. As for Type, let’s select Modular and check the box that says Is Resumable. This will allow us to stop the bake halfway through if we need to.
The Cache panel should look like this:
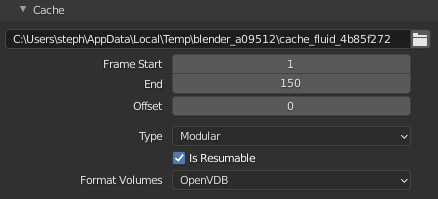
Figure 1.11 – Cache
- Now, let’s set up the other Domain settings. Starting at the very top, set Resolution Divisions to 128. This will give us a nice, high-quality fire:

Figure 1.12 – Resolution Divisions
- Check the Adaptive Domain box. This will change the size of the domain based on where the fire is, which, in turn, will decrease the bake time:

Figure 1.13 – Adaptive Domain
We can leave all the default settings as-is.
- In the Gas panel, open the Fire section. Reaction Speed controls the height of the flames. Higher values = lower flames, while lower values = taller flames. Let’s set it a bit lower to 0.5:

Figure 1.14 – Fire settings
- (Optional) If you want more swirls in your fire, you can turn up the Vorticity amount in the flames to 0.6 or 0.7. Don’t set it too high or your fire will go crazy!
The domain settings are now done; the next step is the flow object!
Flow object
Now that our domain is all set up, it’s time for the flow object:
- Select your sphere and in the Physics Properties panel, select Fluid. As you’ve probably guessed, set Type to Flow.
- As for Flow Type, change it from Smoke to Fire.
- Currently, Flow Behavior is set to Geometry. With it set to Geometry, the fire will disappear very quickly when we play the animation. However, we want it to constantly add fire, so let’s change it to Inflow.
- We can bring up Fuel to 1.3. This will make the fire a bit taller and move more quickly.
- In the Flow Source section, Surface Emission is currently at 1.5. This means that the fire will emit slightly away from the mesh surface. I would rather have it closer to the mesh, so let’s set this value to 1.
- With all that done, we are ready to bake our simulation! Select your domain and click the big Bake Data button at the top to start baking the simulation. Keep in mind that this might take a little bit of time, depending on how fast your computer is.
Now, all we have to do is sit back and wait for it to finish baking. Once it’s done, we can create the fire material!
Creating the material
Creating a basic fire material is pretty simple and easy to do:
- With the Domain object selected, let’s jump over to the Material Properties panel (it will look like a red circle):

Figure 1.15 – Material Properties
The base Principled Shader is what we call a Surface Shader. This controls the colors, textures, and light bounces on the surface. This won’t work for fire, so let’s remove it.
- Click on Surface Principled BSDF (it will have a green dot next to it) and select Remove.
- What we need instead is a Volume Shader. These kinds of shaders are for the interior of a mesh or fire and smoke. So, let’s add one. Open the Volume panel and select Principled Volume:

Figure 1.16 – Volume Shader
- The first color option is for the smoke. Pick whichever color you want; I’m going to set mine to a slightly darker gray.
- You can also set the Density property higher if you want more dense smoke. For my final result, I set my density to 8.
- There are many ways to create fire. The most basic way is to turn up Blackbody intensity. You will notice that if you drag it up, you can only go to 1, but if you type a number in manually, then you can go higher. The higher you set this, the brighter the fire will appear. I’m going to set mine to 7.
And that’s it! You’ve created your fire material. Now, let’s set up our camera so that we can see the fire! If you aren’t happy with the look, you can always come back later and change it.
Setting up the camera
Our fire is looking good so far! Now, we need a way to see it! Let’s set up the camera and position it where we want:
- Press 0 on your Numpad to go into Camera View or go up to View | Cameras | Active Camera.
- To move the camera around easily, go into the Properties Panel (N) section and, in the View tab, check the Camera to View checkbox. Now, you can move the camera around just like how you would move around the 3D space:
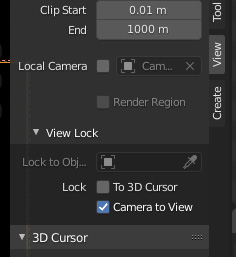
Figure 1.17 – Camera
- Move the camera to where you can see the entire simulation. Then, make sure to uncheck Camera to View; otherwise, you may accidentally move the camera when you don’t mean to.
- As for the lighting for the scene, let’s jump over to the World settings and set Color to black:

Figure 1.18 – World lighting
Now that our camera, lighting, and material are all done, it’s time to set up the render settings!
Rendering the animation
Now would be a good time to match the simulation to the end frame. Since we baked 150 frames, let’s set the End Frame property in the timeline to 150 as well:

Figure 1.19 – Timeline example
Next, let’s choose which rendering engine to use. There are two default render engines to choose from in Blender: Eevee and Cycles. Both have their strengths and weaknesses. For example, Eevee will render much faster than Cycles, but the fire won’t look as good. If you have a slower computer, I recommend using Eevee because rendering smoke/fire in Cycles is pretty GPU/CPU-intensive. To choose a rendering engine, head over to the Render Properties section and click Render Engine:

Figure 1.20 – Render Engine
For my animation, I used Eevee, but if you want to use Cycles, I will provide instructions for both!
Cycles
With the Cycles engine selected, let’s change some of the settings so that Blender will render faster and get a better result:
- Open the Sampling panel and in the Render tab, set the number of Max Samples to 20.
- Open the Color Management tab and set Look to High Contrast. This will give the fire a much better look.
Now that you’ve completed the steps for rendering in Cycles, feel free to skip the Eevee instructions and head on over to the Setting the output section!
Eevee
In the coming chapters, we will be learning a lot more about rendering volumes in Eevee! For now, let's go over some basic settings to help the fire look much better. Switch over to the Eevee render engine and let's get started:
- In the Sampling panel, set Render Samples to 128. This will help increase the detail in the fire.
- To add a bit of glow, turn on Bloom. If the glow is too strong you can lower the Intensity value.
- In the Volumetrics tab, set End to 15 and Tile Size to 2px. This will make the fire have more detail and look better.
- If the fire disappeared in the rendered view, make sure you set Distribution to 1.
- Open the Color Management tab and set Look to High Contrast. This will give the look of the fire much more contrast, making the colors stand out a lot more!
The final step in this tutorial is to set up an output for our animation.
Setting the output
Whenever you render an animation in Blender, you need to set an Output folder. To do this, head over to the Output Properties section and set a directory for where you want your animation to render by clicking on the little Open Folder icon on the right. After that, set up the file format of your choosing. I’m going to set mine to FFmpeg Video and Container to MP4. It should look something like this once you are done:
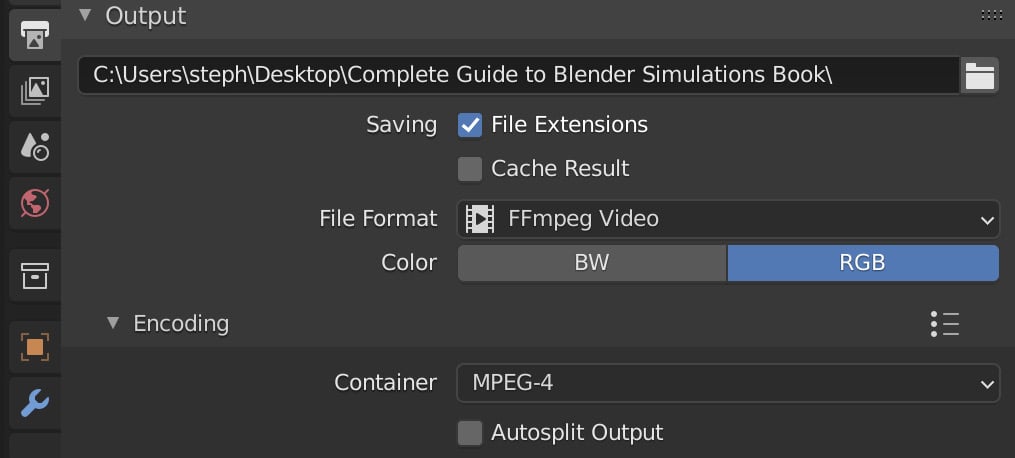
Figure 1.21 – Output
Now, you are ready to render! Go to Render | Render Animation or press Ctrl + F12/Cmd + F12. Once the render has finished, it will be in the output directory you set!
To view my result and download this .blend file, you can visit https://github.com/PacktPublishing/Learn-Blender-Simulations-the-Right-Way/tree/main/Chapter01. The following is a frame of my simulation:
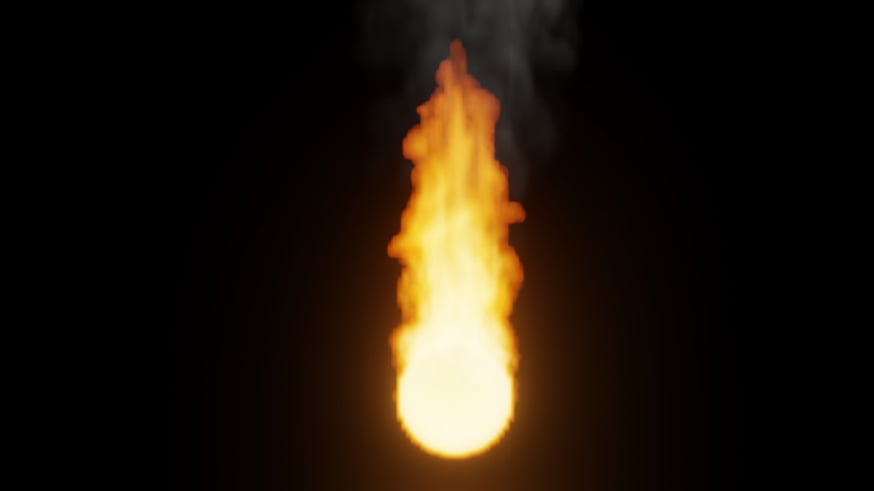
Figure 1.22 – Final result
And there you have it! You’ve completed the first tutorial of this book. Hopefully, you made it through with ease and learned something new along the way!


