


Making freeze frames and speed changes
Life moves at one speed—1x (although, I'm sure we all feel differently sometimes, for example when writing a book), but unlike real life, movies can be a lot cooler when they move slower or faster than real time. Final Cut Pro X makes it easy to slow down or speed up clips to fit your needs within a project down to the frame.
Getting ready
Any clips at all can be used to illustrate speed changes. We're going to experiment on three clips in this exercise.
How to do it...
1. Click on any clip in your timeline. Our first shot is a pan of a produce aisle in a grocery store. The shot is nice and smooth, but the pan is a bit fast, so we need to slow it down to appreciate the imagery.

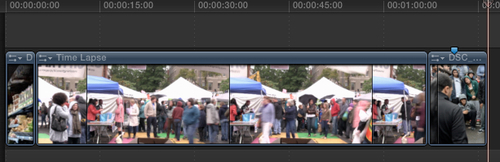
2. Click on the Retime button in the toolbar and choose Slow | 50%, as shown in the following screenshot:

In the timeline, the clip appears longer, but the Retime Editor that appears over the clip tells us that the clip is merely playing at 50% speed. We are not seeing any new frames...


