Choosing an input handler
The Input Manager in Unity is the area where you define the keys or axes of the keyboard and mouse that will be detected when the user plays the game. These keys and axes can be related to a name and then accessed via code. For example, in one of our scripts, we can ask if the user has made a jump because they have pressed the spacebar.
A few years ago, Unity used an Input Manager system that is now obsolete due to the arrival of a new system called the new Input System.
Unity’s new Input System was created to unify the controls on PC, PlayStation, Xbox, and other systems.
Let’s start by adding the new Input System to our project:
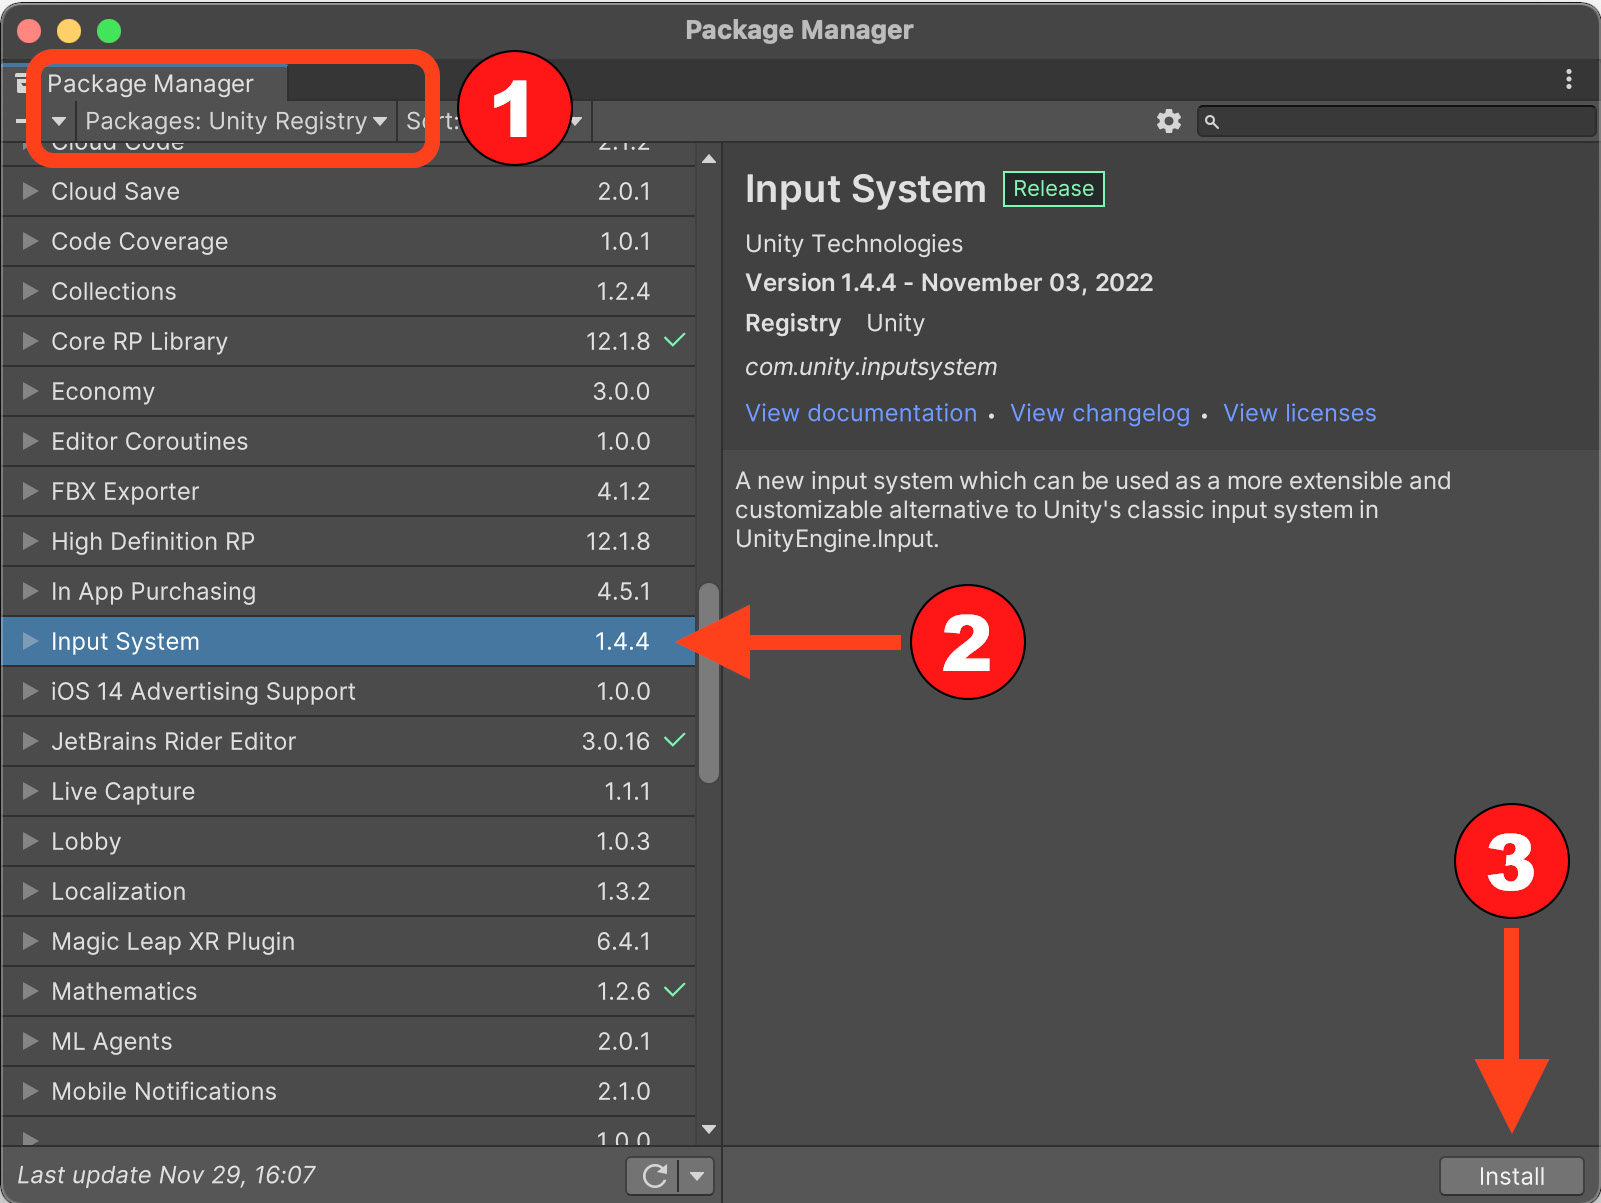
- Open Package Manager. This can be found under Window | Package Manager:

Figure 1.23 – Locating the new Input System plugin in Package Manager
- Change the source of Packages: In Project to Packages: Unity Registry (1).
- Scroll down the list and look for Input System (2) and click the Install button (3).
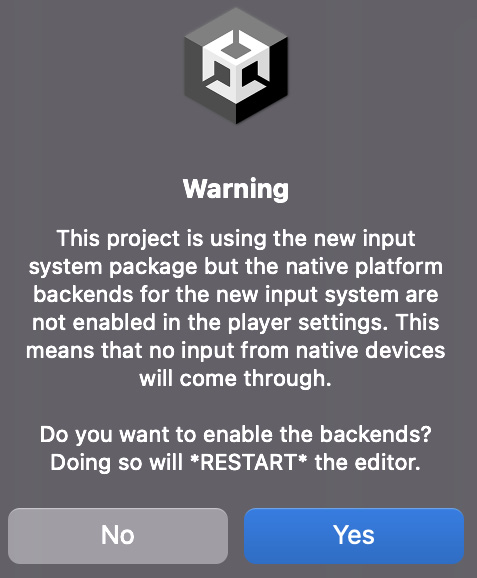
- Unity will display a warning that for the changes to activate the new Input System, the project must be restarted. Click the Yes button to restart the editor.
If you have unsaved changes in the scene, you will see a popup, warning you of this so that you can save it before the editor closes:

Figure 1.24 – Unity notice about applying changes to the project
Note
You can find detailed information about the differences between the old and the new system at https://blog.unity.com/technology/introducing-the-new-input-system. This is recommended reading.
Perfect! Our project has been configured to work. Now, it’s time to get to know Firebase and learn about all the services that it offers.


