Drag and drop techniques
In Outlook, there is a surprisingly simple technique you can use called drag and drop. This allows you to drag and drop one object to another object, and at times, doing this will create another item. This technique will help you be more productive, as you will not have to recreate the email content in the item you are creating by dragging the email.
To drag and drop, first move the mouse pointer to the item that you want to drag. Press and hold down the button on the mouse to “grab” the item. Drag the item to the desired location on your computer by moving the mouse pointer to the item. Release the mouse click once you are at the location where you want to drop the item.
Drag and drop to the calendar
As shown in the following example, you can click on an email message and keep the mouse button pressed down while dragging it to the calendar object in the navigation pane. This will create a new calendar item, with the email contents included in the notes section of the calendar event. The steps are as follows:
- Click on the item you want to copy to a calendar item:

Figure 1.6 – The item to copy
- Click and hold the mouse down while you move it to the calendar object:
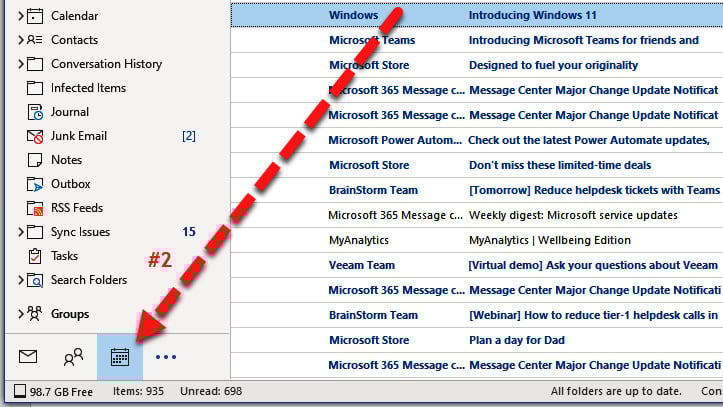
Figure 1.7 – Moving to a Calendar object
- Drag and drop the item onto the calendar or another object. Fill in the required text for the event and be sure to click Save & Close:
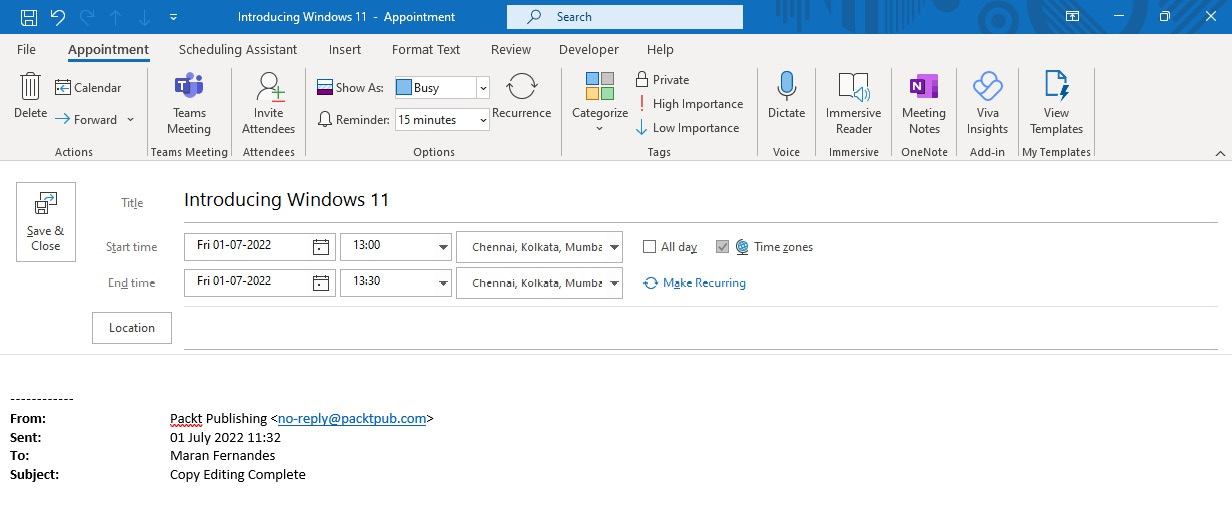
Figure 1.8 – Creating the Calendar item
Drag and drop to a to-do Item
To drag and drop an email to the to-do list on the right side of the screen within the TO-DO BAR (turn this on through the View menu), first select the email to drag and drop. Drag your mouse to the to-do list, and a thin line will position between the tasks. If you want to move this to the top of the list, just keep the mouse button pressed and relocate that line where you want the task to drop:

Figure 1.9 – Positioning an item
Note
If you don’t have the to-do bar open, you can drag the item to the tasks object at the bottom of the navigation bar as well. This technique will open a new task dialog box to create a new task item.
Drag and drop to people/contacts
If you drag and drop an email to a People object, Outlook will create a new contact from the email. The email address will become the new contact’s name and the email address will be created, and a copy of the email message will be copied to the Notes section of the contact, as seen here:
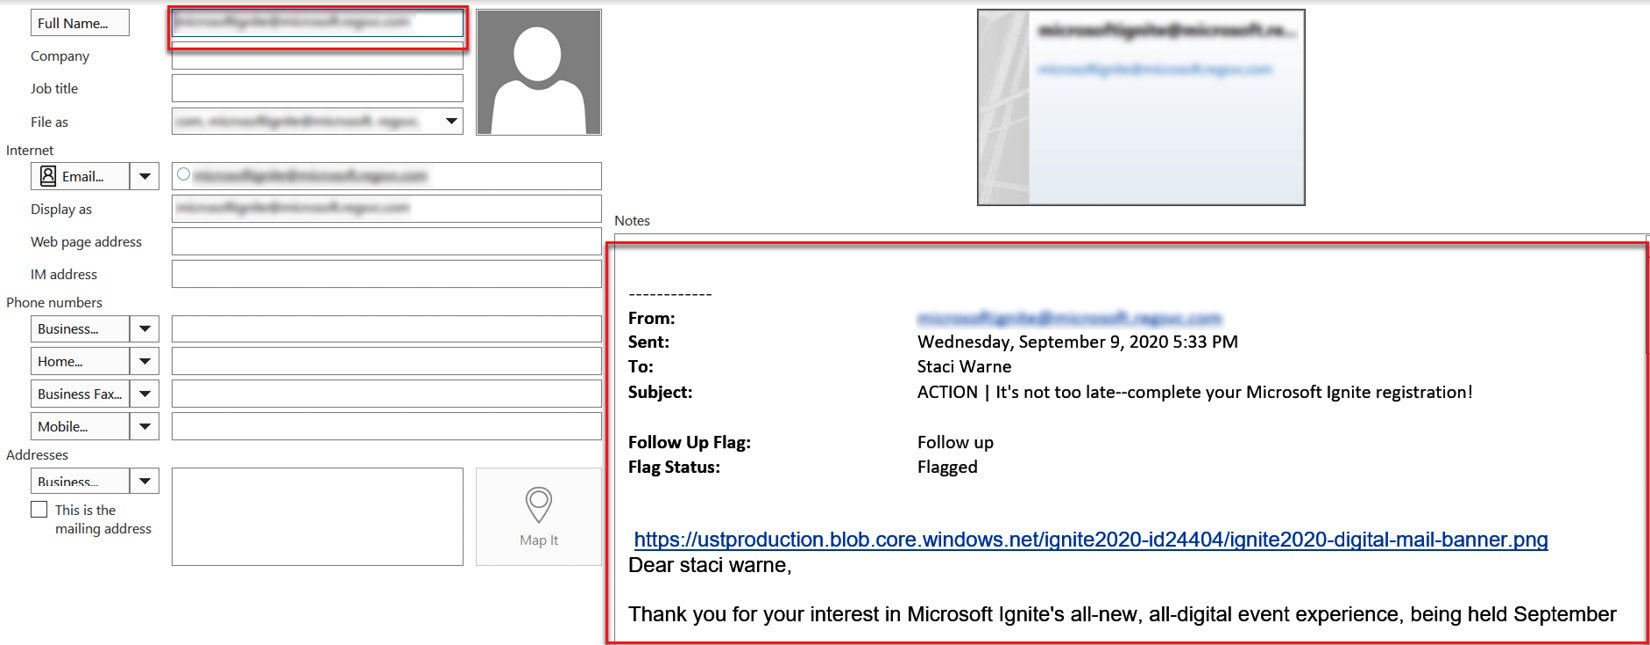
Figure 1.10 – A new contact
Drag and drop other uses
The preceding steps will work to drag and drop an email item to any of the buttons at the bottom of the navigation pane in Outlook, including the following:
- People (Contacts)
- Calendar
- Notes
- Tasks
- Folders
- Shortcuts
- Other applications such as PowerPoint and Word
- Desktop or other folders on the system
- Outlook folders
You can also go in a reverse direction to drag and drop other objects in your system from their folders to an email window. This will automatically open a blank email and attach the object to the email. This can save a lot of time spent clicking on the drop-down arrow by attaching an item and then navigating through your file path. If the folder is open, just select the item (or items) and click and drag them wherever you want them.
Note
You cannot attach a folder to the email, but you can open the folder and select the files inside the folder to attach.
To access objects not showing on the navigation bar, let’s follow these steps:
- Click the three dots to access more items:
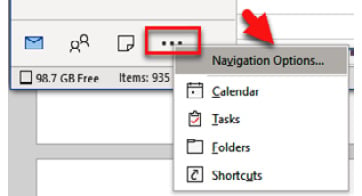
Figure 1.11 – Accessing more items
- Select Navigation Options…:
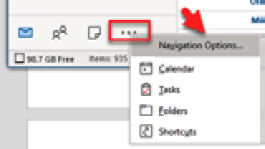
Figure 1.12 – Navigation Options
- From the Navigation Options dialog box, move the object you need to view to the top of the list in the Display in this order box:
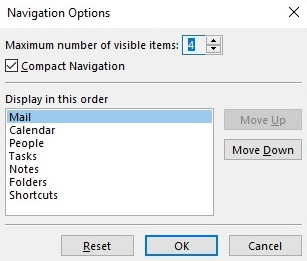
Figure 1.13 – Display in this order
Don’t be afraid to experiment; try to drag and drop several objects. You will probably find some other ways to use drag and drop other than what you have seen in this book. It’s an amazing feature.


