Search icon CANCEL
Subscription
0
Cart icon
Your Cart (0 item)
Close icon
You have no products in your basket yet
Save more on your purchases! discount-offer-chevron-icon
Savings automatically calculated. No voucher code required.
Arrow left icon
Explore Products
Best Sellers
New Releases
Books
Videos
Audiobooks
Learning Hub
Free Learning
Arrow right icon
Arrow up icon
GO TO TOP
Raspberry Pi cookbook for Python programmers

You're reading from   Raspberry Pi cookbook for Python programmers The Raspberry Pi Cookbook has over 50 tailor-made recipes for programmers to get the most out of Raspberry Pi using Python to unleash its huge potential.

Arrow left icon
Product type Paperback
Published in Apr 2014
Publisher
ISBN-13 9781849696623
Length 402 pages
Edition 1st Edition
Languages
Arrow right icon
Toc

Table of Contents (18) Chapters Close

Raspberry Pi Cookbook for Python Programmers
Credits
About the Author
About the Reviewers
www.PacktPub.com
Preface
1. Getting Started with a Raspberry Pi Computer 2. Starting with Python Strings, Files, and Menus FREE CHAPTER 3. Using Python for Automation and Productivity 4. Creating Games and Graphics 5. Creating 3D Graphics 6. Using Python to Drive Hardware 7. Sense and Display Real-world Data 8. Creating Projects with the Raspberry Pi Camera Module 9. Building Robots 10. Interfacing with Technology Hardware and Software List Index

Starting with 3D coordinates and vertices


The world around us is three dimensional; so in order to simulate parts of the world, we can create a 3D representation and display it on our 2D screen.

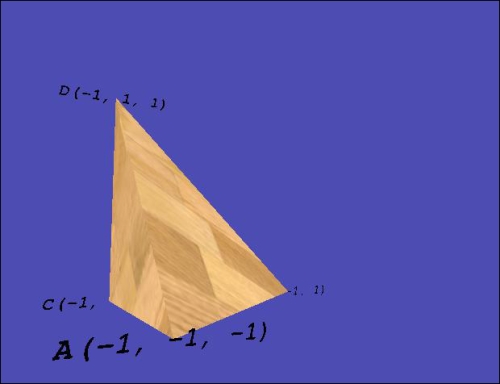
The Raspberry Pi enables us to simulate a 3D space, place 3D objects within it, and observe them from a selected viewpoint. We will use the GPU to produce a representation of the 3D view as a 2D image to display it on the screen.

The following example will show how we can use Pi3D (an OpenGL ES library for the Raspberry Pi) to place a single 3D object and display it within the 3D space. We will then allow the mouse to rotate the view around the object.
Getting ready

The Raspberry Pi must be directly connected to a display, either via the HDMI or an analog video output. The 3D graphics rendered by the GPU will be only displayed on a local display, even if you are connecting to the Raspberry Pi remotely over a network. You will also need to use a locally connected keyboard/mouse for control.

The first time...

lock icon The rest of the chapter is locked
Register for a free Packt account to unlock a world of extra content!
A free Packt account unlocks extra newsletters, articles, discounted offers, and much more. Start advancing your knowledge today.
Unlock this book and the full library FREE for 7 days
Get unlimited access to 7000+ expert-authored eBooks and videos courses covering every tech area you can think of
Renews at $19.99/month. Cancel anytime
Banner background image