Template selection and website vision
In the previous chapter, Sarah had already set up the environments and initial website using Power Pages. Microsoft’s policy of offering a 30-day free trial and allowing users to create multiple websites within the same tenancy worked to the company’s advantage. This flexibility enabled Sarah to experiment confidently with various template designs. She named these experimental sites RobBuilderDev1, RobBuilderDev2, and RobBuilderDev3. This approach allowed her to explore different design options without any immediate commitment, ensuring that the final choice for Rob the Builder’s website would be well-informed and perfectly suited to their needs.
To create the websites, Sarah follows these steps:
- Log in to Power Pages.
- Select the Dev environment and select the Templates tab.
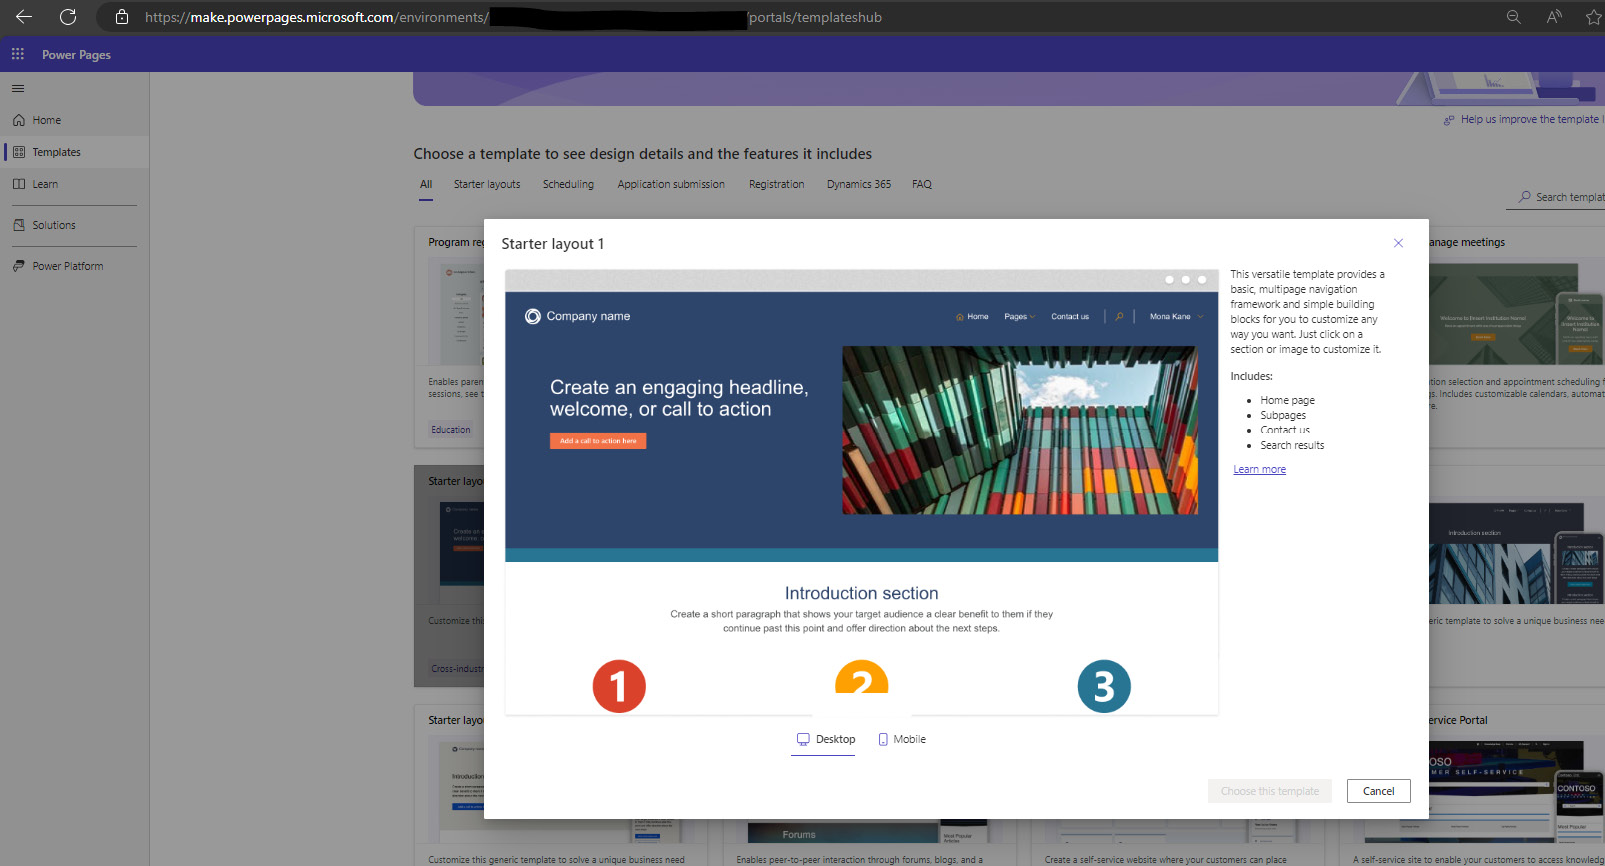
- Scroll through templates, read the description, and view their styling design.
- Select a Preview template such as Starter layout 1, as shown in Figure 2.1.
- Having reviewed the description, select Choose this template to install it.
- Enter a site name and a web address, such as
RobBuilderDev1:

Figure 2.1 – Power Pages design studio templates
After thoroughly reviewing and selecting their preferred templates from Power Pages, Sarah now had a clear vision for the page layouts, font choices, and styling.


