In this section, you will explore how the Properties inspector can be used to apply and create styles:
- Still in the Chapter06/styles.cptx file you created in the previous section, select the title placeholder on the first slide of the new project.
- If needed, click the Properties icon on the Toolbar to open the Properties inspector.
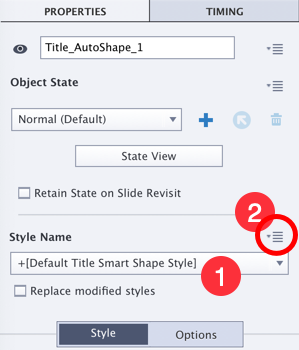
The Style Name drop-down list (shown as 1 in the following screenshot) tells you that the style that's currently applied to the selected object is the +[Default Title Smart Shape Style] style. The + sign in front of the style name means that the formatting has been manually changed on top of the original style. Technically, this is called a style override. There's no way of knowing which formatting changes have been made on top of the original style:

Just above the Style Name drop-down menu of the Properties inspector is another icon (marked as 2 in the preceding screenshot). This icon gives you...


