Azure Databricks setup
This section describes how to set up Databricks in Azure. Once logged in to the Azure portal, click on Create a resource in the top-left corner and select the Analytics category. As shown in the following screenshot, click on Azure Databricks:

We're now redirected to the Azure Databricks Service blade. We first need to set up a workspace, as shown in the following screenshot:
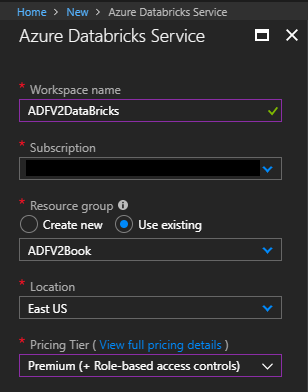
The parameters are explained here:
Workspace name:ADFV2DataBricksSubscription: The subscription in use when you logged in to AzureResource group: The same as we have used since the beginning—ADFV2BookLocation: The same location of all our resources used so farPricing Tier:Premium. This is mandatory to be able to connect Power BI to Databricks
Once done, check the Pin to dashboard option and click on Create at the bottom-left of the blade to create the workspace. After a few minutes, the workspace is ready to use, as shown in this screenshot:
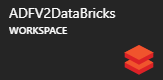
A workspace is a placeholder or folder where we store all...