Exploring the SketchUp Pro User Interface
SketchUp Pro is available for both the Windows OS and macOS environments. This book will focus on using SketchUp Pro in the Windows OS environment using a PC keyboard (with Shift, Ctrl, and Alt keys) and a 3-button mouse.
SketchUp provides quick reference guides for both Windows and macOS on their website. I would suggest downloading the Quick Reference Card for your preferred software. This book will exclusively focus on the SketchUp Pro interface toolbars and buttons, and keyboard and mouse controls for the Windows OS environment.
Note
It will be possible to use this book while working in SketchUp Pro in a macOS environment, but you will notice differences in the User Interface and keyboard and mouse shortcuts!
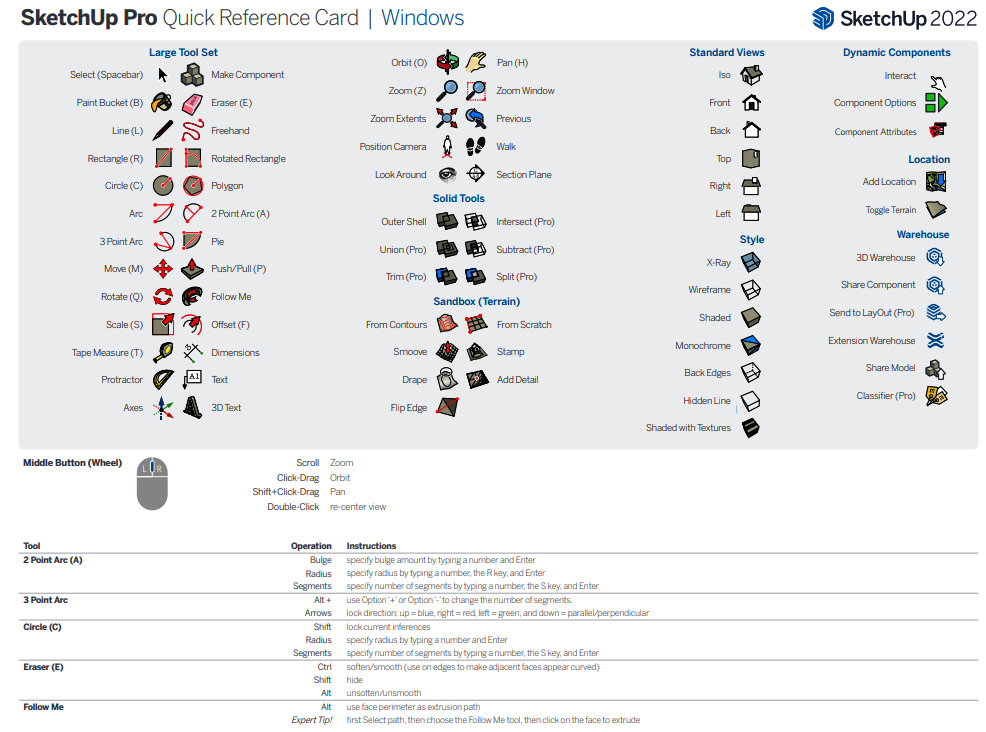
Figure 1.3: SketchUp Pro Quick Reference Card for Windows OS
Note
You can find the enlarged image here – https://download.sketchup.com/HC-QRC2022-en-SU-win-v01.pdf.
The SketchUp User Interface is composed of six main elements:
- Drawing Area
- Title Bar
- Menu Bar
- Toolbars (the Getting Started Toolbar)
- Status Bar (Prompts & Measurements)
- Default Tray (containing Default Panels)
Each of these elements is identified in the following screenshot:
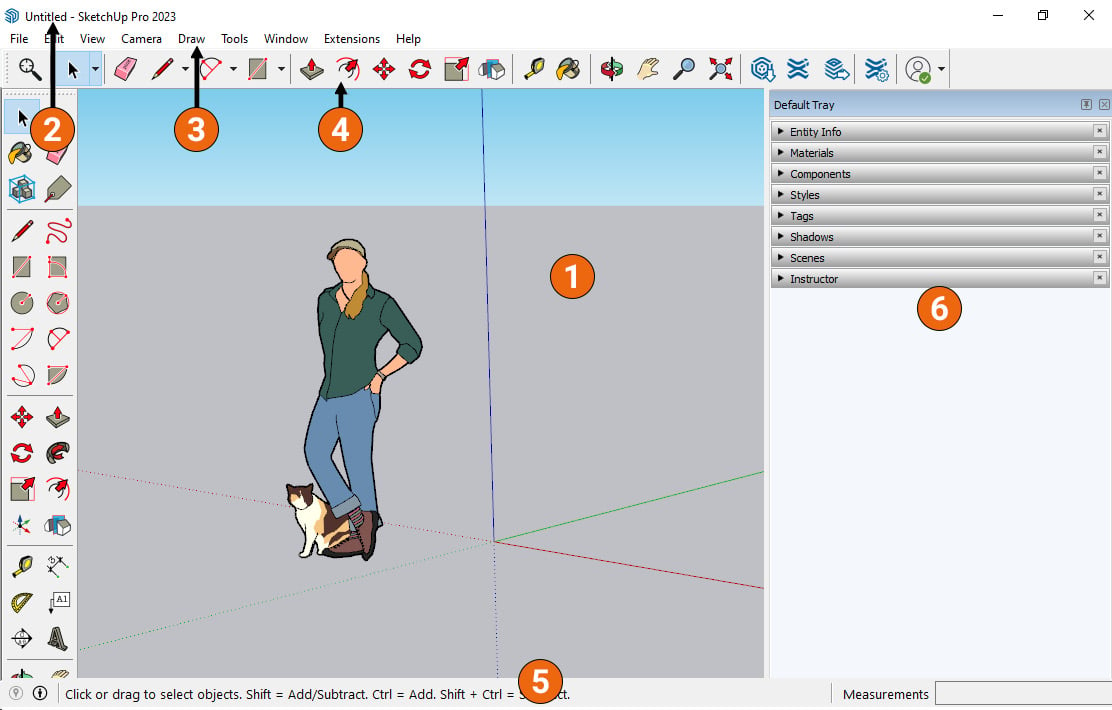
Figure 1.4: SketchUp Pro User Interface with Labeled Elements
Let’s look at each of them in detail.
Drawing Area
The largest part of the User Interface is the drawing area, which is the large modeling section in the middle of the screen. This is where all SketchUp geometry is created and edited! The drawing area is always a fully 3D environment, meaning that you can draw and move geometry in any direction, and you can move the camera to view geometry at any distance or angle.
The drawing area will contain the drawing axes (red, green, and blue lines) and typically will show a model of a person to get a sense of scale. All tools are used by interacting with the drawing area. We will talk more about templates and using the drawing area in Chapter 3, Modeling with Groups and Components.
Note
The drawing area traditionally had a green ground and blue sky in older versions of the Simple SketchUp Pro template. This template has been updated to have a blue-gray ground and bright blue sky in newer versions of SketchUp.
All other User Interface elements surround the drawing area. The Title Bar, Menu Bar, and Getting Started Toolbar can all be found above the drawing area.
Title Bar
The title bar is a standard Windows OS element and will include standard Windows controls, including minimize, maximize, and close. Additionally, the title bar will show the name of the currently open file. If you have not yet saved an open file, it will show Untitled.
Menu Bar
The menu bar is another standard element found in many Windows OS software and includes the majority of all SketchUp tools in drop-down menus. File, Edit, View, Camera, Draw, Tools, Window, and Help are the main menu titles for the menu bar:

Figure 1.5: Title Bar (Top), Menu Bar (Middle), and Getting Started Toolbar (Bottom)
Getting Started Toolbar and Other Toolbars
The Getting Started toolbar is meant to provide a visual and linear guide for creating 3D models in SketchUp Pro. The Getting Started toolbar is the only toolbar that is displayed when opening SketchUp Pro for the first time. All toolbars in SketchUp Pro follow the same visual design, with colorful icons that represent the tools.
While the Getting Started toolbar contains an excellent guide for working linearly through a SketchUp project, it does not contain all tools that are in SketchUp Pro. Additional toolbars can be displayed by right-clicking on the gray space directly to the right of the getting started toolbar and selecting additional toolbars. Additionally, toolbar visibility can be toggled by doing the following:
- Accessing the Menu Bar
- Selecting View | Toolbars
This workflow will open the Toolbar dialog box:
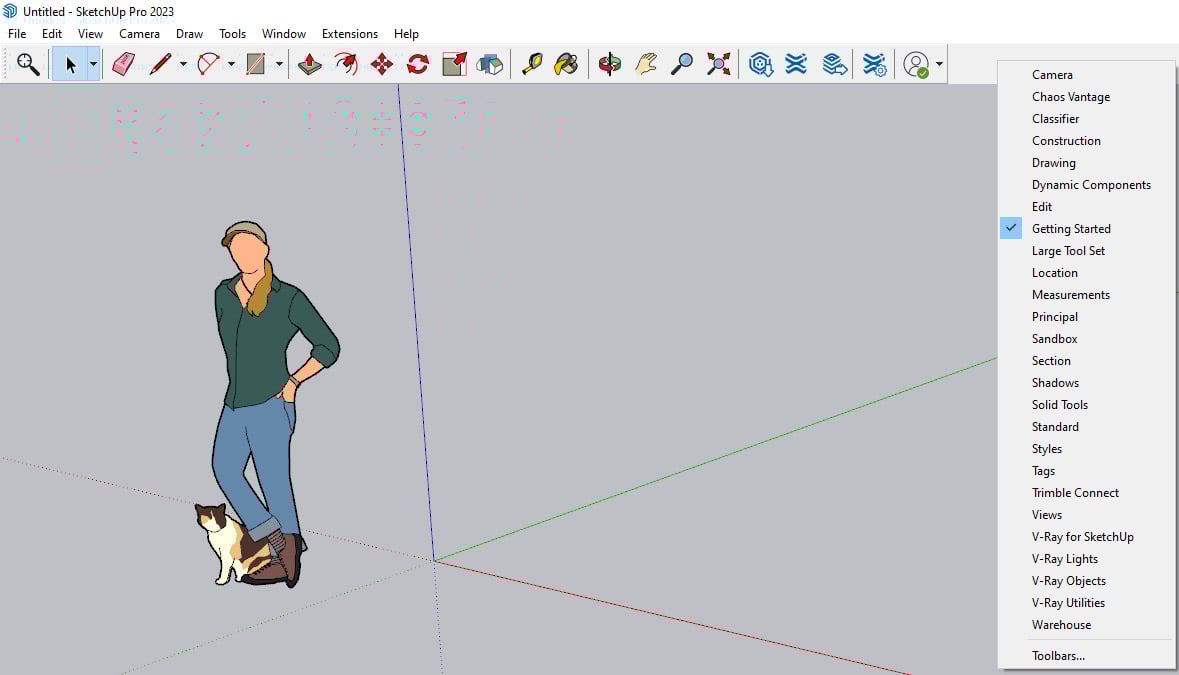
Figure 1.6: Toolbar Right-Click Contextual Menu and Toolbar Toggle Options
More toolbars will be introduced alongside professional workflows as we move through this book. It is recommended that the getting started toolbar remains visible and in the original position. However, all toolbars can be hidden or displayed, can be moved to dock at the sides of the drawing area, or can float in front of the drawing area.
To move a toolbar, do the following:
- Click and hold on the line of small dots on the left or top of the toolbar.
- Drag the toolbar to the preferred location.
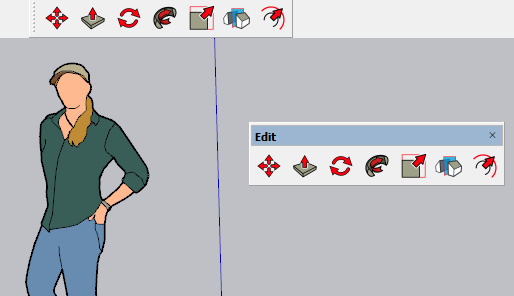
Figure 1.7: “Docked” Toolbar with Small Dots (Left) and “Floating” Toolbar (Right)
Turn on Toolbars and try moving them around for yourself! SketchUp Pro users will often have different sets of Toolbars open – you will need to find the right Toolbars and locations for your workflows.
Status Bar
The Status Bar can be found at the bottom of the screen. The Status Bar contains the Geo Location button, the Attribution button, Prompts, Measurement Label, and Measurements Value. These elements cannot be moved to other locations in the User Interface but can have their display toggled by right-clicking on the Status Bar.
Note
The Status Bar may appear to be frozen at times. This may be because SketchUp Pro is performing an autosave of the SketchUp Model. Try to back out of the tool and redo the workflow.
For now, we will focus on the prompts (or tooltips) and the measurements value. Both the prompts and measurements will constantly update as you work through a SketchUp Model. It is essential to know how to read and use both elements.
Prompts
The prompts will clarify what to do next while using a tool. Even before a tool is selected, the prompt will give a brief description of the tool’s function. Additionally, the prompt will provide options that expand on the primary function of the tool, typically accessed by using the Shift, Ctrl, and Alt keys on the keyboard.

Figure 1.8: SketchUp Pro Status Bar Prompt for the Move Tool
Measurements
The measurements label and value (measurements box collectively) should be used when creating precise geometry. SketchUp geometry can occasionally be created without specific dimensions, but typically professional projects require precise dimensions.
Note
SketchUp Pro is incredibly precise, down to 15 decimal places. For reference, writing 1/64 as a decimal only requires 6 decimal places (0.015625).
The measurements value will behave similarly to the prompts in that it will update to show different values depending on the type of tool being used. The value will be a distance (dimensional) value when drawing, offsetting, or extruding with the Push/Pull tool. Similar to showing a Distance value, the measurements box value can also be an angle, like when using the Rotate or Protractor tool. Additionally, the measurements box value could represent a whole number like when using the Copy tool to create an array.
We will use the measurements box often during this book and so it would be good practice to recognize what the measurements label is prompting during different workflows:

Figure 1.9: SketchUp Pro Status Bar with Measurements Box Showing a Typed Distance (Dimensional) Value
Note
SketchUp Pro will recognize Imperial and Metric units in the same SketchUp model. If working in a feet and inches file, you can also type mm (millimeters), cm (centimeters), m (meters), and yd (yards).
Default Panels
The Default Panels are collected in the Default Tray, and these are docked on the right side of the drawing area when first using SketchUp Pro. The default panels are essentially the most used dialog boxes that are tied to tools and workflows, so SketchUp is designed to keep these panels in a convenient place.
The default panels’ visibility can be toggled by doing the following:
- Accessing the menu bar
- Selecting Window | Default Tray
- Selecting the appropriate panels:

Figure 1.10: Menu showing Visibility Options for the Default Tray
The Manage Trays… option in the Window menu will also open a more comprehensive dialog box for managing the Default Tray:
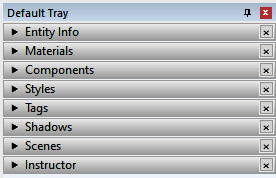
Figure 1.11: SketchUp Pro Default Tray
The default tray is located on the right of the screen to start, but this tray can be located on any side of the drawing area or can float above the drawing area.
To move the default tray, do the following:
- Click and hold on the blue section at the top of the tray.
- Drag to the preferred location. Alternatively, drag on top of the placement guides that will appear.
The panels in the default tray can be minimized or expanded by clicking on the title text or on the black arrow to the left of the title text. Panels can also be hidden by hitting the small gray “X” button, but they must be unhidden (shown) by accessing the menu as discussed at the beginning of this section.
Note
The Default Tray can also be “minimized” by unpinning the Tray. Trays can be unpinned by clicking the Pin icon in the top blue bar, which will “minimize” the bar to the side of the screen. When the Tray is hovered over with the mouse, the Tray will appear. This is helpful for smaller screens where the screen can get crowded.
Default tray panels will be explored as we move through this book. However, it would be a good idea to view the Instructor panel while going through this book, as the Instructor panel provides helpful animations and expanded tooltips for the SketchUp tools:
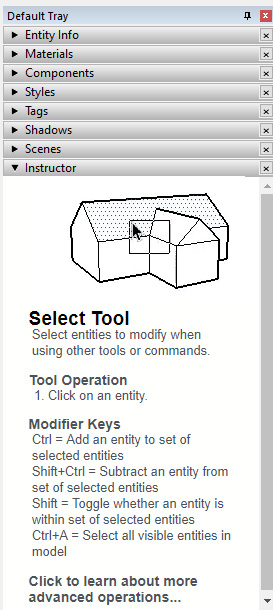
Figure 1.12: Instructor Panel Included in the Default Tray
Note
Additional User Interface elements, such as dialog boxes and context menus, will be explored later in this book. As you move forward with your skills in SketchUp Pro, this Tray can be hidden as screen space is highly valuable when modeling.
The SketchUp Pro User Interface may seem complicated at first! Please take some time to explore, move toolbars around, and begin to get comfortable knowing where things are. You could even start clicking on tools to read the Prompts and see the Measurements Box update. Don’t worry, we’ll discuss all of the basic tools as we move through the next few chapters.
The first set of tools that we must become familiar with is the Navigation tool set. SketchUp is a 3D modeling program, and we first need to learn how to navigate through our 3D space!


