The importance of using a real-world scale
When creating complex scenes in Blender, it’s easy to fall into the trap of eyeballing the scale of objects when modeling them, without taking the right measurements. This can lead to multiple problems that will prevent you later on from achieving a photorealistic and eye-pleasing result.
We think our eyes are accurate – “I know how large this window is, it’s this size”; however, we’re really bad at estimating measurements simply because we give more emphasis to the things that we pay attention to and neglect the parts we deem unimportant.
This then affects the photorealistic aspect of your scene: you end up wondering what is wrong with your scene. Something just looks off and you don’t know what it is. You start messing around with the materials and the lighting, and maybe those are perfect but then you realize the foundation was wrong. So, it is important to get this modeling foundation right.
So, the solution is to always use a real-world scale.
Let’s say you’re designing a wood cabin; the first thing you need to do is research on Google: What is the height of a log cabin?.

Figure 1.1 – Google search for the height of a log cabin
So, now we understand that a wood cabin must not exceed 3 meters in height, so everything between 2 and 3 meters should be reasonable. With the apex roof included, another meter is added.
Since we must not exceed 30 m2, we can give a dimension of 5 m wide and 6 m long (5 m × 6 m = 30 m2.).
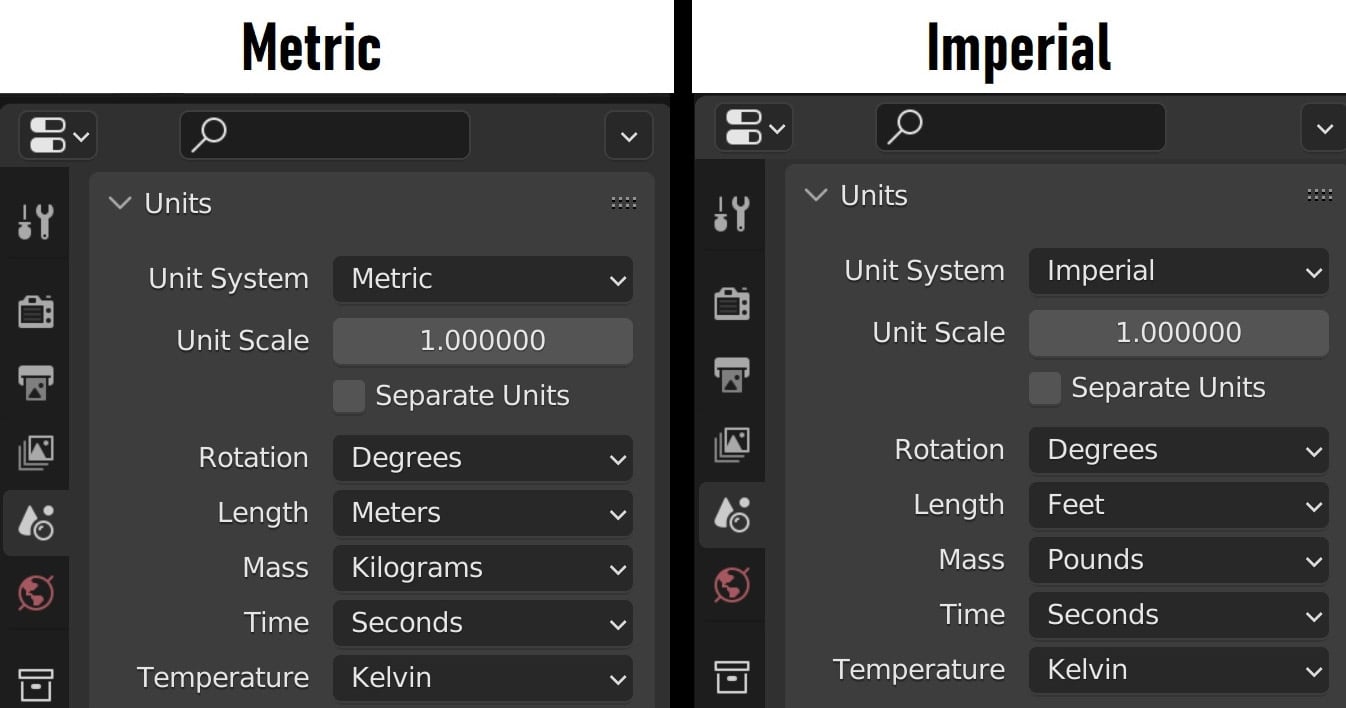
Next, we will check the Blender unit scale:
- Go to Scene Properties.
- Click on the Units tab.
- Then choose the Unit System measurement that suits you.

Figure 1.2 – Blender scene properties units system
Choosing Metric will measure the length in meters and mass in kilograms, unlike Imperial, which will measure the length in feet and mass in pounds. This is the right way to set real-world measurements in Blender.
Another good reason to always use a real-world scale is because of how physics simulation works in Blender. Physics in Blender, such as gravity, rigid body, and mass, relies on real measurements to work properly.
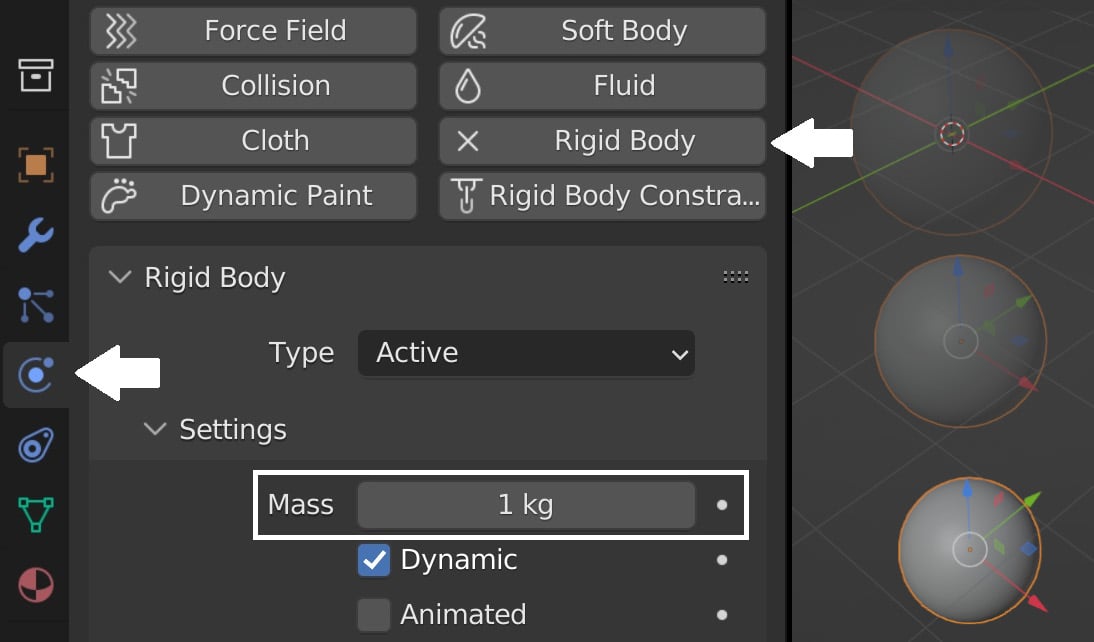
To emphasize this even more, let’s create a sphere; by default, the sphere will be 2 meters in diameter. Next, we go to Physics Properties, and we click on Rigid Body while making sure the sphere is selected. Under the Settings tab, you’ll see that Mass is set to 1 kg by default. This means that the 2-meter diameter sphere you’ve just created has a weight of 1 kg.

Figure 1.3 – Blender physics properties
Now, if you press the spacebar, the physics simulation will start. Our sphere will fall down due to gravitational force. If we change the scale of our sphere to something around 0.2 meters and give it a weight of 4.5 kg, our sphere will behave exactly like a bowling ball. Similarly, if we scale down our sphere diameter to 5 cm and a weight of 170 g, our ball will act like a billiard ball.
The bottom line is, always use a real-world scale: it’s crucial for achieving photorealistic results that match reality.
Now that we have seen the importance of using real-scale measurements when modeling, let’s learn scale matching. It’s an awesome trick that allows us to get almost the exact camera settings from an image reference, so that we can then easily recreate the scene in Blender.


