One of the types of games that best utilize the features of the Post Processing Stack is the horror genre. Using things such as depth of field to hide scary objects, as well as static to make the screen more menacing, can really help set your game firmly in the right place and provide the mood you are going for.
Creating a horror game look with fog
Getting ready
Make sure you have completed the Installing the Post Processing Stack recipe before starting this one.
How to do it...
- We first create a new Post Processing Profile by right-clicking within the Assets folder in the Project window and then selecting Create | Post Processing Profile. Once selected, it will allow us to rename the item. Go ahead and set the name to HorrorProfile.
- Select the Post-process volume object and, from the Inspector window, go to the Post Processing Volume component and assign the Profile property to the HorrorProflie we just created.
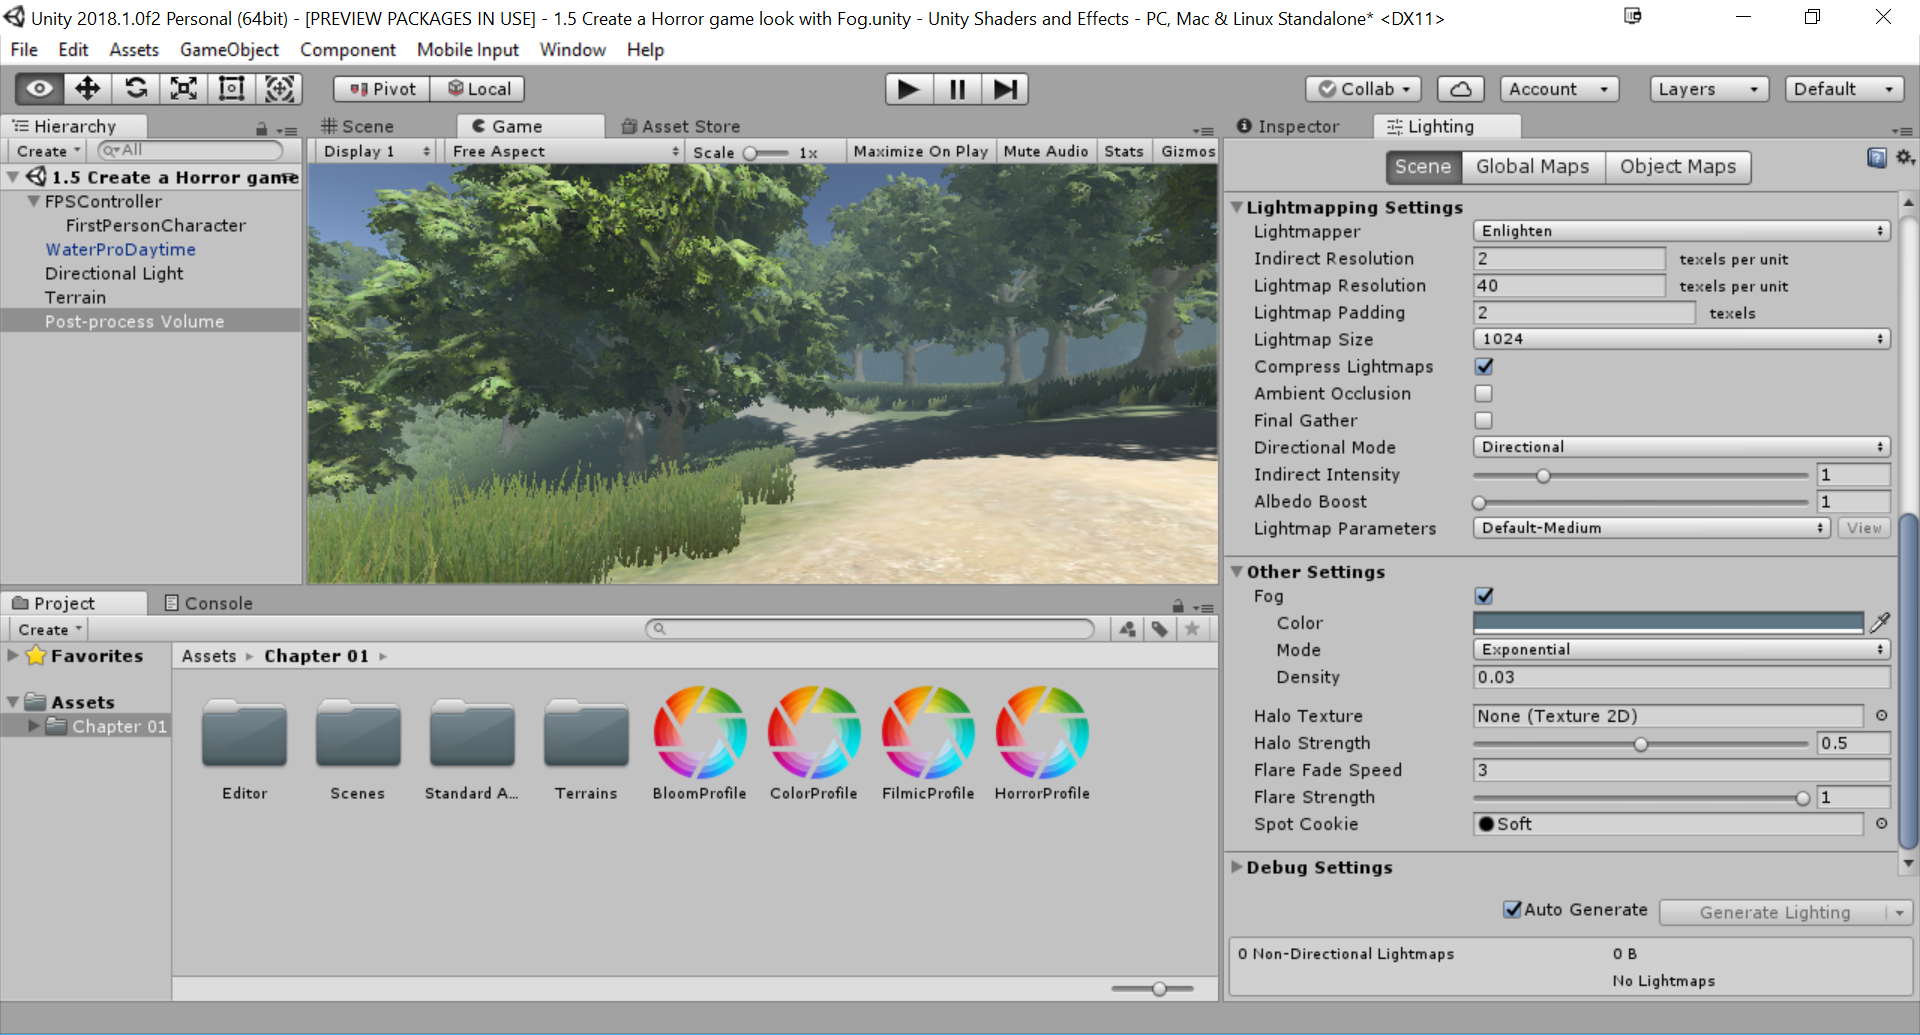
- Unlike previous settings, though, the fog settings are located in the Lighting window, which can be accessed by going into Window | Lighting.
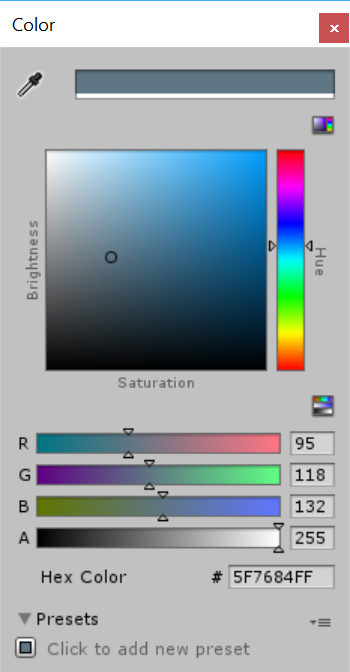
- From there, scroll all the way to the bottom until you reach the Other Settings option. Once there, check Fog and set the color to a value that is close to the skybox. I used the following settings:

If you know the hex values of the color from your graphic editing software you can just type it in the Hex Color property of the Color window.
- Next, change the Mode to Exponential and the Density to 0.03:

As you can see, it's already much more spooky that it was previously, but there are still more options that we can change.
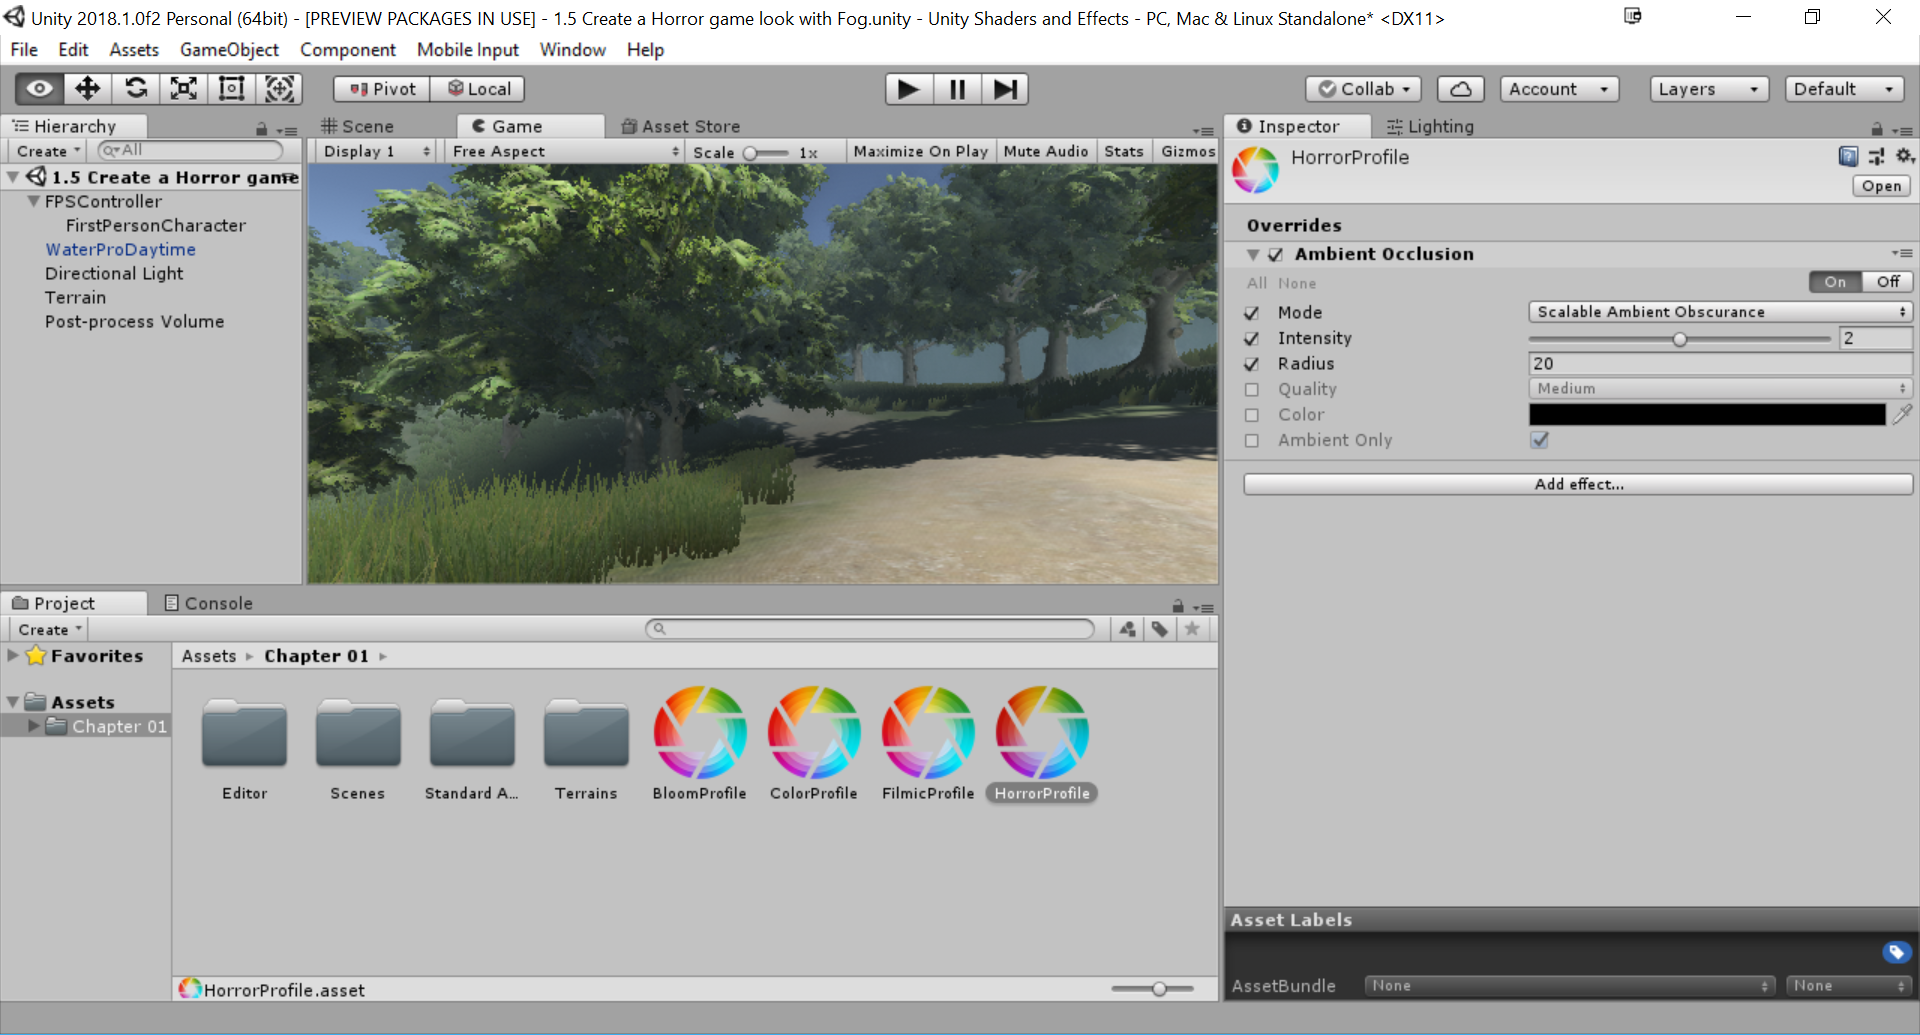
- Open up the HorrorProfile again and go to the Inspector tab. Press the Add effect... button and select Unity | Ambient Occlusion. Check the Mode option and select Scalable Ambient Obscurance. Afterward, change the Intensity to 2 and the Radius to 20:

- Lastly, lighting often has a big effect on the theme of a scene as well. If you're using the example map, select the Directional Light object in the Hierarchy tab and, from the Inspector tab under the Light component, change the Intensity to 0.5 and then adjust the Color to something darker. (I used the same color as in step 4 with a HEX of 5F7684FF.)
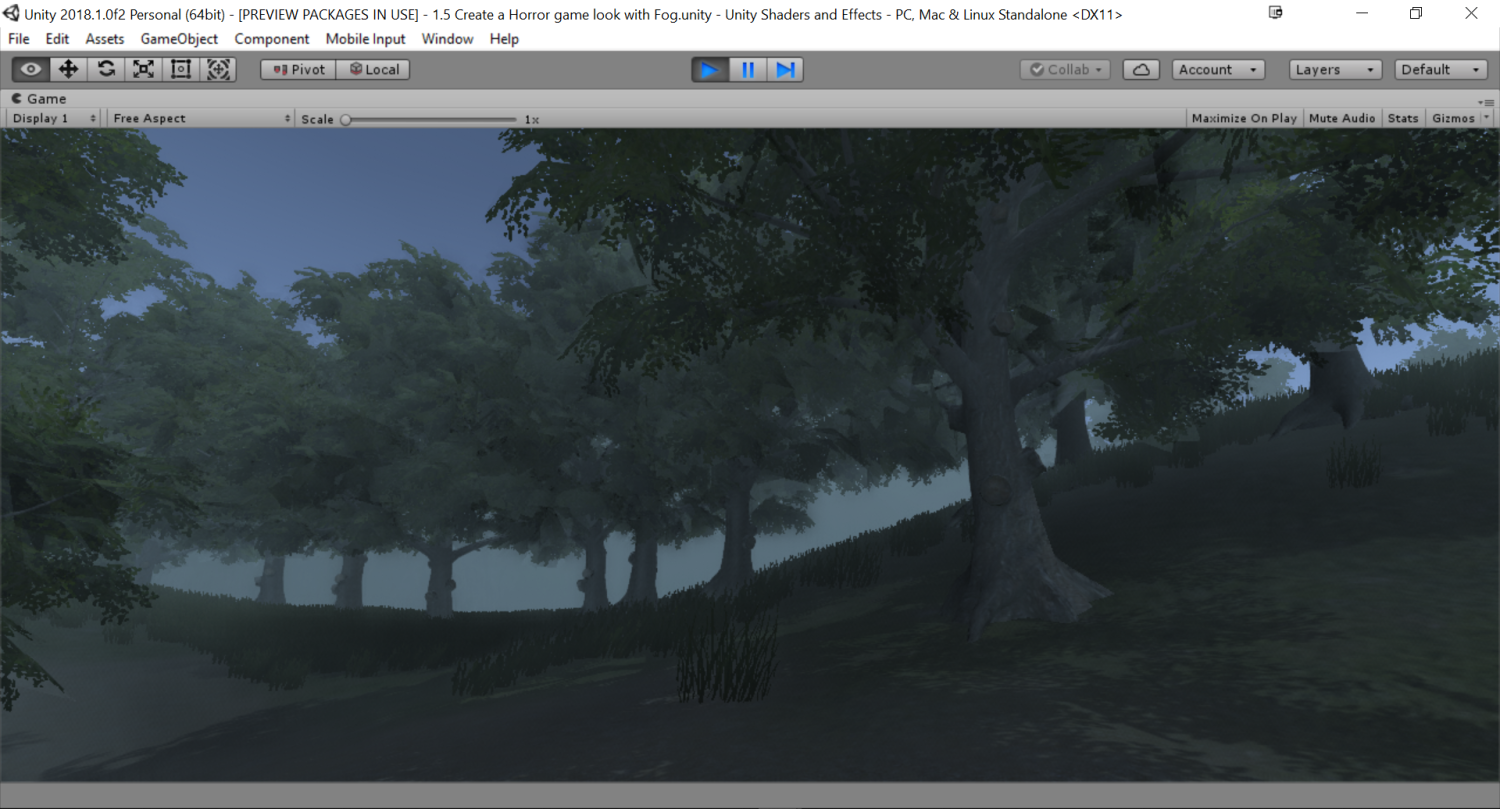
- Save your game and then start it to see the effect of all of the changes:

The final result of our horror look
How it works...
The Ambient Occlusion option will calculate areas that should have additional shadows. Since our scene is filled with trees, this will make the undersides much darker than they were previously.
For more information on the Ambient Occlusion effect, check out: https://github.com/Unity-Technologies/PostProcessing/wiki/Ambient-Occlusion. If you are interested in looking into the other options that the Post Processing stack has, check out: https://github.com/Unity-Technologies/PostProcessing/wiki.


