Installing and importing modules
Python was built to be shipped with a basic set of functionalities known as the standard library. Knowing that all programming needs would never be covered by the standard library, Python was built to be open and extensible. This allows programmers to create their own modules to solve their specific programming needs. These modules are often shared under an open-source license on the Python Package Index, also known as PyPI. To add to the capabilities of the standard Python library of modules, third-party modules are downloaded from PyPI using either the built-in pip program or another method. For us, modules such as arcpy and the ArcGIS API for Python are perfect examples: they extend the capabilities of Python to be able to control the tools that are available within ArcGIS Pro.
ArcGIS Pro comes with a Python Package Manager which will allow you to install additional packages to any virtual environments you have set up. You will learn in Chapter 3 how to use this, creating your own virtual environments in ArcGIS Pro and installing additional packages that you may need. The following sections offer more detail about installing packages and creating virtual environments through the command line in the terminal. Don’t worry if you aren’t comfortable with the command line, as the Python Package Manager in ArcGIS Pro can manage much of the same and you will work through that in more detail in Chapter 3.
If you don’t plan on working in the command line, you can skip the next section. But as you get more comfortable as a Python programmer, come back to this, as you will find it very useful in helping you learn how to work from the command line and install more packages. The Python Package Manager does not have access to all the packages available in PyPI. If you need a package that is not listed in the Python Package Manager, you will need the information below to install it.
Using pip
To make Python module installation easier, Python is now installed with a program called pip. This name is a recursive acronym that stands for Pip Installs Programs. It simplifies installation by allowing for one-line command line calls, which both locate the requested module on an online repository and run the installation commands.
Here is an example, using the open-source PySHP module:
pip install pyshp
You can also install multiple modules at a time. Here are two separate modules that will be installed by pip:
pip install pyshp shapely
Pip connects to the Python Package Index. As we mentioned, stored on this repository are hundreds of thousands of free modules written by other developers. It is worth checking the license of the module to confirm that it will allow for your use of its code.
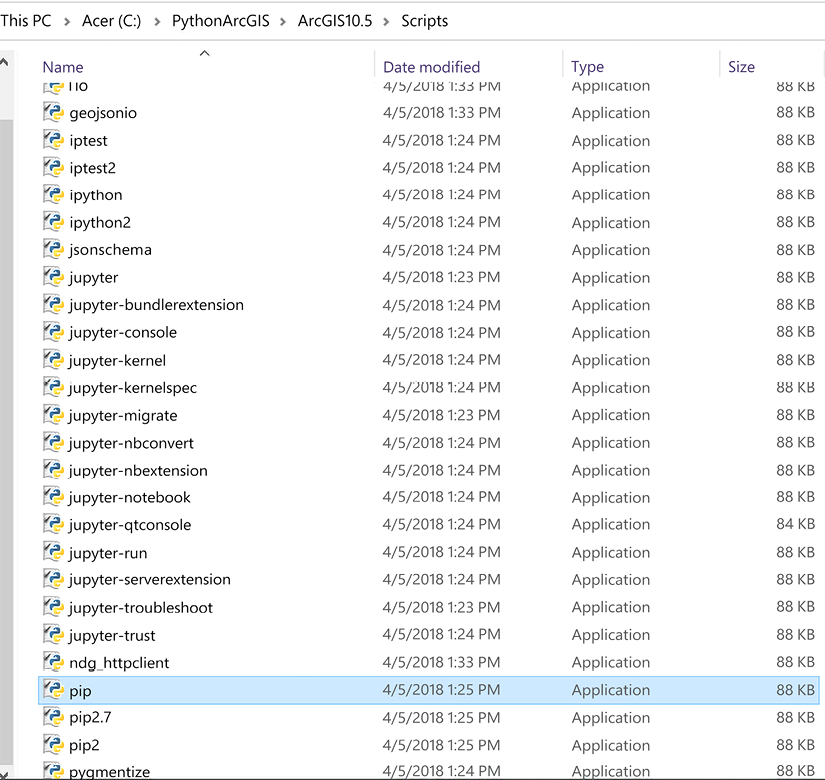
Pip lives in the Scripts folder, where lots of executable files are stored:

Figure 1.8: Locating pip in the Scripts folder
Installing modules that are not in PyPI
Sometimes modules are not available in PyPI, or they are older modules that don’t understand the pip install method. This means that available modules have different ways of being installed that you should be aware of (although most now use pip).
The setup.py file
Often in Python 2.x, and sometimes in Python 3.x, a module includes a setup.py file. This file is not run by pip; instead, it is run by Python itself.
These setup.py files are located in a module, often in a downloadable zipped folder. These zip files should be copied to the /sites/packages folder. They should be unzipped, and then the Python executable should be used to run the setup.py file using the install command:
python setup.py install
Wheel files
Sometimes modules are packaged as wheel files. Wheel files use the extension .whl. These are essentially zip files that can be used by pip for easy installation of a module.
Use pip to run the wheel file and install the module, by downloading the file and running the pip install command in the same folder as the wheel file (or you can pass the whole file path of the wheel file to pip install):
pip install module.whl
Read more about wheel files here: https://realpython.com/python-wheels/
Installing in virtual environments
Virtual environments are a bit of an odd concept at first, but they are extremely useful when programming in Python. Because you will probably have two different Python versions installed on your computer if you have ArcGIS Desktop and ArcGIS Pro, it is convenient to have each of these versions located in a separate virtual environment.
The core idea is to use one of the Python virtual environment modules to create a copy of your preferred Python version, which is then isolated from the rest of the Python versions on your machine. This avoids path issues when calling modules, allowing you to have more than one version of these important modules on the same computer. In Chapter 3, you will see how to use the Python Package Manager provided in ArcGIS Pro to create a virtual environment and install a package that you want to run only in that environment.
Here are a few of the Python virtual environment modules:
|
Name |
Description |
Example virtual environment creation |
|
|
Built into Python 3.3+. |
|
|
|
Must be installed separately. It is very useful and my personal favorite. |
|
|
|
Used to isolate Python versions for testing purposes. Must be installed separately. |
|
|
Conda/Anaconda |
Used often in academic and scientific environments. Must be installed separately. |
|
Read more about virtual environments here: https://towardsdatascience.com/python-environment-101-1d68bda3094d
Importing modules
To access the wide number of modules in the Python standard library, as well as third-party modules such as arcpy, we need to be able to import these modules in our script (or in the interpreter).
To do this, you will use import statements, as we have seen already. These declare the module or sub-modules (smaller components of the module) that you will use in the script.
As long as the modules are in the /sites/packages folder in your Python installation, or in the Windows PATH environment variable (as arcpy is after it’s been installed), the import statements will work as expected:
import csv
from datetime import timedelta
from arcpy import da
You will see in Chapter 2 what happens when you attempt to import arcpy from a Python install that does not have the module in the site/packages folder. That is why it is important to know which version of Python has the arcpy module and use that one when working with IDLE or in the command line. When working in ArcGIS Pro using the Python window or ArcGIS Notebooks, this is not an issue, as they will automatically be directed to the correct version of Python.
Three ways to import
There are three different and related ways to import modules. These import methods don’t care if the module is from either the standard library or from third parties:
- Import the whole module: This is the simplest way to import a module, by importing its top-level object. Its sub-methods are accessed using dot notation (for example,
csv.reader, a method used to read CSV files):import csv reader = csv.reader - Import a sub-module: Instead of importing a top-level object, you can import only the module or method you need, using the
from X import Yformat:from datetime import timedelta from arcpy import da - Import all sub-modules: Instead of importing one sub-object, you can import all the modules or methods, using the
from X import *format:from datetime import * from arcpy import *
Read more about importing modules here: https://realpython.com/python-import/
Importing custom code
Modules don’t have to just come from “third parties”: they can come from you as well. With the use of the special __init__.py file, you can convert a normal folder into an importable module. This file, which can contain code but is most of the time just an empty file, indicates to Python that a folder is a module that can be imported into a script. The file itself is just a text file with a .py extension and the name __init__.py (that’s two underscores on each side), which is placed inside a folder. As long as the folder with the __init__.py is either next to the script or in the Python Path (e.g. in the site-packages folder), the code inside the folder can be imported.
In the following example, we see some code in a script called example_module.py:
import csv
from datetime import timedelta
def test_function():
    return "success"
if __name__ == "__main__":
    print('script imported')
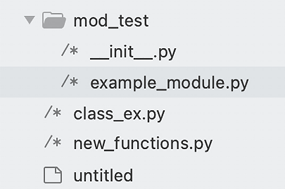
Create a folder called mod_test. Copy this script into the folder. Then, create an empty text file called __init__.py:

Figure 1.9: Creating an __init__.py file
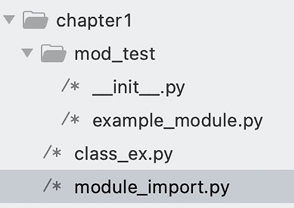
Now let’s import our module. Create a new script next to the mod_test folder. Call it module_import.py:

Figure 1.10: Creating a new script
Inside the script, import the function test_function from the example_module script in the mod_test folder using the format below:
from mod_test.example_module import test_function
print(test_function())
Scripts inside the module are accessed using dot notation (for instance, mod_test.example_module). The functions and classes inside the script called example_module.py are able to be imported by name.
Because the module is sitting next to the script that is importing the function, this import statement will work. However, if you move your script and don’t copy the module to somewhere that is on the Python system path (aka sys.path), it won’t be a successful import.
That is because the way import statements work is based on the Python system path. This is the sys.path list of folder locations that Python will look in for the module that you are requesting. By default, the first location is the local folder, meaning the folder containing your script. The next location is the site-packages folder.
The site-packages folder
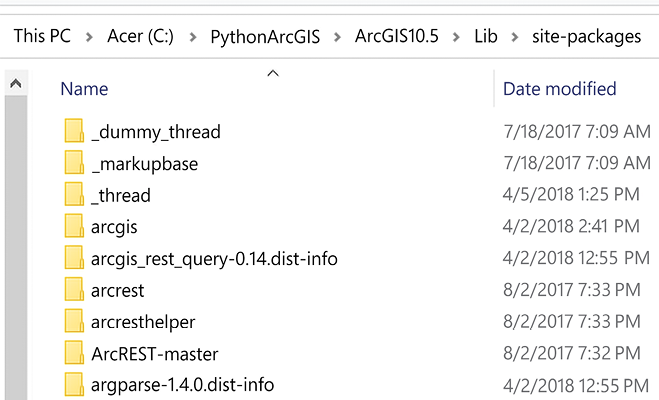
Most modules are installed in a special folder. This folder is inside the folder that contains the Python executable. It is called the site-packages folder and it sits at *\Lib\sites-packages.
To make your module available for import without needing it to be next to your script, put your module folder in the site-packages folder. When you run from mod_test.example_module import test_function, it will locate the module called mod_test in the site-packages folder.

Figure 1.11: The site-packages folder
These tips will make it easier to add your custom code to the Python installation and to import reusable code in other scripts. In the last section, we will explore tips about writing good code.


